5
• Supports six internal EDIDs, four external EDIDs copied from connected devices, and four
user provided EDIDs
• OSD with user customizable information text
• Controllable via front-panel buttons with LCD, WebGUI, Telnet, RS-232, and IR remote
6. OPERATION CONTROLS AND FUNCTIONS
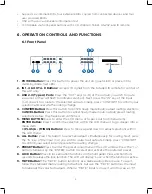
6.1 Front Panel
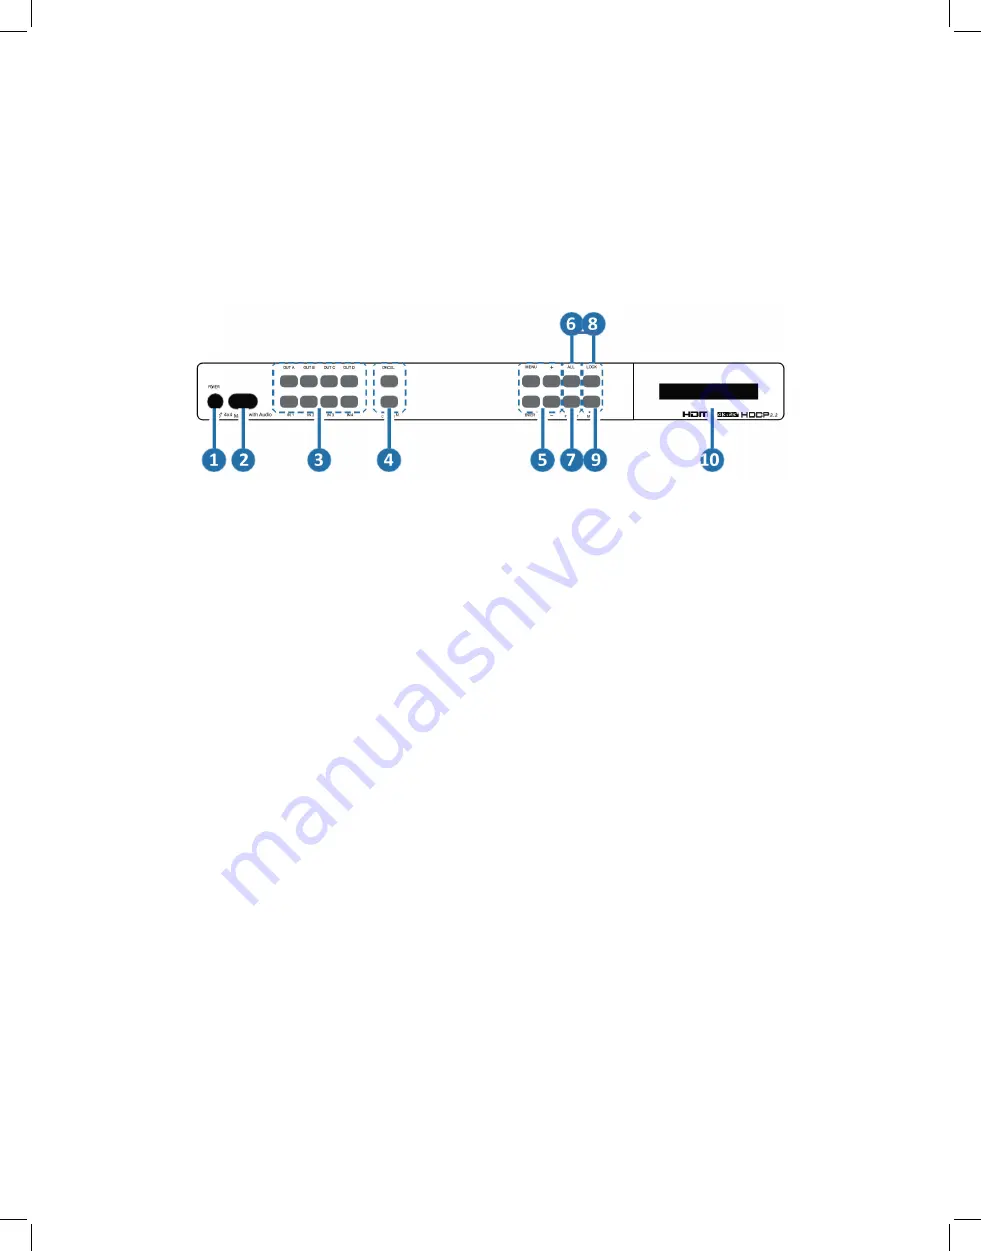
1. POWER Button:
Press this button to power the unit on (green LED) or place it into
stand-by mode (red LED).
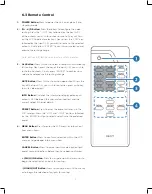
2. IN 1~4 & OUT A~D Buttons:
Accepts IR signals from the included IR remote for control of
this unit only.
3. USB 2.0 (Type A) Ports:
Press the “OUT” keys (A~D) of the outputs you wish to route
a source to (they will flash to indicate selection). Next, press the “IN” key of the input
(1~4) you wish to route to the selected outputs. Finally, press “CONFIRM” to confirm your
selection and execute the routing change.
4. CONFIRM Button:
Press this button to confirm newly made input/ output routing selections.
CANCEL Button:
Press this button to cancel newly made input/ output/preset routing
selections before they have been confirmed.
5. MENU BUTTON:
Press to enter the LCD menu, or to back out from menu items.
ENTER Button:
Press to confirm a selection within the LCD menu or to go deeper into a
menu item.
+ (PLUS) & - (MINUS) Buttons:
Press to move up and down or adjust selections within
the LCD menu.
6. ALL Button:
Press this button to select all outputs simultaneously for routing. Next, press
the “IN” key of the input (1~4) you wish to route to all outputs. Finally, press “CONFIRM”
to confirm your selection and execute the routing change
.
7. PRESET Button:
Press to enter the preset recall menu in the LCD window. Press the “+/-”
buttons followed by the “ENTER” button to select and activate the preferred preset.
8. LOCK Button:
Press to lock all button functions on the front panel. Press and hold for 3
seconds to release the lock function. The LCD will display “Lock” when the function is active.
9. MUTE Button:
The “MUTE” button functions as a blank audio/video source. To use it,
follow the standard matrix routing instructions, but use the “MUTE” button as the input
to blank out the selected outputs. When a “MUTE” input is in use it will show up as “M”
Summary of Contents for HDMX44A-18G
Page 35: ...35 ...


