background image

28

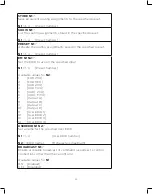
ROSDINFO

Show the current status of the OSDINFO setting.

SDI_CUSTOM N1

Set the discrete IR customer code to use.

N1

 = 0000~FFFF  [Discrete IR code in ASCII hex]

RDI_CUSTOM N1

Show the current discrete IR customer code.

Note: Commands will not be executed unless followed by a carriage return. Commands are not 
case-sensitive.

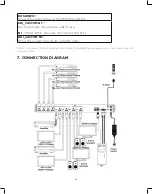
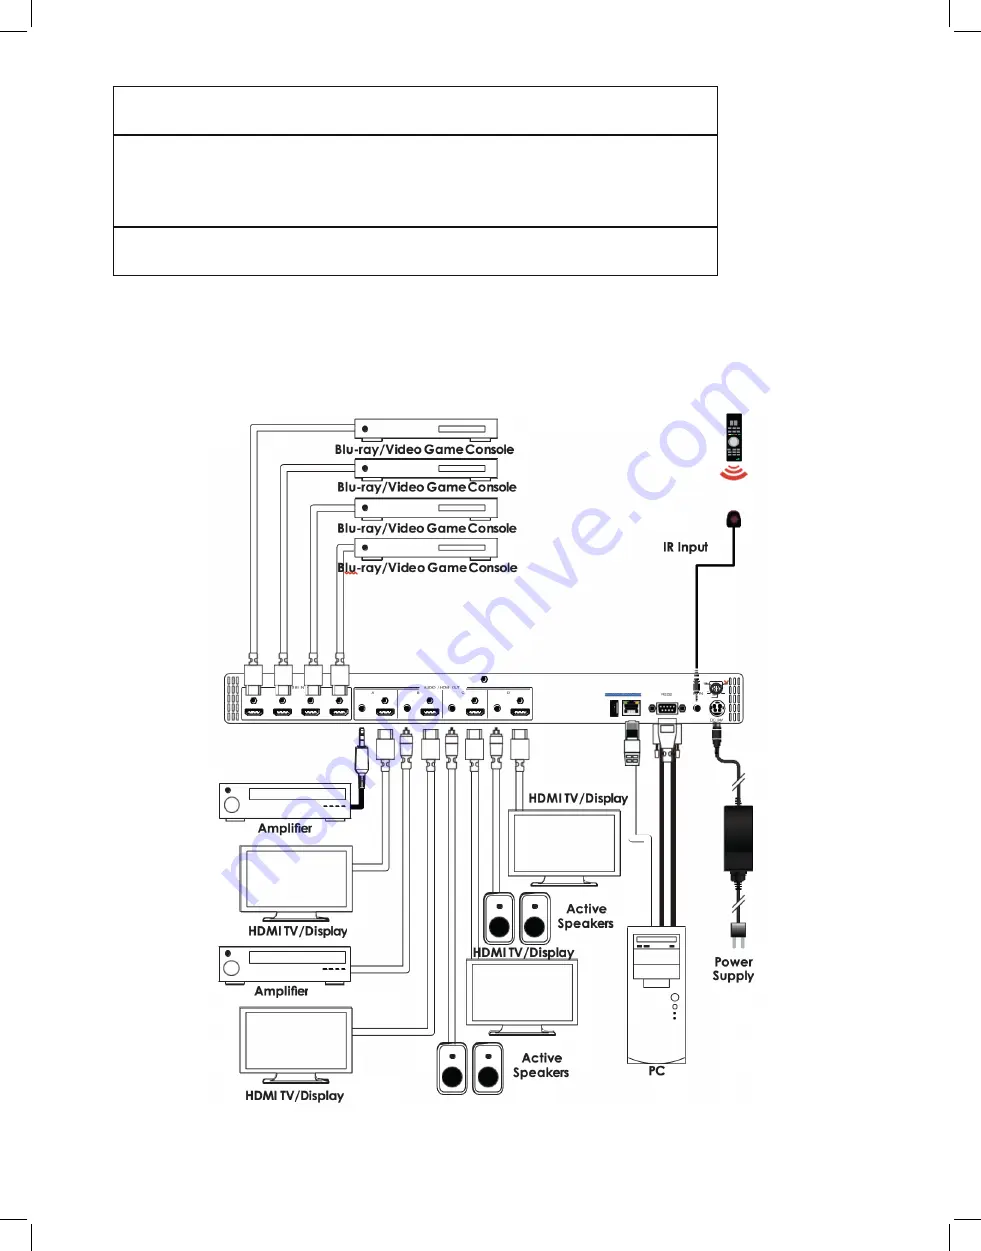
7. CONNECTION DIAGRAM

Summary of Contents for HDMX44A-18G

Page 1: ...VER 1 0 All Right Reserved MPN HDMX44A 18G Ultra Fast 4x4 HDMI Matrix Switcher with Audio Extraction 4K 60Hz ...

Page 2: ...penings or empty slots in the unit as you may damage parts inside the unit Do not attach the power supply cabling to building surfaces Use only the supplied power supply unit PSU Do not use the PSU if it is damaged Do not allow anything to rest on the power cabling or allow any weight to be placed upon it or any person walk on it To protect the unit from overheating do not block any vents or openi...

Page 3: ...RS 232 Pinout and Defaults 8 6 6 Front Panel LCD Menu 9 6 7 WebGUI Control 14 6 7 1 Video Switch Tab 16 6 7 2 EDID Settings Tab 20 6 7 3 Device Settings Tab 21 6 8 Telnet Control 22 6 9 Serial and Telnet Commands 23 7 Connection Diagram 28 8 Specifications 29 8 1 Technical Specifications 29 8 2 Video Specifications 29 8 3 Audio Specifications 31 8 3 1 Digital Audio 31 8 3 2 Analog Audio 31 8 4 Cable S...

Page 4: ... and IR remote control options 2 APPLICATIONS Residential or commercial AV matrix installations Security systems Lecture halls and ballrooms Retail product showrooms Control centers 3 PACKAGE CONTENTS 1 x UHD 4 x 4 HDMI Matrix with Audio Output 1 x 24V 2 7A DC Power Adapter 1 x Remote Control CR 177 1 x Rackmount Ears Set of 2 1 x Shockproof Feet Set of 4 1 x Operation Manual 4 SYSTEM REQUIREMENTS...

Page 5: ... preset routing selections before they have been confirmed 5 MENU BUTTON Press to enter the LCD menu or to back out from menu items ENTER Button Press to confirm a selection within the LCD menu or to go deeper into a menu item PLUS MINUS Buttons Press to move up and down or adjust selections within the LCD menu 6 ALL Button Press this button to select all outputs simultaneously for routing Next pres...

Page 6: ...udio output The audio from each stereo analog output will be the same as the HDMI output it is paired with 3 SERVICE Port This slot is reserved for firmware update use only 4 CONTROL Port Connect directly or through a network switch to your PC laptop to control the unit via Telnet WebGUI 5 RS232 Port Connect directly to a PC laptop or other serial control device to send RS 232 commands to control t...

Page 7: ...hange MUTE Button Press this key to mute video output Press the key of the input 1 4 you wish to route then press mute key to mute video output INFO Button Switches the information displayed on each output s OSD between the user customized text and the current video Ethernet details PRESET Button Press to enter the preset call menu in the LCD window Press the IN and OUT buttons followed by the ENT...

Page 8: ...8 6 4 IR Cable Pinout 6 5 RS 232 Pinout and Defaults Serial Port Default Settings Baud Rate 19200 Data Bits 8 Parity Bits None Stop Bits 1 Flow Control None ...

Page 9: ...the PLUS MINUS and ENTER buttons to navigate the LCD menu Press the MENU button to back out from any menu item and then press it again to close the menu MAIN MENU EDID Preset Setup Network Setup OSD Setup CEC Send Firmware Firmware Update Factory Reset The individual functions of the LCD menu will be introduced in the following section Items marked in BOLD are the factory default settings ...

Page 10: ...07 Sink A 08 Sink B 09 Sink C 10 Sink D 11 User 1 12 User 2 13 User 3 14 User 4 1 In 1 4 Select the EDID to assign to each input independently 6 internal EDIDs 4 sink EDIDs and 4 user EDIDs are available Press the Enter button to confirm the selection After making a selection the change will occur immediately on that input Note After changing the EDID on an input the video will typically black out ...

Page 11: ...Store Preset 1 Preset Setup Select the number of the preset to store the current routing configuration into Press the Enter button to confirm the selection After saving the preset the stored routing will be displayed on the LCD Press the Menu button to return to normal operation Network Setup 2ND LEVEL 3RD LEVEL Link Current Link Status Mode Current Network Mode IP Current IP Address Mask Current Ne...

Page 12: ...n editing the address and use the and buttons to adjust each value Press the Enter button to store the current number segment and move to the next segment Note The unit s default static IP address is 192 168 1 50 3 Mask When DHCP is off the netmask can be set here Press the Enter button to begin editing the address and use the and buttons to adjust each value Press the Enter button to store the cu...

Page 13: ...t using the and buttons and then press the Enter button to select it Using the and buttons pick the appropriate CEC command to send to the display connected to the selected output port On Off Turn the connected display on or off Vol Vol Increase or decrease the volume of the connected display Mute Mute the audio output of the connected display Note Not all displays can support all CEC commands CEC...

Page 14: ...s will perform a factory reset and return the unit to its factory default state After the reset is complete the unit will reboot automatically 6 7 WebGUI Control Device Discovery Please obtain the Device Discovery software from your authorized dealer and save it in a directory where you can easily find it Connect the unit and your PC Laptop to the same active network and execute the Device Discover...

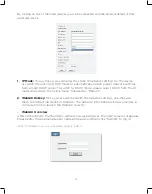
Page 15: ...DHCP mode please select DHCP from the IP mode drop down then click Save followed by Reboot 2 WebGUI Hotkey Once you are satisfied with the network settings you may use them to connect via Telnet or WebGUI The network information window provides a convenient link to launch the WebGUI directly WebGUI Overview After connecting to the WebGUI s address in a web browser the login screen will appear Pleas...

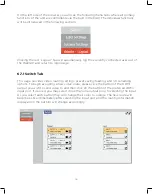
Page 16: ...ch Tab This page provides video routing settings preset saving loading and I O renaming options To begin assigning a new video route please click the button of the HDMI output you wish to send video to and then click on the button of the preferred HDMI input port If desired you may select more than one output prior to selecting the input As you select each button they will change their color to or...

Page 17: ...e individually muted black video no audio To mute an output please click the icon within the appropriate output button To unmute the output please click the icon a second time Note The associated analog output will not be muted 2 Input Buttons for selecting the input to route to the selected output s Detail about the input names and signal information is also displayed here Clicking on the edit ic...

Page 18: ...on of the OSD custom text The X value can be from 1 to 1920 and the Y value can be from 1 to 1080 Click the Save button to confirm changes OSD Text Each output can display up to 2 lines of customized OSD text Enter each line of text here Click the Save button to confirm changes Note Each line of text can have up to 64 characters OSD Text Size Use the dropdown to select the preferred size for the OSD...

Page 19: ...rapid hassle free recall Preset Set Once you have the matrix set the way you like you can click the Preset Store icon in the upper right corner of the window and the Preset Store window will open Hovering the mouse over each button will display the current routing stored within it You may also rename each preset by selecting the Edit icon Click the center of the preferred preset s button to store ...

Page 20: ...tion on your PC Upload To upload a new user EDID please click the Upload button next to the Customer EDID Settings item you would like to change An EDID Upload window will appear allowing you to locate and upload the preferred EDID file bin format from a local PC Once the correct file has been selected please click the Upload button in the window and the file will be transferred to the matrix 2 Sink ...

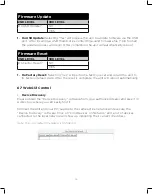
Page 21: ... 2160p 60Hz 18Gbps Deep Color 8 10 12 bit LPCM 2 0 UHD MCH 3840 x 2160p 60Hz 18Gbps Deep Color 8 10 12 bit LPCM 7 1 Bitstream Note In some rare cases it is possible for custom or external EDIDs to cause compatibility issues with certain sources If this happens it is recommended to switch to one of the 6 default EDIDs for maximum compatibility 6 7 3 System Settings Tab This page provides system con...

Page 22: ...on or mode Note The unit s default IP address is 192 168 1 50 If the IP address is changed then the IP address required for WebGUI Telnet access will also change accordingly 1 Reset to Default To reset the unit s routing selections to the default settings click the Routing Reset button To reset the unit to its factory default state press the Fadefault button After the reset is complete the unit wi...

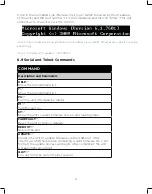
Page 23: ... Serial and Telnet Commands COMMAND Description and Parameters HELP Show the full command list Show the full command list P0 Turn the unit off stand by mode P1 Turn the unit on ST Show the unit s current firmware version and routing status FADEFAULT Reset the unit to factory defaults REBOOT Reboot the unit UPDATE Prepare the unit to update firmware via the USB port After inserting a USB thumb drive...

Page 24: ... s network settings to the factory defaults NAME N1 N2 Set a name for the specified preset N1 1 4 Preset number N2 Preset name 8 characters maximum N1 N2 Route the specified input to one or more outputs N1 A D Output port letter s N2 1 4 Input port number Note Multiple output letters may be assigned to N1 to route the same source to more than one output at once For example ABD2 routes input 2 to out...

Page 25: ... on the specified input N1 1 4 Preset number Available values for N2 1 FHD 2CH 2 FHD MCH 3 UHD 2CH 4 UHD MCH 5 UHD 2CH 6 UHD MCH 7 Output A 8 Output B 9 Output C 10 Output D 11 User EDID 1 12 User EDID 2 13 User EDID 3 14 User EDID 4 USEREDID N1 N2 Set a name for the specified User EDID N1 1 4 User EDID number N2 EDID name 8 characters maximum BROADCAST N1 Enable or disable broadcast of command resp...

Page 26: ...r OSDOFF N1 Disable the OSD banner text on the specified output N1 1 4 Output port number OSDXY N1 N2 N3 Set the contents of the OSD banner text used on the specified output N1 1 4 Output port number N2 1 1920 Horizontal position N3 1 1080 Vertical position OSDSTR N1 N2 N3 Set the horizontal and vertical position of the upper left corner of the OSD banner text on the specified output N1 1 4 Output po...

Page 27: ... banner on the specified output N1 1 4 Output port number Available values for N2 1 Black 2 White 3 Red 4 Green 5 Blue 6 Magenta 7 Yellow 8 Cyan 9 Gray OSDTS N1 N2 Enable or disable replacing the custom OSD banner text with system information N1 1 4 Output port number N2 1 8 Transparency level OSDINFO N1 Enable or disable replacing the custom OSD banner text with system information Available values...

Page 28: ...M N1 Set the discrete IR customer code to use N1 0000 FFFF Discrete IR code in ASCII hex RDI_CUSTOM N1 Show the current discrete IR customer code Note Commands will not be executed unless followed by a carriage return Commands are not case sensitive 7 CONNECTION DIAGRAM ...

Page 29: ...ge 4kV Contact Discharge Dimensions W x H x D 438mm x 49mm x 269mm Case Only 482mm x 49mm x 274mm All Inclusive Weight 2 99kg Chassis Material Metal Steel Chassis Color Black Operating Temperature 0 C 40 C 32 F 104 F Storage Temperature 20 C 60 C 4 F 140 F Relative Humidity 20 90 RH Non condensing Power Consumption 34W 8 2 Video Specifications Supported Resolutions Hz Input Output HDMI HDMI 720 x 4...

Page 30: ... 60 1920 x 1080i 50 60 1920 x 1080p 24 25 30 1920 x 1080p 50 60 1920 x 1200p 60RB 2560 x 1440p 60RB 2560 x 1600p 60RB 2048 x 1080p 24 25 30 2048 x 1080p 50 60 3840 x 2160p 24 25 30 3840 x 2160p 50 60 4 2 0 3840 x 2160p 24 HDR10 3840 x 2160p 50 60 4 2 0 HDR10 3840 x 2160p 50 60 4096 x 2160p 24 25 30 4096 x 2160p 50 60 4 2 0 4096 x 2160p 24 HDR10 4096 x 2160p 50 60 4 2 0 HDR10 4096 x 2160p 50 60 ...

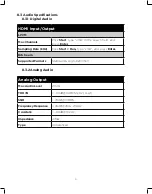
Page 31: ...ch field and press Enter Sampling Rate kHz Click Start Run type cmd and press Enter Bitstream Supported Formats Standard High Definition 8 3 2Analog Audio Analog Output Max Audio Level 2Vrms THD N 60dB 0dBFS 1kHz A wt SNR 70dB 0dBFS Frequency Response 3dB 20Hz 20kHz Crosstalk 60dB 10kHz Impedance 470Ω Type Unbalanced ...

Page 32: ...30Hz 4K 50 60Hz 4 2 0 8 bit color Data rates higher than 5 3Gbps or above 225MHz TMDS clock but below 10 2Gbps 4K60 UHD Video 4K 50 60Hz 4 4 4 8 bit 4K 50 60Hz 4 2 0 10 bit HDR Data rates higher than 10 2Gbps 9 ACRONYMS ACRONYM COMPLETE TERM HDM10GbE ASCII American Standard Code for Information Interchange Cat 5e Enhanced Category 5 cable Cat 6 Category 6 cable Cat 6A Augmented Category 6 cable Ca...

Page 33: ...P Internet Protocal IR Infrared kHz Kilohertz LAN Local Area Network LCD Liquid Crystal Display LED Light Emitting Diode LPCM Linear Pulse Code Modulation MHz Megahertz OSD On Screen Display SNR Signal to Noise Ratio TCP Transmission Control Protocol THD N Total Harmonic Distortion plus Noise TMDS Transition Minimized Differential Signaling UHD 4K Ultra High Definition 10 2Gbps max UHD 4K Ultra Hi...

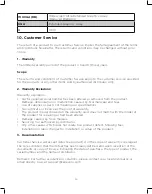
Page 34: ...rmal wear and tear Use of supplies or parts not meeting our specifications No certificate or invoice as the proof of warranty The product model showed on the warranty card does not match with the model of the product for repairing or had been altered Damage caused by force majeure Servicing not authorized by distributor Any other causes which does not relate to a product defect Shipping fees insta...

Page 35: ...35 ...

Reviews: