PK3656_07_14 • ILCO Q90 INSTALLATION GUIDE
6
8.
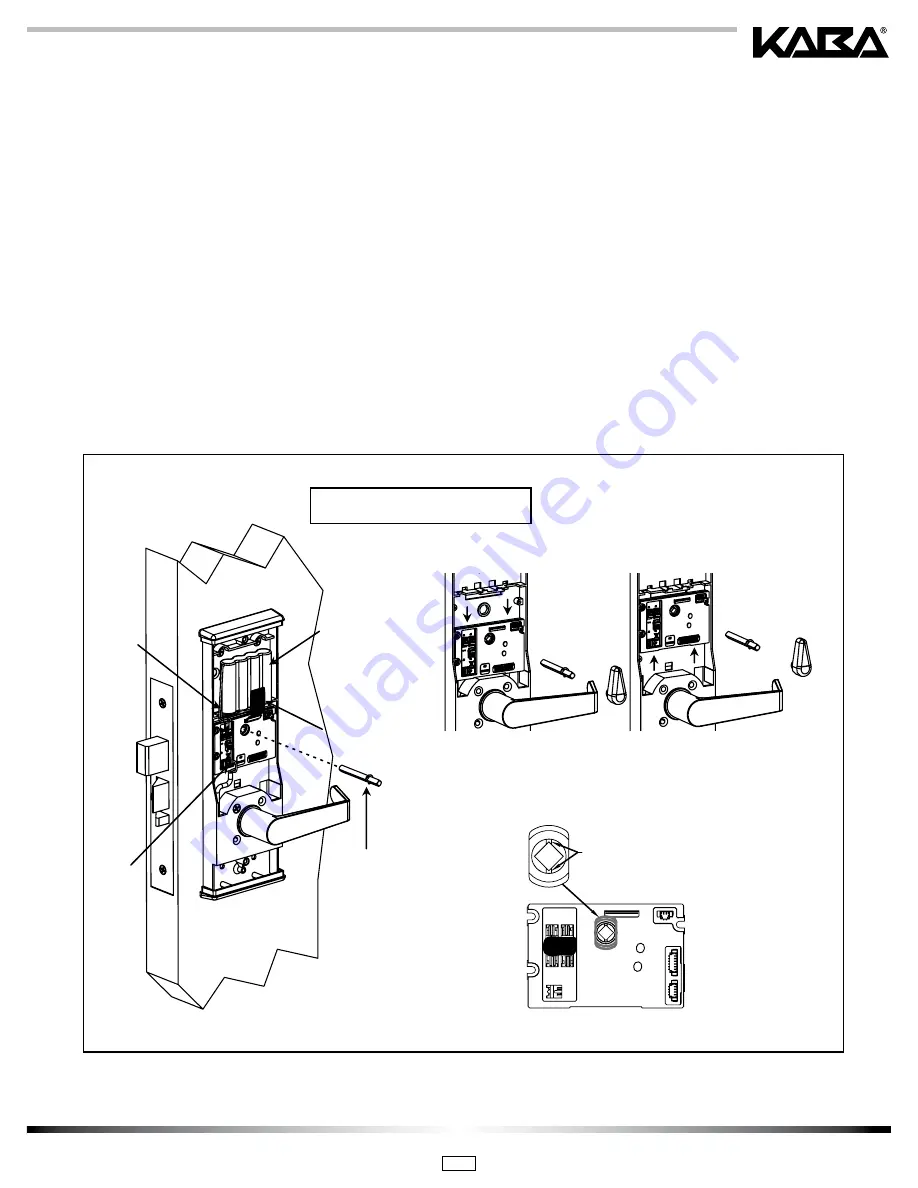
Connect reader ribbon cable, reader power cable, motor cable, and power wire to the PCB. See Fig. 6.
Be sure not to crease the ribbon.
9.
Watch for the green LED on the card reader to flash once, and for the clutch motor to reset when you connect the
battery wire to the PCB. This is an indication that the PCB has reset and the door is locked.
Important:
The battery wire should be the last connection made to the PCB.
10.
With the dead bolt retracted, insert the long end of the dead bolt spindle assembly through the PCB switch cam
hole and into the mortise dead bolt hub. The indicator marks on the switch cam should be at the top/bottom
(12:00 and 6:00 position) when the mortise dead bolt is retracted (see Fig. 6). The retaining ring should rest on
the switch cam when fully inserted (the proper positioning of the cam will allow the door to be opened when the
dead bolt is retracted and block entry when the dead bolt is thrown for privacy, except when emergency keycards
are used.)
Important:
As illustrated in figure 6 ensure the deadbolt cam position is orientated correctly.
11.
Install the inside escutcheon with the thumb turn pointed upward.
Fig. 6
Battery
Wire
Motor
Wire
Battery
Ribbon
Cable
Dead Bolt
Spindle
ADB PCB ORIENTATION
STD PCB ORIENTATION
ADB VS STD PCB INSTALLATION
INSERT SPINDLE
WITH NOTCHES
VERTICAL & DEAD
BOLT RETRACTED
DEAD BOLT CAM POSITION
Route the ribbon over the battery.
Do not crease ribbon connector.
Installing the lock trim
(continued)


