


72
MENU
REV
FWD
REV
FWD
MENU
1
CAMERA TITLE
1.BLOCK
2.CAMERA 1 TITLE (NONE)
3.CAMERA 2 TITLE (NONE)
4.CAMERA 3 TITLE (NONE)
5.CAMERA 4 TITLE (NONE)
<= : RETURN
1
CAMERA TITLE
1.BLOCK
2.CAMERA 1 TITLE (NONE)
3.CAMERA 2 TITLE (NONE)
4.CAMERA 3 TITLE (NONE)
5.CAMERA 4 TITLE (NONE)
<= : RETURN
1
CAMERA TITLE
1.BLOCK
2.CAMERA 1 TITLE
(
NONE)
3.CAMERA 2 TITLE (NONE)
4.CAMERA 3 TITLE (NONE)
5.CAMERA 4 TITLE (NONE)
<= : RETURN
[CANCEL]:DELETE
[SKIP]:CATEGORY
INPUT SELECT([JOG]) = > ? @
A
B C D E
1
CAMERA TITLE
1.BLOCK
2.CAMERA 1 TITLE ENTRANC
E
3.CAMERA 2 TITLE (NONE)
4.CAMERA 3 TITLE (NONE)
5.CAMERA 4 TITLE (NONE)
<= : RETURN
INPUT SELECT([JOG])
[CANCEL]:DELETE
[SKIP]:CATEGORY
A B C D
E
F G H I
SEARCH
MENU
REV
SKIP
FWD
HDD
OPERATE
LOCK
VIDEO
AUDIO
OUT
EXECUTE
1.6.
3.5.
2.4.5.
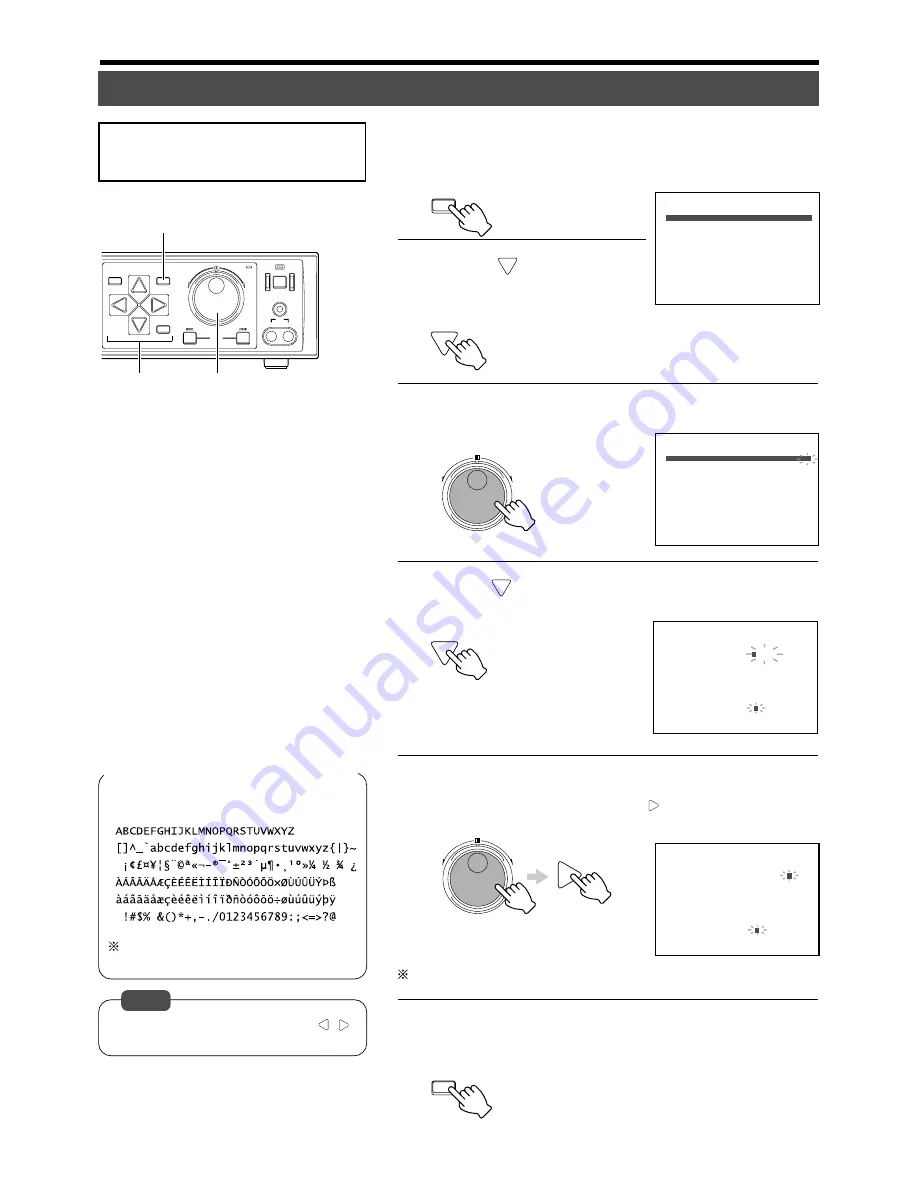
<Example>
Register the title for Camera 1 as [EN-
TRANCE1].
1.
Press the [MENU] button
• Follow procedures in ‘Changing Menu Settings’ on page 22 to display
the “CAMERA TITLE” Menu.
2.
Press [
] to select the
“BLOCK” item
• Move the cursor to select.
3.
Turn the jog dial to set “BLOCK” to “1”
4.
Press [
] to select the “CAMERA 1 TITLE” item
• Move the cursor to select.
5.
Turn the jog dial to select a character
• Upon moving the cursor to [E], press [
] to move the cursor forward
and continue to select [N], [T], [R], [A], [N], [C], [E] and [1] accordingly.
Repeat Steps
2
~
5
to register titles for other cameras.
6.
Press [MENU] to end setting
• The display returns to the normal screen.
• To clear a registered character, use [
/
]
to select the character and press [CANCEL].
Setting a Title for Each Camera Channel Screen
(Excludes the case when title is set using a
computer.)
Up to 15 characters can be used when reg-
istering the camera title.
Note
<
Characters that can be used in camera titles
>
Useful Features (continued)