background image

24

  Registering a Bluetooth device

Registration (Pairing) methods

Use either of the following items in the Bluetooth menu 
to register and establish the connection with a device.
• Select “

BT-PHONE

” or “

BT-AUDIO

” as the 

source to operate the Bluetooth menu.

OPEN

Make the unit ready to establish a new 
Bluetooth connection.
Connection is established by operating the 
Bluetooth device.

SEARCH

Make the unit ready to establish a new 
Bluetooth connection.
Connection is established by operating 
the unit.

Registering using “OPEN”

Preparation:

 Operate the device to turn on its 

Bluetooth function.

1

  Select “

BT-PHONE

” or “

BT-AUDIO

.”

2

  Select “NEW DEVICE.”

3

  Select “OPEN.”

4

  Enter a PIN (Personal Identification Number) 

code to the unit.


•  You can enter any number you like (1-digit to 

16-digit number). [Initial: 0000]


  – Some devices have their own PIN code. Enter 

the specified PIN code to the unit.
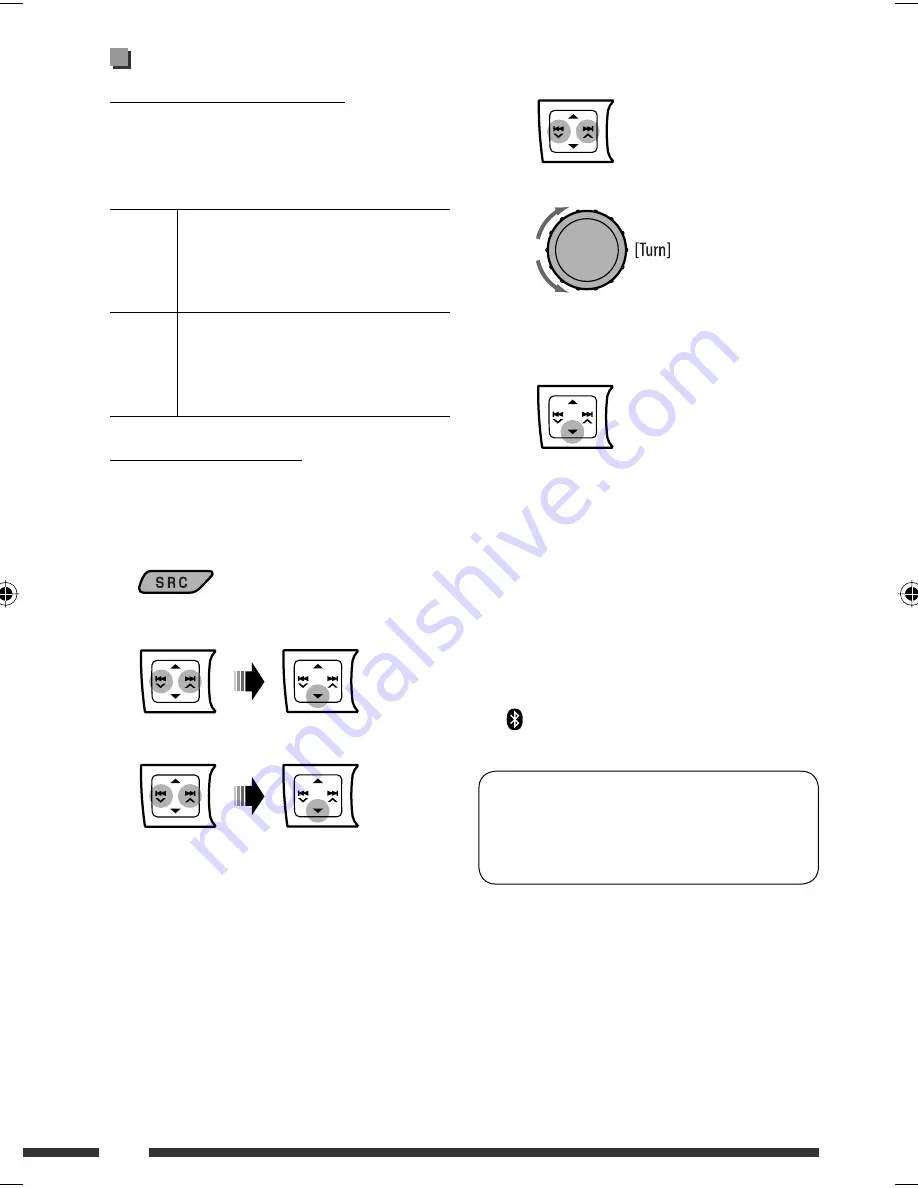
 

1

  Move to the next (or previous) number 

position.


2

  Select a number.


3

  Repeat steps 

1

 and 

2

 until you finish 

entering a PIN code.


4

  Confirm the entry.


“OPEN...” flashes on the display.

5

  Use the Bluetooth device to search and 

connect.


On the device to be connected, enter the same 
PIN code you have just entered for this unit. 
“CONNECTED” appears on the display.


Now connection is established and you can use the 
device through the unit.


 appears when Bluetooth connection is 

established.

The device remains registered even after you 
disconnect the device. Use “CONNECT“ (or activate 
“AUTO CNNCT”) to connect the same device from 
next time on. (See pages 25 and 44.)

EN18-25_KD-DV5506_001A_3.indd   24

EN18-25_KD-DV5506_001A_3.indd   24

2/13/09   3:05:04 PM

2/13/09   3:05:04 PM

Summary of Contents for KD-DV5504

Page 1: ...DVD CD RECEIVER INSTRUCTIONS For canceling the display demonstration see page 10 For installation and connections refer to the separate manual KD DV5506 KD DV5505 KD DV5504 ...

Page 2: ...make a selection then press to confirm the selection Indication language In this manual English indications are used for purposes of explanation You can select the indication language on the monitor on the LANGUAGE setting see page 42 European Union only For safety Do not raise the volume level too much as this will block outside sounds making driving dangerous Stop the car before performing any c...

Page 3: ...ocation where it may obstruct the steering wheel and gearshift lever operations it may obstruct the operation of safety devices such as air bags it may obstruct visibility DO NOT operate the unit while driving If you need to operate the unit while driving be sure to look around carefully The driver must not watch the monitor while driving If the parking brake is not engaged DRIVER MUST NOT WATCH T...

Page 4: ...DTS CD SVCD Super Video CD CD ROM CD I CD I Ready CD Recordable Rewritable CD R RW ISO 9660 level 1 level 2 Romeo Joliet CD DA VCD Video CD DivX MPEG1 MPEG2 MP3 WMA WAV AAC JPEG MPEG4 1 IfyouinsertaDVDVideodiscofanincorrectRegionCode REGIONCODEERROR appearsonthemonitor 2 DVD Rrecordedinmulti borderformatisalsoplayable exceptforduallayerdiscs DVD RWduallayerdiscsarenot playable 3 Itispossibletoplay...

Page 5: ...ler RM RK255 16 USB operations 22 EXTERNAL DEVICES Using the Bluetooth devices 23 Using the Bluetooth cellular phone 26 Using the Bluetooth audio player 27 Listening to the CD changer 28 Listening to the iPod iPhone 29 When connected with the USB cable 29 When connected with the interface adapter 33 Listening to the other external components 34 SETTINGS Selecting a preset sound mode 35 Menu operat...

Page 6: ... display and button illumination color 6 Loading slot 7 Display window 8 Eject disc 9 Select the sound mode p USB Universal Serial Bus input terminal q Detach the panel w FM AM Search for station DISC USB USB iPod Select chapter track CD CH IPOD Select track BT PHONE BT AUDIO Select setting item registered device e Change the display information if the power is turned on Check the current clock ti...

Page 7: ...setto CLOCK OFF seepage37 7 Youcanusethisfunctiononlywhen IPOD MODE isavailablefortheconnectediPod seepage47 Display window 1 Bluetooth indicator 2 Tr track indicator 3 Source display Disc number Track number Folder number Title number PBC indicator Time countdown indicator Setting and list operation information 4 USB indicator 5 iPod indicator 6 Playback mode item indicators RND random disc folde...

Page 8: ...g the remote controller Aim the remote controller directly at the remote sensor on the unit DO NOT expose the remote sensor to bright light direct sunlight or artificial lighting Using the remote controller RM RK255 R03 LR03 AAA 1 button Turns the power on if pressed briefly or attenuates the sound when the power is on Turns the power off if pressed and held 2 5 buttons FM AM Selects the preset st...

Page 9: ...rs incoming calls Enters DIAL menu when a Bluetooth phone is connected Enters REDIAL menu when a Bluetooth phone is connected Hold Continuedonthenextpage 6 SETUP button Enters disc setup menu during stop 7 TOP MENU button DVD Video Shows the disc menu DVD VR Shows the Original Program screen VCD Resumes PBC playback USB iPod Enters the search mode menu 8 OSD on screen display button Shows the on s...

Page 10: ... Changes discs in the magazine buttons DVD Video Makes selection settings DivX MPEG Video Skips back or forward by about five minutes ENT enter button Confirms selection Press and hold until the main menu is called up Repeat this procedure i DUAL button Not applicable for this unit o DIRECT button DISC USB Enters direct search mode for chapter title program playlist folder track when pressed with ...

Page 11: ...en a station is tuned in searching stops To stop searching press the same button again You can also search for a station manually Manual Search Hold either one of the buttons until M flashes on the display then press it repeatedly When receiving an FM stereo broadcast with sufficient signal strength the ST indicator lights up on the display Turn Press Storing stations in memory Automatic presettin...

Page 12: ...ing to the monitor screen See pages 18 21 The disc type is automatically detected and playback starts automatically for DVD automatic start depends on its internal program If the current disc does not have any disc menu all tracks will be played repeatedly until you change the source or eject the disc If appears on the monitor when pressing a button the unit cannot accept the operation you have tr...

Page 13: ...e Track title back to the beginning Current track number and Elapsed playing time Current track number and Clock back to the beginning Current track number and Elapsed playing time Current track number and Clock Album name performer folder name 1 Track title file name 1 back to the beginning Current track number and Elapsed playing time Current track number and Clock Disc title performer 2 Track t...

Page 14: ...apter 1 Select program number playlist number Press Pause resume playback Press Select track Hold Reverse fast forward track 2 Select folder Press Pause resume playback Press Select track Hold Reverse fast forward track 1 Press Pause resume playback Press Select track Hold Reverse fast forward track 1 Select folder Press Pause resume playback Press Select track Hold Reverse fast forward track 1 Pr...

Page 15: ... Randomly play all tracks of current folder then tracks of next folders ALL RND Randomly play all tracks TRACK RPT Repeat current track PBC not in use ALL RND Randomly play all tracks PBC not in use TRACK RPT Repeat current track FOLDER RPT Repeat current folder FOLDER RND Randomly play all tracks of current folder then tracks of next folders ALL RND Randomly play all tracks TRACK RPT Repeat curre...

Page 16: ...esnotwork Reverse forward track search 4 No sound can be heard Press Select chapter during play or pause Hold Reverse fast forward chapter search 3 Press Select track Hold Reverse fast forward track search 5 No sound can be heard DVD Video Select title during play or pause DVD VR Select program Select playlist during play or pause Select folder Skip back or forward the scenes by about five minutes...

Page 17: ...Hold Reverse fast forward track search 3 No sound can be heard Press Select track Hold Reverse fast forward track search 3 Press Select track Hold Reverse fast forward track search 3 Select folder 1 3 Seepage16 Searching for chapter title program playlist folder track directly DVD DivX MPEG Video MP3 WMA WAV CD 1 While holding SHIFT press DIRECT repeatedly to select the desired search mode DVD Vid...

Page 18: ...ime search DVD _ _ _ _ _ Ex 1 02 00 Press once then twice to go to the third entry twice then press ENT enter Removing the on screen bar twice For DivX MPEG Video MP3 WMA WAV track is searched within the same folder For DVD VR program playlist search is possible during Original program playback PG Playlist playback PL To erase a misentry press CLR clear while holding SHIFT To return to the previou...

Page 19: ...Video elapsed playing time of the current title program playlist DVD Video DVD VR Remaining title program playlist time VCD Remaining disc time Elapsed playing time of the current chapter track 3 Remaining time of the current chapter track 3 6 Playback status Play Forward reverse search Forward reverse slow motion Pause Stop 7 Operation icons Change time indication see 5 Time Search Enter the elap...

Page 20: ...s To cancel repeat play or random play select REPEAT OFF or RANDOM OFF NotselectableforCD 4 Confirm the selection Operations using the control screen DivX MPEG Video MP3 WMA WAV CD These operations are possible on the monitor using the remote controller 1 Show the control screen DivX MPEG Video Press 7 during play MP3 WMA WAV CD Automatically appear during play 2 Select Folder column or Track colu...

Page 21: ...alprogramorplaylistmay notbedisplayeddependingontherecording equipment 2 Select an item from the list Operations using the list screen DVD VR DivX MPEG Video MP3 WMA WAV These operations are possible on the monitor using the remote controller Before playing you can display the folder list track list to confirm the contents and start playing a track 1 Display the folder list while stop 2 Select an ...

Page 22: ... it has been stopped previously If a different USB device is currently attached playback starts from the beginning Stop playing and detaching the USB device Straightly pull it out from the USB input terminal NO USB appears Press SRC to listen to another playback source Turn on the monitor to watch the playback picture if you play back an MPEG file You can also control playback by referring to the ...

Page 23: ...the power The detect time and response time may be very long for some USB devices such as Digital Audio Player HDD etc For more details about USB operations see pages 46 and 47 Using the Bluetooth devices For Bluetooth operations it is required to connect the Bluetooth adapter KS BTA200 not supplied to the CD changer jack on the rear of this unit Refer also to the instructions supplied with the Bl...

Page 24: ...ter a PIN Personal Identification Number code to the unit You can enter any number you like 1 digit to 16 digit number Initial 0000 Some devices have their own PIN code Enter the specified PIN code to the unit 1 Move to the next or previous number position 2 Select a number 3 Repeat steps 1 and 2 until you finish entering a PIN code 4 Confirm the entry OPEN flashes on the display 5 Use the Bluetoo...

Page 25: ...evice to the unit Refer to the instructions supplied with the device to check the PIN code 2 Use the Bluetooth device to connect Now connection is established and you can use the device through the unit For special device Use OPEN or SEARCH to connect Connecting disconnecting deleting a registered device 1 Select BT PHONE or BT AUDIO 2 Select a registered device you want to connect disconnect dele...

Page 26: ...tooth setting menu See the following and page 44 When a call comes in The source is automatically changed to BT PHONE The display will flash in blue see RING COLOR on page 38 for setting When AUTO ANSWER is activated The unit answers the incoming calls automatically see page 44 When AUTO ANSWER is deactivated press any button except 0 to answer the incoming call You can adjust the microphone volum...

Page 27: ...start operate the Bluetooth audio player to start playback Operate the Bluetooth audio player to pause if playback does not pause when you change the source Reverse skip forward skip Pause start playback Enter the Bluetooth menu see page 44 Operationmaybedifferentaccordingtotheconnected Bluetoothaudioplayer Refer also to page 25 for connecting disconnecting deleting a registered device If the soun...

Page 28: ...d folder track is selected The selection always start from disc number first If another disc folder is selected playback starts from the 1st track of the selected disc folder To change the display information see page 13 MP3 Select folders Press Select track Hold Reverse fast forward track Selecting the playback modes 1 2 3 REPEAT TRACK RPT Repeats current track FOLDER RPT MP3 Repeats all tracks o...

Page 29: ...le below Make sure AV ON is selected for AV IN see page 39 Turn on the monitor to watch the video Disconnecting the iPod iPhone will stop playback Press SRC to listen to another playback source For details refer also to the manual supplied with your iPod iPhone Caution Avoid using the iPod iPhone if it might hinder your safety while driving Make sure all important data has been backed up to avoid ...

Page 30: ... the desired menu Selecting SHUFFLE SONGS starts playback 3 Select the desired item Turn Press Turn Press The operation explained on the following are under HEAD MODE Connect using USB 2 0 cable accessory of the iPod iPhone Connect using USB Audio and Video cable for iPod iPhone KS U29 not supplied Playback starts automatically from where it had been paused previously Notapplicableforvideofiles US...

Page 31: ...press BACK REPEAT RANDOM Turn Press Turn Press Operations using the control screen These operations are possible on the monitor using the remote controller and HEAD MODE is selected Connect your iPod iPhone to the USB input terminal on the control panel using the USB cable accessory of the iPod iPhone or KS U29 not supplied for watching video file 1 Turn on the monitor Control screen appears on th...

Page 32: ... mode change the speed of the Audiobooks Not applicable for IPOD MODE 1 While control screen is displayed Playback mode selection screen appears on the category list section of the control screen 2 Select an item 3 Select a playback mode speed REPEAT REPEAT ONE Same as Repeat One REPEAT ALL Same as Repeat All RANDOM 1 RANDOM ALBUMS 2 Same as Shuffle Albums RANDOM SONGS Same as Shuffle Songs AUDIO ...

Page 33: ...ith the elapsed playing time Current track number with the clock time back to the beginning Selecting a track from the menu 1 Enter the main menu This mode will be canceled if no operations are done for about 5 seconds 2 Select the desired menu PLAYLISTS Ô ARTISTS Ô ALBUMS Ô SONGS Ô GENRES Ô COMPOSERS Ô back to the beginning Pressing and holding 4 skips 10 items at a time 3 Confirm the selection I...

Page 34: ...ure to connect and turn on the monitor to watch the playback picture If the parking brake is not engaged PARKING flashes on the display and no playback video on the monitor For connection see Installation Connection Manual separate volume LINE IN LINE IN plugs on the rear of this unit 1 Select EXT INPUT LINE IN or AV IN 2 Turn on the connected component and start playing the source 3 Adjust the vo...

Page 35: ...USER 60 Hz 00 Q1 0 1 0 kHz 00 Q1 0 10 0 kHz 00 Q1 25 OFF ROCK 100 Hz 03 Q1 0 1 0 kHz 00 Q1 25 10 0 kHz 02 Q1 25 CLASSIC 80 Hz 01 Q1 0 1 0 kHz 00 Q1 25 10 0 kHz 03 Q1 25 POPS 100 Hz 02 Q1 0 1 0 kHz 01 Q1 25 10 0 kHz 02 Q1 25 HIP HOP 60 Hz 04 Q1 0 1 0 kHz 02 Q1 0 10 0 kHz 01 Q1 25 JAZZ 80 Hz 03 Q1 0 1 0 kHz 00 Q1 25 10 0 kHz 03 Q1 25 Freq Frequency Q Q slope See page 36 for USER settings or Selectin...

Page 36: ... Q1 0 Q1 25 Q1 5 Q0 75 Q1 25 5 Repeat steps 3 and 4 to adjust other sound characteristics The adjustment made will be stored automatically Storing your own sound mode You can store your own adjustments in memory 1 Select USER 2 While USER is shown on the display 3 Select a tone 4 Adjust the sound elements of the selected tone 1 Adjust the frequency 2 Adjust the level 3 Adjust the Q slope Turn Pres...

Page 37: ...off CLOCK SET Clock setting Adjust the hour then the minute 10 Initial 1 00 EQ EQ Equalizer Select a preset sound mode suitable to the music genre USER ROCK CLASSIC POPS HIP HOP JAZZ DISPLAY DIMMER Dimmer DIMMER AUTO DIMMER ON DIMMER OFF Dims the display when you turn on the headlights 2 Dims the display and button illumination Cancels SCROLL 3 Scroll SCROLL ONCE SCROLL AUTO SCROLL OFF Scrolls the...

Page 38: ...r for display and button except EQ 0 illumination For customized color settings USER see page 40 MENU COLOR ON OFF Changes the display and button except EQ 0 illumination during menu list search and playback mode operations Cancels RING COLOR 6 ON OFF When a call comes in the display will flash in blue The display will change to the original color when you answer the call or the incoming call stop...

Page 39: ...Pod 33 To connect a portable video audio player to the CD changer jack 34 AV IN 11 Audio video input AV ON AV OFF Enable AV IN in source selection 6 Disable AV IN in source selection ARTWORK 12 ARTWORK ON ARTWORK OFF Activates Artwork display on the control screen 31 It takes 5 seconds or more to display an Artwork and no operations are available while loading it Skip the track so that your settin...

Page 40: ...he buttons and display Selecting a preset color You can select a preset color for the buttons and display See also page 38 Creating your own color USER Color You can create your own colors DAY COLOR or NIGHT COLOR DAY COLOR Color for the display and buttons NIGHT COLOR Color for the display and buttons when the display is dimmed To dim the display see DIMMER on page 37 1 Select USER 2 While USER i...

Page 41: ... each title 1 Select FM or AM 2 Show the title entry screen 3 Assign a title 1 Select a character 2 Move to the next or previous character position 3 Repeat steps 1 and 2 until you finish entering the title 4 Finish the procedure To erase the entire title In step 2 on the left column Title assignment ...

Page 42: ...ANGUAGE Select the initial disc menu language Refer also to Language codes on page 50 AUDIO LANGUAGE Select the initial audio language Refer also to Language codes on page 50 SUBTITLE Select the initial subtitle language or remove the subtitle OFF Refer also to Language codes on page 50 ON SCREEN LANGUAGE Select the language for the on screen display PICTURE MONITOR TYPE Select the monitor type to...

Page 43: ...ls reproduced through the LINE OUT jacks and through the DIGITAL OUT terminal when PCM ONLY is selected for DIGITAL AUDIO OUTPUT SURROUND COMPATIBLE Select to enjoy multi channel surround audio by connecting an amplifier compatible with Dolby Surround STEREO Normally select this D RANGE COMPRESSION You can enjoy a powerful sound at low or middle volume levels while playing a Dolby Digital software...

Page 44: ...nging and displaying RCV MESSAGE receiving message The display illuminates in blue see RING COLOR on page 38 MANUAL The unit does not inform you of the arrival of a message MIC SETTING microphone setting Only for the device being connected for BT PHONE Adjust the volume of the microphone connected to the Bluetooth adapter LEVEL 01 02 03 VERSION The Bluetooth software and hardware versions are show...

Page 45: ...trol dial the operation will be canceled Tuner operations Storing stations in memory During SSM search All previously stored stations are erased and the stations are stored anew When SSM is over the station stored in the lowest preset number will be automatically tuned in When storing a station manually the previously preset station is erased when a new station is stored in the same preset number ...

Page 46: ...ded in the interlaced scanning mode may not be played back correctly This unit cannot play back the following files Files encoded in Codec Compressor decompressor other than DivX Codec If you want to know more about DivX visit http www divx com Playing MPEG Video files This unit can play back MPEG Video files with the extension code mpg mpeg or mod mod isanextensioncodeusedfortheMPEG 2files record...

Page 47: ...sages for Bluetooth operations ERROR CNNCT Error Connection The device is registered but the connection has failed Use CONNECT to connect the device again See page 25 ERROR Try the operation again If ERROR appears again check if the device supports the function you have tried UNFOUND No available Bluetooth device is detected by SEARCH LOADING The unit is updating the phone book PLEASE WAIT The uni...

Page 48: ...t If you try to assign titles to more than 30 station frequencies NAME FULL appears Delete unwanted titles before assignment Disc setup menu When the language you have selected is not recorded on a disc the original language is automatically used as the initial language In addition for some discs the initial languages settings will not work as you set due to their internal disc programming When yo...

Page 49: ...utput Signal STREAM PCM DOLBY DIGITAL PCM PCM ONLY OFF DVD Video 48 kHz 16 20 24 bits Linear PCM 48 kHz 16 bits stereo Linear PCM OFF 96 kHz Linear PCM 48 kHz 16 bits stereo Linear PCM Dolby Digital Dolby Digital bitstream 48 kHz 16 bits stereo Linear PCM MPEG Audio MPEG bitstream 48 kHz 16 bits stereo Linear PCM Audio CD Video CD 44 1 kHz 16 bits stereo Linear PCM 48 kHz 16 bits stereo Linear PCM...

Page 50: ...alog BG Bulgarian HA Hausa LO Laothian RO Rumanian TN Setswana BH Bihari HI Hindi LT Lithuanian RW Kinyarwanda TO Tonga BI Bislama HR Croatian LV Latvian Lettish SA Sanskrit TR Turkish BN Bengali Bangla HU Hungarian MG Malagasy SD Sindhi TS Tsonga BO Tibetan HY Armenian MI Maori SG Sangho TT Tatar BR Breton IA Interlingua MK Macedonian SH Serbo Croatian TW Twi CA Catalan IE Interlingue ML Malayala...

Page 51: ...isc by the edges Do not touch its recording surface When storing a disc in its case gently insert the disc around the center holder with the printed surface facing up Make sure to store discs in cases after use Connectors Center holder To keep discs clean A dirty disc may not play correctly If a disc does become dirty wipe it with a soft cloth in a straight line from center to edge Do not use any ...

Page 52: ...dable Rewritable discs cannot be played back Tracks on the Recordable Rewritable discs cannot be skipped Insert a finalized disc Finalize the discs with the component which you have used for recording Disc cannot be recognized Eject the disc forcibly see page 3 Sound and pictures are sometimes interrupted or distorted Stop playback while driving on rough roads Change the disc Check the cords and c...

Page 53: ... for MPEG Video files Elapsed playing time is not correct This sometimes occurs during playback This is caused by how the tracks are recorded PLEASE and EJECT appear alternately on the display Insert a disc that contains tracks of appropriate formats Correct characters are not displayed e g album name This unit can only display letters upper case numbers and a limited number of symbols See page 41...

Page 54: ...e tracks have not been properly copied into the USB device Copy tracks again into the USB device and try again Bluetooth 2 Bluetooth device does not detect the unit The unit can be connected with one Bluetooth cellular phone and one Bluetooth audio device at a time While connecting a device this unit cannot be detected from another device Disconnect currently connected device and search again The ...

Page 55: ...nd press the reset button of the CD changer RESET 1 RESET 7 appears on the display Press the reset button of the CD changer The CD changer does not work at all Reset the unit see page 3 iPod iPhone The iPod does not turn on or does not work Check the connecting cable and its connection Update the firmware version of the iPod iPhone Charge the battery of the iPod iPhone Reset the iPod iPhone Check ...

Page 56: ...e and its connection Charge the battery No sound can be heard when connecting an iPod nano Disconnect the headphones from the iPod nano Update the firmware version of the iPod nano RESET 1 RESET 7 appears on the display Disconnect the adapter from both this unit and iPod Then connect it again RESET 8 appears on the display Check the connection between the adapter and this unit JVC bears no respons...

Page 57: ...re either registered trademarks or trademarks of Microsoft Corporation in the United States and or other countries The Bluetooth word mark and logos are owned by the Bluetooth SIG Inc and any use of such marks by Victor Company of Japan Limited JVC is under license Other trademarks and trade names are those of their respective owners Made for iPod means that an electronic accessory has been design...

Page 58: ... to Noise Ratio 80 dB Audio Output Level Digital DIGITAL OUT Optical Signal wave length 660 nm Output level 21 dBm to 15 dBm Line Out Level Impedance 2 5 V 20 kΩ load full scale Output Impedance 1 kΩ Color System PAL NTSC Video Output composite 1 Vp p 75 Ω Other Terminal USB input terminal AV audio video input jack CD changer jack LINE IN plugs TUNER SECTION Frequency Range FM 87 5 MHz to 108 0 MH...

Page 59: ... kbps Sampling Frequency MPEG 1 32 kHz 44 1 kHz 48 kHz MPEG 2 16 kHz 22 05 kHz 24 kHz WMA Bit Rate 32 kbps 320 kbps Sampling Frequency 22 05 kHz 32 kHz 44 1 kHz 48 kHz WAV Quantization Bit Rate 16 bit Sampling Frequency 44 1 kHz USB SECTION USB Standard USB 1 1 USB 2 0 Data Transfer Rate Full Speed Max 12 Mbps Compatible Device Mass storage class Compatible File System FAT 32 16 12 Playable Audio ...

Page 60: ...Having TROUBLE with operation Please reset your unit Refer to page of How to reset your unit ...

Page 61: ...aged see page 39 of the INSTRUCTIONS To prevent short circuits cover the terminals of the UNUSED leads with insulating tape The heat sink becomes very hot after use Be careful not to touch it when removing this unit INSTALLATION IN DASH MOUNTING The following illustration shows a typical installation If you have any questions or require information regarding installation kits consult your JVC car ...

Page 62: ...k connecting to the car battery bypassing the ignition switch constant 12 V LINE OUT see diagram Rear ground terminal Left speaker front Right speaker front Left speaker rear Right speaker rear Purple Purple with black stripe Green Green with black stripe Gray Gray with black stripe White White with black stripe Typical connections ELECTRICAL CONNECTIONS Antenna terminal To car light control switc...

Page 63: ...ecting the external amplifier You can connect an amplifier to upgrade your car stereo system Connect the remote lead blue with white stripe to the remote lead of the other equipment so that it can be controlled through this unit Disconnect the speakers from this unit connect them to the amplifier Leave the speaker leads of this unit unused Rear speakers JVC Amplifier Remote lead Y connector not su...

Page 64: ...output jacks Line input adapter KS U57 Portable audio player with 3 5 mm stereo mini jack AUX input adapter KS U58 When connecting more than one component maximum two it is recommended that you connect the components in series as explained below 3 To use these components set the external input setting correctly see page 39 of the INSTRUCTIONS Connecting the external components F iPod is a trademar...

Reviews: