


Dubbing Files to a Disc by Connecting to a
DVD Recorder
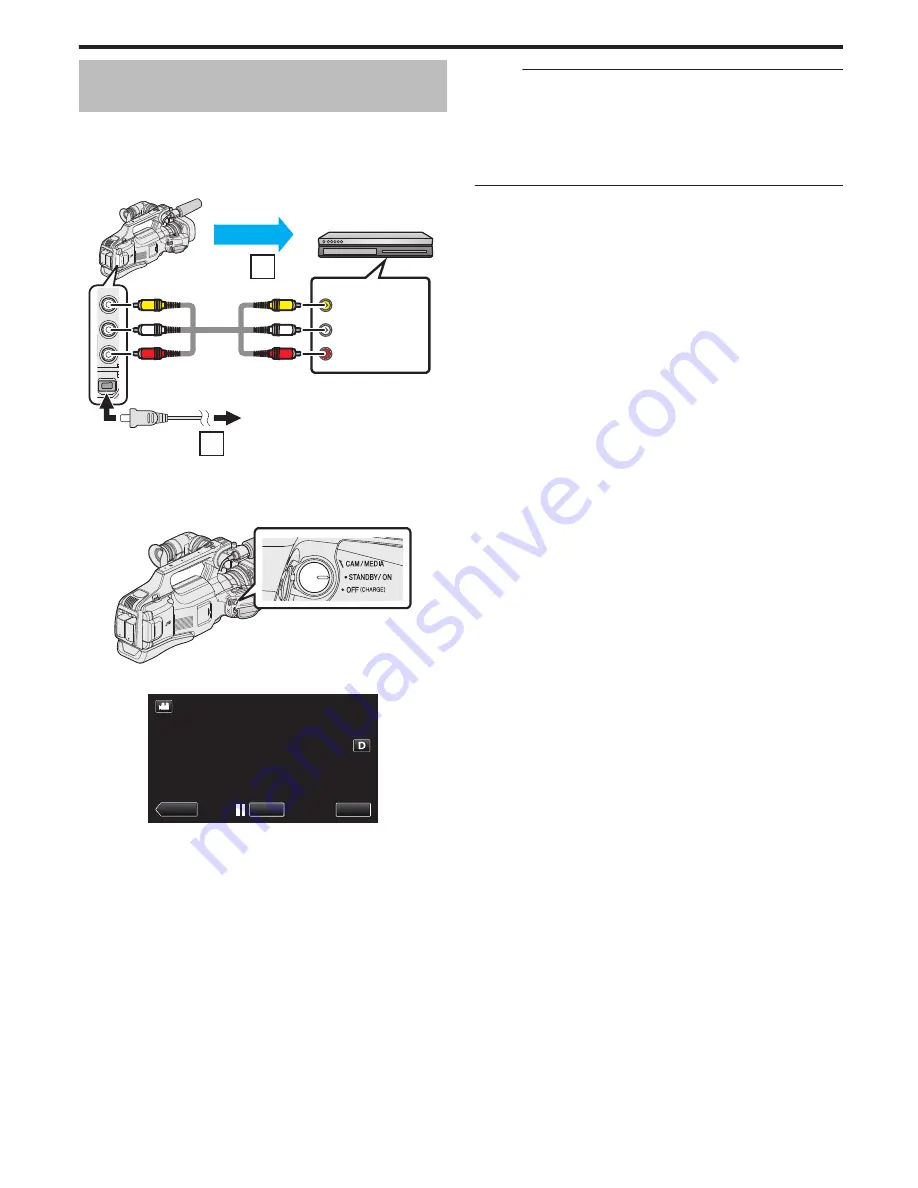
You can dub videos in standard quality by connecting to a DVD recorder.
0
Refer also to the instruction manuals of the TV and DVD recorder.
1
Remove the AC adapter and battery pack from this unit.
2
Connect to a DVD recorder.
.
AV
DC
2
1
Audio Input (R)
Audio Input (L)
Video Input
Video Input
To AV Connector
VCR/DVD Recorder
Record
AC Adapter To AC Outlet
To DC
Connector
Yellow
Red
White
Yellow
Red
White
AV Cable
(Provided)
A
Connect using the provided AV cable.
B
Connect the AC adapter to this unit.
3
Set the “STANDBY/ON OFF” switch to “ON”.
.
4
Tap <<MEDIA to select the playback mode.
.
REC
MENU
≪
MEDIA
5
Prepare the TV/DVD recorder for recording.
0
Switch to a compatible external input.
0
Insert a disc (DVD-R, etc.) into the DVD recorder.
6
Prepare this unit for playback.
0
Set “VIDEO OUTPUT” in the “CONNECTION SETTINGS” menu to
the aspect ratio (“4:3” or “16:9”) of the connecting TV.
“ VIDEO OUTPUT ” (
A
p. 116)
7
Start recording.
0
Start playback on this unit and press the record button on the
recorder.
“Playing Back Videos” (
A
p. 45)
0
After playback is complete, stop the recording.
Memo :
0
When there are many videos to dub, you can create a playlist in advance
and play it back so that all your favorite videos can be dubbed at once.
“Creating Playlists with Selected Files” (
A
p. 63)
“ PLAYBACK PLAYLIST ” (
A
p. 50)
0
To include the recording date and time during dubbing, set “DISPLAY
DATE/TIME” in the “PLAYBACK SETTING” menu to “ON”. Or, set
“DISPLAY ON TV” in the “CONNECTION SETTINGS” menu to “ON”.
Copying
85


