Filename [MV5S_05Name.fm]
Masterpage:Left+
16
EN
GET OVER IT! – CONNECTIONS –
Page 16
Wednesday, 31 August 2005 16:55
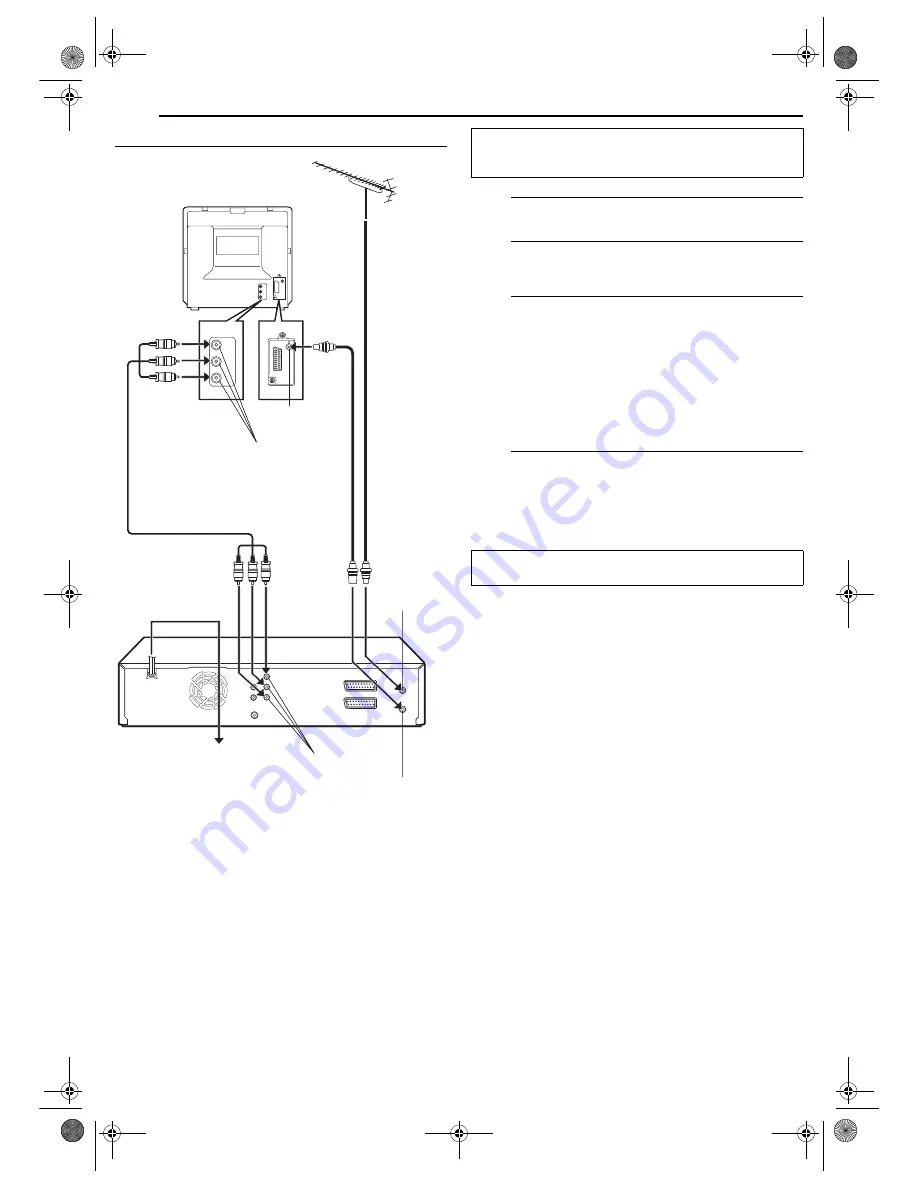
Component Video Connection (DVD deck only)
1
Perform
1
–
3
in “Composite Connection”
(
墌
pg. 15).
2
Connect the unit’s [COMPONENT VIDEO OUT]
connectors to the TV’s component video input
connectors.
3
Connect the unit’s [AUDIO OUT] connectors to the
TV’s AUDIO input connectors.
●
You can obtain high-quality component video pictures.
●
If your TV is not stereo-capable, use the unit’s [AUDIO
OUT] connectors to connect to an audio amplifier for Hi-Fi
stereo sound reproduction.
●
By using the component video connection, you can view
the images in the progressive mode. For switching to the
progressive mode, refer to “Scan Mode Set” (
墌
pg. 80).
4
Plug the end of the AC power cord into an AC outlet.
●
“LOADING” blinks on the front display panel when the AC
plug of the power cord is connected into an AC outlet and
no operation will be done for approximately 50 seconds.
This is not a malfunction.
RF cable
(provided)
Back of unit
Back of TV
TV aerial cable
ANTENNA IN
AC power cord
Aerial connector
AC outlet
Component video input connectors
Component video cable
(not provided)
COMPONENT VIDEO OUT
ANTENNA OUT
ATTENTION:
Your TV also must have a component video input
connectors for the connection to the unit.
After connection is completed, perform “Auto Set Up” on
page 17.
MV5S_00.book Page 16 Wednesday, August 31, 2005 4:55 PM


