background image

64

Operation

Adjustments and settings in the menu (continued)

[3] Installation 

Use this function to set and adjust installation method and projection 
environment.  
Use the UP/DOWN keys to select an adjustment item. Press the [BACK] 
key to return to the previous screen.

Items                               Explanation, operation, precautions, settings
Lens Control

To sub-menu 

"[3-1] Lens Control"


Pixel Adjust

To sub-menu 

"[3-2] Pixel Adjust"

Installation Style

0DWFKLQJWKHVWDWHRIWKHSURMHFWRU¶VSURMHFWLRQRQHFDQVZLWFKKRUL]RQWDODQGYHUWLFDOÀLS

forward switch.
Settings: Front, Ceiling Mount (Front), Rear, Ceiling Mount (RE)  

[Front]

Front

Front upright projection mode.

Ceiling Mount (F)

Ceiling/front projection mode.

Rear

Rear upright projection mode.

Ceiling Mount (R)

Ceiling/ rear  projection mode.

Keystone

In regards to the projection plane, any occurring keystone distortion is adjusted in case 
the installation location is inclined.
(*) There may be instances, when the video image - after having corrected keystone 
distortion - will not match the screen. The position with a shift correction of 0% position is 
an exception. 
(*) When there is a 3D input signal, adjustment is not possible.

Horizontal

Adjusts the horizontal keystone. 
Settings: -40 to 40 

[0]

Vertical

Adjusts the vertical keystone.
Settings: -30 to 30 

[0]

Anamorphic

The video images are projected after being enlarged in the vertical direction of the panel
resolution. This setting is used when one uses the anamorphic lens to enlarge them in the
horizontal direction.
If a 3D signal is fed in when Anamorphic mode is set to A or B, Anamorphic mode is
automatically turned Off.
Settings: A, B, Off 

[Off]

A

Video with an aspect ratio of 2.35:1 is enlarged in the vertical direction of the panel
resolution and then projected. 

B

Video with an aspect ratio of 16:9 are displayed by reducing them in the horizontal 
direction, without changing their size in the vertical direction. 

Off

Used when watching video images other than those with a 2.35:1 aspect ratio while using
an anamorphic lens. 2.35:1 video images are projected without any changes. (Black
bands appear on all sides)

Screen Adjust

,WFRUUHFWVWKHZKLWHEDODQFHIDXOWDFFRUGLQJWRWKHUHÀHFWLYHSURSHUWLHVRIWKHSURMHFWLRQ

screen. Please adjust to your preference.

Black Level

Sets the black level when used indoors.
Settings: 0 to 10 

[0]

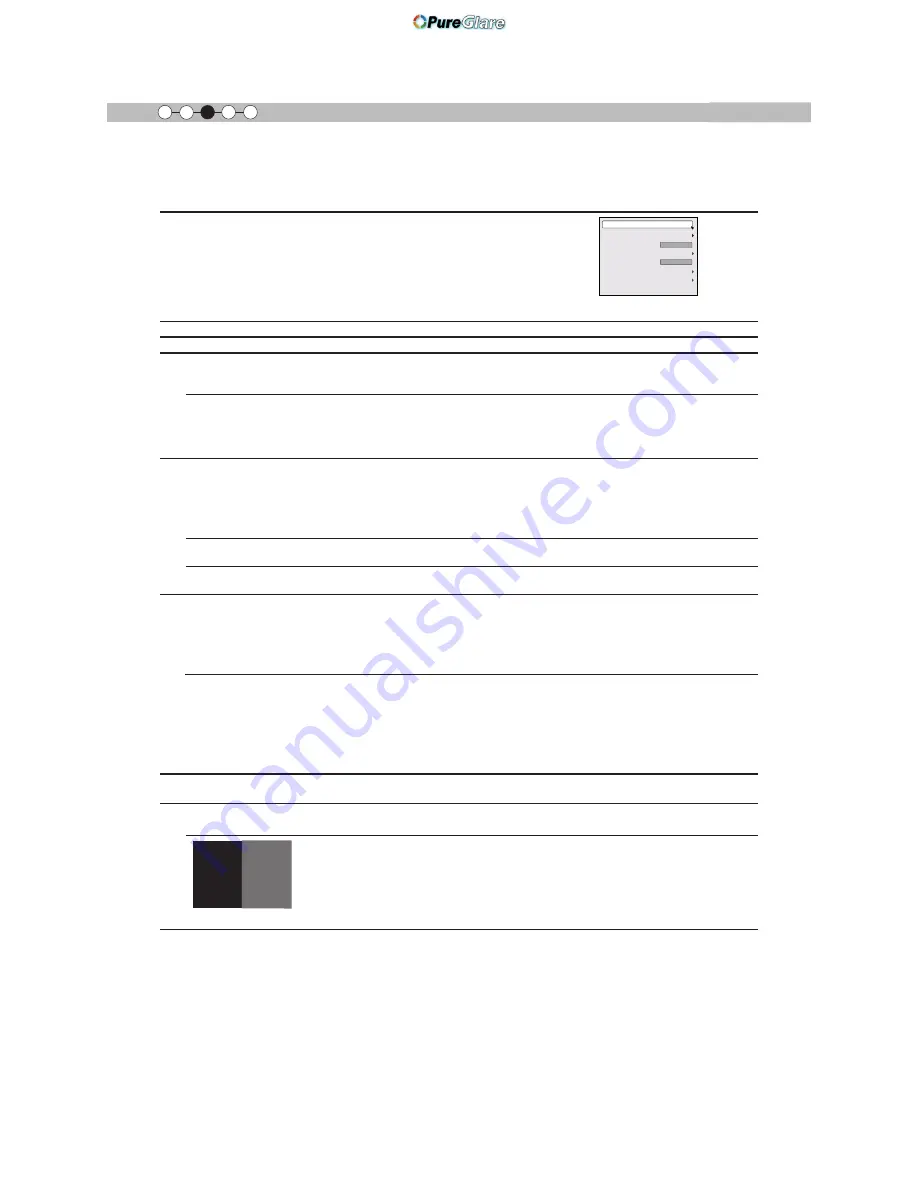
The frame is displayed in the center as shown in the 

¿

gure on the right. (Resolution is 

emphasized in this 

¿

gure and is not a true representation.) The actual black that can be 

displayed by this machine is shown in the right frame. Adjust so that the borderline shared 
with the left frame does not stand out.
(*) This adjustment decreases shading, making 

¿

ne adjustments from the black (dark) side 

to the white (bright) side. Adjust settings according to your preference. 

Pixel Adjust

ޓ

Lens Control

Keystone

Anamorphic

Screen Adjust

Black Level

Installation Style

Front

Off

http://www.pureglare.com.au

Summary of Contents for DLA-X30

Page 1: ...CE ADJUST USER2 USER3 ANIME PICTURE CINEMA 90 70 For Customer use Enter below the serial No which is located on the side of the cabinet Retain this information for future reference Model No DLA X70R DLA X30 DLA X90R Pour utilisation par le client Entrer ci dessous le N de série qui est situé sous le boîtier Garder cette information comme référence pour le futur N de modèle DLA X70R DLA X30 DLA X90...

Page 2: ...ipment into an outlet on a circuit different from that to which the receiver is connected Consult the dealer or an experienced radio 79 WHFKQLFLDQ IRU KHOS WARNING 72 35 9 17 5 25 6 2 5 6 2 NOT EXPOSE THIS APPLIANCE TO RAIN OR MOISTURE WARNING THIS APPARATUS MUST BE EARTHED CAUTION To reduce the risk of electric shock do not remove FRYHU 5HIHU VHUYLFLQJ WR TXDOL HG VHUYLFH SHUVRQQHO This projector...

Page 3: ...arts are required be sure the service technician has used replacement SDUWV VSHFL HG E WKH PDQXIDFWXUHU RU ZLWK same characteristics as the original part 8QDXWKRUL HG VXEVWLWXWLRQV PD UHVXOW LQ UH electric shock or other hazards Upon completion of any service or repairs to this product ask the service technician to perform safety checks to determine that the product is in proper operating conditio...

Page 4: ... KHQ LQJ WKH XQLW WR WKH FHLOLQJ 3OHDVH QRWH WKDW we do not take any responsibility even during the warranty period if the product is damaged due to XVH RI PHWDO WXUHV XVHG IRU DWLRQ WR WKH FHLOLQJ other than our own or if the installation HQYLURQPHQW RI VDLG PHWDO WXUHV LV QRW DSSURSULDWH I WKH XQLW LV VXVSHQGHG IURP WKH ceiling during use please be careful in regard to WKH DPELHQW WHPSHUDWXUH RI...

Page 5: ...re FRORUHG 9HUW HW MDXQH LQ DFFRUGDQFH ZLWK WKH following cord Green and yellow Blue Brown As these colors may not correspond with the colored making identifying the terminals in your plug proceed as follows The wire which is colored green and yellow must be connected to the terminal which is marked M with the letter E or the safety earth or colored green or green and yellow The wire which is colo...

Page 6: ... JLEW DQ dass diese Batterie Blei enthält Informations relatives à l élimination des appareils et des piles usagés à l intention des utilisateurs Union européenne seulement 6L FHV V PEROHV JXUHQW VXU OHV SURGXLWV FHOD VLJQL H TX LOV QH doivent pas être jetés comme déchets ménagers Si vous voulez jeter ce produit ou cette pile veuillez considérer le système de collection de déc hets ou les centres ...

Page 7: ...lle batter ie indica che questa batteria contiene piombo Informação para os utilizadores acerca da eliminação de equipamento usado e pilhas Apenas União Europeia Estes símbolos indicam que o equipamento com estes símbolos não deve ser eliminado juntamente com o restante lixo doméstico Se p retende eliminar o produto ou a pilha utilize os sistemas de recolha ou instalações para uma reciclagem aprop...

Page 8: ...tarkoit taa että akku sisältää lyijyä Information för användare gällande bortskaffning av gammal utrustning och batterier Endast den Europeiska unionen Dessa symboler indikerar att utrustning med dessa symboler inte ska hanteras som vanligt hushållsavfall Om du vill bortsk affa produkten eller batteriet ska du använda uppsamlingssystem eller inrättningar för lämplig återvinning Observera Märkninge...

Page 9: ...olovo QIRUPDFMH GOD XĪ WNRZQLNyZ GRW F ąFH SR E ZDQLD VLĊ XĪ WHJR VSU ĊWX L baterii Tylko kraje Unii Europejskiej 7H V PEROH R QDF DMą ĪH VSU Ċ WX QLH QDOHĪ Z U XFDü UD HP RGSDGDPL JRVSRGDUF PL HĞOL WU HED SR E ü VLĊ WHJR SURGXNWX OXE ED WHULL SURV Ċ VNRU VWDü V VWHPX RGELRUX OXE XU ąG HĔ GR zbió rki odpadów elektronicznych w celu odpowiedniego ponowne go ich przetworzenia Uwaga 2 QDF HQLH 3E QDMG...

Page 10: ...terije sa ovim simbolom ne VPHMX ELWL RGORåHQL NDR QHVRUWLUDQ NXüQL RWSDG NR åHOLWH GD LK VH UHãLWH PROLPR YDV GD QH XSRWUHEOMDYDWH RELþQX NDQWX D ÿXEUH Postoje zasebni sistemi za prikupljanje ovakvih proizvoda Naznaka Hemijski simbol Pb ispod simbola za baterije XND XMH QD WR GD OL EDWHULMD VDGUåL RORYR Baterija Produkt ɪɩɫɤɚ http www pureglare com au ...

Page 11: ...LV DEOH WR EULQJ RXW WKH IXOO SRWHQWLDO RI WKH SURMHFWRU ZKHQ SOD LQJ PRYLHV RQ D ODUJH VFUHHQ 5HFHLYHG 7 LVSOD HUWL FDWLRQ VSHFL HG E 7 WG Q DGGLWLRQ WKH FHUWL FDWLRQ VWDQGDUGV ZHUH HVWDEOLVKHG ZLWK WKH DLP WR IDLWKIXOO UHSURGXFH LPDJHV DW KRPH DFFRUGLQJ WR WKH LQWHQWLRQV RI WKH OP GLUHFWRU GXULQJ SOD EDFN RI RU LPDJHV DQG WKH DUH D SURRI RI KLJK GH QLWLRQ DQG KLJK LPDJH TXDOLW LQGLFDWLQJ WKDW D ...

Page 12: ...12 㪈 Getting started For detail information about ISF please refer web site http www imagingscience com 90 70 http www pureglare com au ...

Page 13: ... provided 34 Operation Basic Operation 36 Basic operation procedures 36 Frequently used useful functions 38 Setting the Screen Size 38 Masking the Surrounding Area of an Image 40 Temporary turning off of the video 41 Adjustment of the keystone correction 41 Adjustments and settings in the menu 42 Structure of the menu hierarchy summary 42 Menu operation button 50 Menu operation procedure 51 Menu i...

Page 14: ...HW P 1 piece Power Cord For the EU market P 1 piece Power Cord For the UK market P 1 piece Instruction manual this book warranty card and other printed material are also included Optional Accessories Please check with your authorized dealer for details Replacement Lamp PK L2210U Replacement Filter PC010661199 3D Glasses PK AG1 B PK AG2 B 3D Synchro Emitter PK EM1 http www pureglare com au ...

Page 15: ... not block or prevent the outÀow of hot air Doing so could lead to failure of the unit There are inlets at two points on the right and left sides of the rear side 㽷 Manual operation button of the lens cover 90 70 The lens cover can be opened when pressed down It is used for maintenance and not used during normal use 㽸 Feet The height 0 to 5 mm can be adjusted by turning the foot Main body Front Ma...

Page 16: ...re details 㽼 Light receiving section of the remote control rear Please aim the remote control at this section when using There is also a light receiving section at the rear 㽽 Power input terminal This is the power input terminal It is connected via the supplied power cord Reference page 34 To turn on off the power To switch input 7R VHOHFW RU FRQ UP Up button Right button Left button Down button T...

Page 17: ...r which shows the operation mode of this unit is displayed as described above Reference page 92 The display the indicator lights They display Àashing of the indicator STAND BY Light on Red Duringstandby LAMP WARNING STANDBY ON STAND BYLight on Green LAMP WARNING STANDBY ON STAND BY Blinking Red Duringcooldown Whileactivatingthelamp about1minute STAND BY Blinking Green Duringimageprojection LAMP WA...

Page 18: ...power again 2 times Cooling fan stops 3 times Internal temperature is too high 4 times External temperature is too high 䇭 䇭䇭 orange 䇭䇭 red Simultaneous Àashing 1 times Abnormal electrical circuit 2 times 3 times 4 times If something is wrong with the automatic lens cover Check that an impact shock has not occurred during operation Check that the lamp unit and lamp cover are correctly installed Che...

Page 19: ...ence page 30 㽷 3D SYNCHRO terminal 3D synchro emitter it is connected to the P EM1 sold separately when enjoying 3D video contents Reference page 31 㽸 PC terminal D Sub 15 pin This is an input term used for Personal Computer PC signals only RGB video signals and sync signals Use to connect a computer display output terminal etc Reference page 31 㽹 TRIGGER terminal DC power supply output terminal w...

Page 20: ...nce page 41 This sequentially switches the call up save edit modes of your lens memory Reference page 65 Use this function to sequentially select focus zoom and shift adjustment lens controls Reference page 65 To turn off the power This sequentially switches anamorphic modes Reference page 64 BACK HIDE LIGHT LENS MEMORY ANAMO PC HDMI 1 STAND BY 3D FORMAT HDMI 2 COMP LENS CONTROL MENU GAMMA P FILE ...

Page 21: ...st and brightness The switching items are not the same for different models or different picture modes This sequentially switches the call up save edit modes of your lens memory Reference page 65 To adjust Lens Aperture Reference page 57 BACK HIDE LIGHT LENS MEMORY LENS AP HDMI 1 STAND BY 3D FORMAT HDMI 2 COMP LENS CONTROL MENU GAMMA SPACE COLOR ADJ PIC ON FILM NATURAL STAGE 3D USER INFO C M D ANI...

Page 22: ...hadows on the screen heat haze phenomenon Moreover when it is enclosed in a space as shown in the following illustration please make sure that the enclosed interior has the same temperature as the outside High temperatures might lead to failure of the unit This unit uses a projection lamp which will get hot when in use Please refrain from projecting in the following circumstances Otherwise it migh...

Page 23: ...thin the above mentioned range Approximately 34 maximum of the projected image Approximately 34 maximum of the projected image Approximately 80 maximum of the projected image Approximately 80 maximum of the projected image 90 80 70 60 50 40 30 20 10 0 10 20 30 40 Horizontal lens shift Vertical lens shift Maximum Up Down shift varies with the amount of Left Right shift Likewise maximum Left Right s...

Page 24: ...h of the screw holes screw length is 23 mm Use screws shorter than 23 mm but longer than 13 mm Using other screws will result in malfunctioning or cause the unit to drop When mounting to a pedestal ensure VXI FLHQW VSDFH foot height of 10 mm or higher around the unit so that the air inlets are not blocked Do not tilt this unit more than 5 degrees from side to side when using Regardless whether the...

Page 25: ... 78m to Approx 3 66m 70 Approx 0 9 1 5m Approx 2 09m to Approx 4 28m 80 Approx 1 0 1 8m Approx 2 40m to Approx 4 89m 90 Approx 1 1 2 0m Approx 2 70m to Approx 5 51m 100 Approx 1 2 2 2m Approx 3 01m to Approx 6 13m 110 Approx 1 4 2 4m Approx 3 31m to Approx 6 75m 120 Approx 1 5 2 7m Approx 3 62m to Approx 7 36m 130 Approx 1 6 2 9m Approx 3 92m to Approx 7 98m Effective Range of Remote Control Unit ...

Page 26: ...1280X1024 63 981 60 020 108 000 1 688 1 066 1 280 1 024 8 WSXGA 60 1680X1050 65 222 60 002 147 140 2 256 1 087 1 680 1 050 9 WUXGA 60 1920X1200 74 038 59 95 154 000 2 080 1 235 1 920 1 200 About the connection Types of possible input signals Analog 9ideo Input Format signals 480i 480p 576i 576p 720p 50Hz 720p 60Hz 1080i 50Hz 1080i 60Hz Digital 9ideo Input Format signals 480i 480p 576i 576p 720p 50...

Page 27: ...8 631 800 600 10 XGA 60 1024 X 768 48 400 60 000 65 000 1344 806 1024 768 11 XGA 70 1024 X 768 56 500 70 000 75 000 1328 806 1024 768 12 XGA 75 1024 X 768 60 000 75 000 75 750 1312 800 1024 768 13 XGA 85 1024 X 768 68 700 85 000 94 500 1376 808 1024 768 14 WXGA 60 1280 X 768 47 760 60 000 79 998 1675 796 1280 768 15 WXGA 60 1440 X 900 55 919 59 999 106 470 1904 932 1440 900 16 SXGA 60 1280X1024 64...

Page 28: ...MI approved It may not be possible to connect to this unit depending on the dimension of the connector cover of the cables to be connected 1 HDMI 2 RS 232 C 3D CR PR CB PB Y SYNCHRO PC TRIGGER REMOTE CONTROL STANDBY ON MENU BACK INPUT OK To connect via HDMI terminal Reference page 29 Connection to the unit To connect via video terminal Reference page 30 Connection by LAN terminal Reference page 33...

Page 29: ...liance with the HDMI standard a 340MHz cable is recommended In case a cable is used for transmission bandwidth of 75MHz it is recommended to choose 1080i or less for the transmitting equipment If the video is not displayed try to reduce the length of the cable or lowering the resolution of the video transmitting equipment If noise is produced take PCs desktop computer away from this unit If the vi...

Page 30: ...mponent video cable sold separately Connecting via RGB Video Cable Set COMP in the setting menu to RGB Reference page 60 For information on compatible input signals see Speci cations Reference page 92 1 HDMI 2 RS 232 C 3D CR PR CB PB Y SYNCHRO PC TRIGGER REMOTE CONTROL STANDBY ON MENU BACK INPUT OK This unit Device equipped with RGB output RGB video cable sold separately RGB video output terminals...

Page 31: ...rminal for PK EM1 sold separately The PK EM1 infrared sometimes affects other infrared communication devices 3D glasses PK AG1 B PK AG2 B is an optional device and is not included in the 3D synchro emitter Note that converting 2D images to 3D ones using the 3D feature of this product and playing them for commercial purposes or for broadcasting in public places may infringe the rights of authors pr...

Page 32: ...y Using beyond the rated value will cause malfunction Exercise adequate caution to prevent short circuit as the trigger terminal outputs a voltage of 12V The default is set to No output Please set it under the item Trigger of menu 5 Function Reference page 72 Screen Trigger cable sold separately Trigger input terminal Φ 3 5 1 HDMI 2 3D CR PR CB PB Y SYNCHRO PC TRIGGER REMOTE CONTROL STANDBY ON MEN...

Page 33: ...deo signal Please contact your network administrator for questions concerning the network connection Network HUB Server 1 HDMI 2 RS 232 C 3D CR PR CB PB Y SYNCHRO PC TRIGGER REMOTE CONTROL STANDBY ON MENU BACK INPUT OK Connected by a REMOTE terminal This unit External infrared sensor sold separately For an external infrared sensor and connecting cable please contact your dealer connection cable so...

Page 34: ...l 2 Connect to the power outlet As the amount of electrical energy for this unit is large please connect it directly into the wall outlet When you are not using the equipment please unplug the power cord Connect it only with the provided power cord Do not use voltage other than the indicated power voltage Do not damage break or modify the power cord Moreover the power cord will be damaged if you p...

Page 35: ...35 Preparation ENGLISH MEMO http www pureglare com au ...

Page 36: ...ed device X7 30 The same button arrangement is used for the operations in this explanation Adjust the zoom screen size BACK Back Operate Select Exit MENU Zoom Lens Control LENS Adjust accordingly by pressing the up down buttons 4 Adjust the focus focal point Adjust accordingly by pressing the up down buttons BACK Back Operate Select Exit MENU Focus Lens Control LENS BACK HIDE LIGHT LENS MEMORY ANA...

Page 37: ...power Reference page 16 Pull out the power plug when the unit will not be used for a prolonged time About Cool Down mode MEMO The Cool Down mode is a function to cool down the lamp for approximately 60 seconds after projection is complete This function prevents the internal parts of the unit from deformation or damage due to overheating of the lamp It also prevents lamp blowout and premature short...

Page 38: ...DE LIGHT LENS MEMORY ANAMO PC HDMI 1 STAND BY 3D FORMAT HDMI 2 COMP LENS CONTROL MENU GAMMA P FILE COLOR ADJ PIC ON FILM NATURAL STAGE 3D THX USER C M D ANIME CINEMA PICTURE MODE INPUT TEMP COLOR 3D SETTING A A B C D 1 Project the image 4 3 video signal 2 Aspect the image 㩷 1 㩷Display the setting menu MENU Picture Adjust Reset Advanced Exit MENU BACK Back Select Operate Color Temp Gamma Dark Brigh...

Page 39: ...opriate screen size When there is 3D signal input the ratio is xed to 16 9 3 㩷Set a Aspect value Exit MENU BACK Back Select Operate Progressive 3D Setting HDMI COMP Auto PC ޓ Picture Position Mask Input Signal Aspect Video 16 9 4 3 Custom 16 9 off 3 To end MENU Example When the Aspect value is changed from 4 3 16 9 㽳 Confirm 㽲 Select http www pureglare com au ...

Page 40: ...deo Progressive 3D Setting HDMI COMP Auto PC ޓ Picture Position 㪈㪍㪑㪐 㪌㩼 Mask 㪉㪅㪌㩼 㪌㩼 Off Custom Input Signal Example When the Mask value is changed from Off 5 3 To end MENU Images for which quality at the outer area has deteriorated can be projected by masking hiding the surrounding area of the projected image 1 Image for which quality at the outer area has deteriorated Project the image B Masking...

Page 41: ... projection plane any occurring keystone distortion is adjusted in case the installation location is inclined 㩷 2 㩷Select Installation eystone 㽲 Selec 㽳 Confirm Exit MENU BACK Back Select Operate Pixel Adjust ޓ Installation Lens Control Anamorphic Screen Adjust Black Level Installation Style Front Off Keystone BACK HIDE LIGHT LENS MEMORY ANAMO PC HDMI 1 STAND BY 3D FORMAT HDMI 2 COMP LENS CONTROL ...

Page 42: ...that do not feature submenus Structure of the menu hierarchy summary 1 1 Color Temp P 52 Continue to the next P 55 1 1 1 2 1 1 1 2 90 70 Picture Adjust Reset Advanced Exit MENU BACK Back Select Operate Color Temp Gamma Dark Bright Level Picture Tone Contrast Brightness Color Tint 0 0 0 0 Color Profile Picture Mode Natural Video Normal Picture Adjust Reset Exit MENU BACK Back Select Operate Color T...

Page 43: ...90 70 30 Picture Adjust Exit MENU BACK Back Select Operate Advanced 0 Lens Aperture CMD Demo Clear Motion Drive User Name Edit Color Management Custom Gamma NR Lamp Power 1HH 1HH 0QTOCN Sharpness Picture Adjust Exit MENU BACK Back Select Operate Advanced 0 Lens Aperture CMD Demo Clear Motion Drive User Name Edit Custom Gamma Color Space NR Lamp Power 5VCPFCTF 1HH 0QTOCN Sharpness Continue to the n...

Page 44: ... 1HH Custom Custom Custom Picture Adjust Exit MENU BACK Back Select Operate 0 0 0 0 Pause Off Reset Red 1 2 3 Color Management Custom Gamma Correction Value White Red Green Blue Reset 1023 512 50 Custom Custom Custom 0 Picture Adjust Exit MENU BACK Back Select Operate Normal 1 2 2 Custom Gamma P 58 P 59 90 70 http www pureglare com au ...

Page 45: ... with HDMI ޓ Auto Color Space ޓ Standard Input 2 1 HDMI P 61 The Input Signal menu display during 3D signal input is the same as the menu display for 2 3 3D Setting Exit MENU BACK Back Select Operate Aspect Video Progressive 3D Setting HDMI COMP Mask Auto Picture Position 㪈㪍㪑㪐 㪦㪽㪽 Input Signal 90 70 30 Exit MENU BACK Back Select Operate Aspect Video Progressive 3D Setting HDMI COMP Mask Auto PC ޓ ...

Page 46: ...llax ޓ On 2D 3D ޓ Crosstalk Cancel ޓ Auto 3D Format ޓ 0 Intensity ޓ Sub Title Adjust 1 Exit MENU BACK Back Select Operate On P 62 P 63 2 3 3D Setting 2 2 PC Exit MENU BACK Back Select Operate Input Signal PC Phase ޓ Tracking ޓ Picture Position ޓ Auto Alignment 90 70 http www pureglare com au ...

Page 47: ...ns Control Focus Lens Memory Name Edit Off 3 1 Lens Control Exit MENU BACK Back Select Operate Lock Lens Memory Select Lens Memory Save Zoom ޓ Shift On Image Pattern Installation Lens Control Focus Lens Memory Name Edit Off Installation Exit MENU BACK Back Select Operate Adjust Area ޓ Adjust Color Pixel Adjust Adjust Pattern Color Adjust Pixel Adjust Fine Adjust On Whole Red White Reset 3 2 Pixel ...

Page 48: ...㪌㪅㩷㪉㪌㪌㪅㩷㩷㩷㪇 㪈㪐㪉㪅㩷㪈㪍㪏㪅㩷㩷㩷㩷㪇㪅㩷㩷㩷㪉 5 1 Network 5 1 Exit MENU BACK Back Select Operate Trigger Off Timer Remote Code Network Lamp Reset Remote Code High Altitude Mode Off Off Off Function 45 㪘 Exit MENU BACK Back Select Operate Display Setup Back Color Menu Display Menu Position On Line Display 㧡sec Source Display On Logo On Language English Black 4 Display Setup 5 Function P 71 P 72 P 73 http www pur...

Page 49: ...lor Lamp Time 12 011 Soft Ver Information 㧦 㧦 㧦 㧦 㧦 6 Information When inputting PC signals When inputting HDMI signals P 73 P 73 Exit MENU BACK Back Select Operate Lamp Time Deep Color 160H PC 1920X1080 Information Resolution ޓޓ 67 50kHz H Frequency 60 0Hz V Frequency ޓޓޓޓޓ ޓ Input 㧦 㧦 㧦 㧦 㧦 㧦 㪏㪹㫀㫋 12 011 Soft Ver 㧦 90 70 http www pureglare com au ...

Page 50: ...ontrol Displaying the main menu and the submenu Select an adjustment item in the menu Set the setting value of the selected adjustment item The adjusted setting value is immediately reflected in the image Selection of a displayed sub menu item Selection of an item in the menu Ǻ 0 0 Ǻ Operate the menu by use of the buttons on the main body or the remote control STANDBY ON MENU BACK INPUT OK BACK HI...

Page 51: ... the next page for more details 4 Press the cursor to select the items to adjust If the name of a submenu item is displayed in a dimmed manner it cannot be selected 5 Press cursor to change settings 6 After adjusting press BACK Every time it is pressed you will return to the respective previous menu screen 7 Repeat steps 6 2 to adjust other items After all adjustments are done press MENU and the m...

Page 52: ...an image quality setting for watching 3D movies THX 90 70 W LV DQ LPDJH VHWWLQJ FHUWL HG E WKH FRPSDQ 7 User 1 User 2 User 3 User 4 User 5 The User 1 5 should adjust the image quality as desired in each case Data of the last adjustment is saved Edit to set your preferred your username using the 1 2 Advanced User Name Edit function Color Pro le W VHOHFWV D FRORU SUR OH WR VXLW WKH LQSXW VRXUFH HSHQ...

Page 53: ...and or other countries Stage 7KLV SUR OH LV VXLWDEOH IRU OLYH PXVLF RUFKHVWUD DQG RSHUD FRQFHUWV WKHDWHU HWF 3D 7KLV LV WKH PRVW VXLWDEOH SUR OH ZKHQ XVLQJ JODVVHV Off It is a mode that does not adjust the color management Custom 1 Custom 2 Custom 3 Custom 4 Custom 5 RX FDQ LQVWDOO WKH FRORU SUR OH VXSSOLHG E WKLV 9 7KH QDPH FKDQJHV DIWHU installation 90 Adjustments and settings in the menu contin...

Page 54: ...ustom 3 XVWRP FDQQRW EH FRQ JXUHG GXULQJ VLJQDO LQSXW DQG ZKHQ WKH 3LFWXUH Mode is set to 3D Under submenu 1 2 2 Custom Gamma it is possible to change the gamma curve and save it The initial value of Custom 1 2 and 3 is the same as for Normal Dark Bright Level Compensating darkness brightness of an area It is possible to set it unless the Picture Mode is set to Film Dark Level Settings makes dark ...

Page 55: ...rightest image 7KLV FDQ EH FRQ JXUHG ZKHQ WKH 3LFWXUH 0RGH LV VHW WR 90 70 Xenon1 Xenon2 Xenon3 This reproduces the color temp characteristics of a xenon lamp being used in cinemas 7KLV FDQ EH FRQ JXUHG RQO ZKHQ WKH 3LFWXUH 0RGH LV VHW WR LOP RU LQHPD OLJKW VRXUFH FRORU WKDW LV HPLWWHG E D OP SURMHFWRU A light source color emitted by a projector used for digital cinema A light source color that lo...

Page 56: ...color of the screen to the preferred color and save it 90 70 To 1 2 3 Color Management of the submenu User Name Edit You can edit the Picture Mode User Name No of characters is limited to 10 You can use capital and small alphabet letters numbers and symbols User 1 User 2 User 3 User 4 User 5 Select the user name you want to edit 3UHVV WKH 2 NH RQ WKH PDLQ XQLW RU RQ WKH UHPRWH FRQWURO WR FRQ UP DQ...

Page 57: ...r motion drive Right The right screen displays a demonstration of the Clear motion drive Top The upper screen displays a demo of the Clear motion drive Bottom The screen below displays a demo of the Clear motion drive Off The Demo of the Clear motion drive is turned off Lens Aperture Adjusts the amount with which the optical iris is squeezed A setting of 0 means fully opened Settings Dark 15 to 0 ...

Page 58: ...nt 7KH JDPPD FXUYH IRU JUHHQ LV EHLQJ GLVSOD HG DV EHLQJ UHSUHVHQWDWLYH I ZKLWH UHG green or blue are selected the corresponding color curves are displayed 3ODFH WKH FXUVRU RQ D JDPPD FXUYH ZLWK SRLQWV ZLWK WKH EXWWRQV IRU OHIW DQG ULJKW DQG WKHQ XVH WKH EXWWRQV IRU XS DQG GRZQ EXWWRQV WR PRYH WKRVH SRLQWV XS RU GRZQ White Red green and blue can be adjusted at the same time Red It is possible to a...

Page 59: ...ustments the input image in the EDFNJURXQG FKDQJHV W LV SRVVLEOH WR FRQ UP WKH YLGHR LPDJH EHIRUH DGMXVWPHQW E pressing the HIDE button of the remote control Pause It is possible to display the input video image of the background being adjusted as a still picture Settings On Off Off On Off Freezes the input video image Unfreezes the input video image Color Selection It is possible with the 7 color...

Page 60: ...he case that not everything of the video image is displayed When there is a 3D input signal adjustment is not possible Horiz 9ert This aligns the horizontal direction of the image position This aligns the vertical positions of the image Aspect Video It is displayed when there is a video signal input I VHW WR UDWLR LV HG WR 6HWWLQJV RRP 4 3 Sets the screen size of the image to 4 3 For HD signals le...

Page 61: ...WRPDWLFDOO GHWHFWHG LI WKH S YLGHR LPDJHV ZKLFK FDQ EH VHHQ LQ WKH OP VFUHHQV interlaced signals from the original video material or if they are the product of signal conversion and are interpolated accordingly Off The interpolation of video images as interlaced video signals e g video material is done 3D Setting Go to 2 3 3D settings in the submenu 2 1 HDMI RQ JXUH WKLV ZKHQ XVLQJ WKH 0 WHUPLQDO ...

Page 62: ... YLGHR LPDJH VLJQDO LV SHUIRUPHG 5 W LV VHW ZKHQ WKH 5 YLGHR VLJQDOV LQSXW LV SHUIRUPHG Control with HDMI RQ JXUHG FRPPXQLFDWLRQ RI WKH 0 HTXLSPHQW FRQWURO 6HWWLQJV 2Q 2II 2II 2 2 PC 90 70 RQ JXUH WKLV ZKHQ XVLQJ WKH 3 WHUPLQDO 8VH WKH 83 DQG 2 1 NH V WR VHOHFW LWHPV 3UHVV WKH NH WRUHWXUQ WR WKH SUHYLRXV VFUHHQ 7KLV FDQ EH VHW ZKHQ WKH 3 WHUPLQDO LV VHOHFWHG Items Explanation operation precautions...

Page 63: ... to your preference using the LEFT RIGHT keys Press the OK key to display the adjustment gauge window The BACK key will return you to the previous screen Cannot be adjusted during 3D signal input or when 2D 3D is ON Settings 15 15 0 Crosstalk Cancel Use this function to lessen cross talk between 3D video images Adjust settings according to your preference using the LEFT RIGHT keys Press the OK key...

Page 64: ...direction of the panel resolution This setting is used when one uses the anamorphic lens to enlarge them in the horizontal direction If a 3D signal is fed in when Anamorphic mode is set to A or B Anamorphic mode is automatically turned Off Settings A B Off Off A Video with an aspect ratio of 2 35 1 is enlarged in the vertical direction of the panel resolution and then projected B Video with an asp...

Page 65: ...e saved settings There may sometimes be a slight difference between this and saved conditions Lens Memory Save Select lens focus zoom and shift settings after adjustments have been made to save the adjustment data at the time of selection Select Memory 1 Memory 2 or Memory 3 in accordance with your preference You can also save as a different name when save data Lens Memory Name Edit You can edit t...

Page 66: ... FRQ UPDWLRQ PHVVDJH ZLOO appear 3 2 Pixel Adjust 90 70 Use this function to adjust slight color errorsin the horizontal vertical GLUHFWLRQV RI WKH YLGHR LPDJH W LV UHFRPPHQGHG WR UVW VHW WKH GMXVW UHD WR KROH DQG PDNH JHQHUDO DGMXVWPHQWV XVLQJ GMXVW 3L HO WKHQ PDNH IXUWKHU DGMXVWPHQWV XVLQJ WKH GMXVW LQH IXQFWLRQ 1H W VHW WKH GMXVW UHD WR RQH WR PDNH SDUWLDO DGMXVWPHQWV 6HH 6XPPDU 3L HO GMXVW ORZ...

Page 67: ...al settings 31 31 0 V Vertical settings 31 31 0 Reset Setting all pixel adjust data to default factory settings 3 2 Pixel Adjust 30 Use this function to adjust color errors on the horizontal and vertical directions of the video images Use the UP DOWN keys to select an adjustment item Press the BACK key to return to the previous screen It is impossible to match all image pixels on the screen Due to...

Page 68: ...ol to enter the adjust operation mode Use the UP DOWN LEFT and RIGHT buttons to move and adjust pixels in the vertical and horizontal directions across the entire screen The adjustment settings appear in the center of the Adjust pixel window Use the BACK but ton to exit the adjust operation mode Adjust pixel window Remote Control Operation Guide Use the GAMMA button on the remote control to change...

Page 69: ...Remote Control Operation Guide Adjust setting Adjustments and settings in the menu continued See Pixel Adjust Flow and Operation Adjust Fine IWHU PDNLQJ RYHUDOO DGMXVWPHQW IRU HUURU DFURVV WKH HQWLUH VFUHHQ SURFHHG WR QH WXQLQJ 3UHVV WKH 2 25 TEMP button on the remote control to display the Adjust Fine Window Also from the main menu set the Adjust Area to All and select Adjust Color and Adjust Pat...

Page 70: ...ve the cursor to Adjust Fine and press the OK button on the remote control to display the adjust pattern and the zone adjust window The range of adjustment may narrow depending on the adjust amount of the entire screen Zone cursor Zone Adjust Window Use the UP DOWN LEFT and RIGHT buttons to move the cursor to the position you want to adjust Press the OK button on the remote control to enter the ad...

Page 71: ...s If one SUHVVHV 2 WKH PHQX PRYHV WR WKH KLJKOLJKWHG SRVLWLRQ If you press the key to the right the menu will move starting from the top left top right central bottom right bottom left and then back to the upper left By pressing of the left key the menu moves in the opposite direction Upper left Menu Display Sets the time for the menu to be displayed Settings 15 sec On On 15 sec If there is no men...

Page 72: ... JXUH VHWWLQJV WR RPLW ZDUQLQJ GLVSOD 6HWWLQJV 2II KRXU KRXUV KRXUV KRXUV 2II Off 3RZHU LV QRW WXUQHG RII Hour 3RZHU LV WXUQHG RII DXWRPDWLFDOO DIWHU KRXU 2 Hours 3RZHU LV WXUQHG RII DXWRPDWLFDOO DIWHU KRXUV Hours 3RZHU LV WXUQHG RII DXWRPDWLFDOO DIWHU KRXUV Hours 3RZHU LV WXUQHG RII DXWRPDWLFDOO DIWHU KRXUV High Altitude Mode 6HW WR XVH DW ORZ SUHVVXUH ORFDWLRQV P DERYH VHD OHYHO 6HWWLQJV 2Q 2II ...

Page 73: ...nput Items Explanation operation precautions settings Input Resolution H Frequency 9 Frequency Deep Color Lamp Time Soft 9er Displays video image input terminal Displays the name of the input source Displays the color bit depth concerning an input video image signal When you input YCbCr 4 2 2 it is not displayed When there is information about DeepColor from the source device it is displayed Displ...

Page 74: ...ages A low angle of inclination leads on the contrary to the difference in that area becoming smaller so that the video images are harder to distinguish If it is im possible to get an inclination angle so that it is chosen to become horizontal the gap in that area vanished and it might be impossible to distinguish the video images The light output A B C Input sig nal value 100 100 0 0 A B C Suppos...

Page 75: ...mages ᤋ Eye Video images seen with the right eye Video images seen with the left eye Stereoscopic video image Binocular parallax Difference of the view on a single object when seen from the left and right eyes respectively CAUTION Please stop watching at once if you do not feel well and consult a physician if necessary People who already have a kind of photosensitivity sufferers from heart disease...

Page 76: ...ort Left eye image Right eye image Stereoscopic video image CAUTION In most cases 3D images taken or produced are horizontally arranged respectively If these images were not horizontally arranged for left and right eye movement when watching the brain could not perceive a stereoscopic image but would still recognize a double image As such video images can cause 3D sickness please do not hold the 3...

Page 77: ...frared rays Left eye image Right eye image Eye Close Open 9ideo image projection with the projector frame sequential method 3D glasses CAUTION As the video images for the left and right side Àash alternatively when displayed we urge you to refrain from looking at the screen with naked eyes When viewed with several people please prepare glasses for them These 3D glasses are only for the 3D video im...

Page 78: ...ammable air duster to clean the internal parts of the unit This may cause re Lamp replacement procedure MEMO Usable Lamp Life Purchasing the Lamp Unit When using the Lamp Power set at Normal the lifetime of the lamp will be approximately 3000 hours This is an average lifetime and cannot be guaranteed The lamp life may not reach 3000 hours depending on the operating conditions When the lamp has rea...

Page 79: ...w lamp This may shorten the lamp life and cause lamp blowout MEMO After Replacing the Lamp Do not place the removed lamp unit at locations that is reachable by children or near combustible items Dispose used lamp units in WKH VDPH ZD DV ÀXRUHVFHQW lamps Follow your local community rules for disposal 5 6 Tighten the screws with a screwdriver Insert the top part with 2 claws of the lamp cover into t...

Page 80: ...T TEMP COLOR 3D FORMAT LENS MEMORY ANAMO THX C M D 3D SETTING MENU Picture Adjust Reset Advanced Exit MENU BACK Back Select Operate Color Temp Gamma Dark Bright Level Picture Tone Contrast Brightness Color Tint 0 0 0 0 Color Profile Picture Mode Natural Video Normal 㩷㩷Display the setting menu Select Function Lamp Reset Exit MENU BACK Back Select Operate Trigger Off Timer Communication Terminal Net...

Page 81: ...E CINEMA PICTURE MODE INPUT TEMP COLOR 3D SETTING Reset the lamp time by remote control 1 2 Insert the power plug to the power outlet Red Lights Must operate with the remote control in the standby mode the projector is powered but is not turned on Press in the order as shown Press each button within 2 second intervals and press the last button for 2 seconds or more HIDE BACK OK Press for 2 seconds...

Page 82: ... air duster The lter is soft and may be damaged Reinstall the inner lter 3 CAUTION Pull the power plug from the power outlet Please turn this unit and if you put in on a bed or a table rst place something soft like a piece of cloth below Then you can put it on top of it Otherwise it may cause scratches on this unit I WKH OWHU LV GDPDJHG RU too dirty to be cleaned MEMO Replace with a new lter A dir...

Page 83: ...83 Maintenance ENGLISH MEMO http www pureglare com au ...

Page 84: ...gain Reference page 37 Video image does not appear Is the correct external input selected Select the correct external input Reference page 36 Is the A9 device properly connected Connect the A9 device properly Reference page 28 to 33 Is the power of the A9 device turned on Turn on the power of the A9 device and play the video Reference page 34 Are the correct signals being output from the A9 device...

Page 85: ...u to Off Reference page 40 Reference page 61 Is the display out of position Alter the Picture Position value in the setting menu to ensure that images are not missing Reference page 60 Projected image is dark Is the lamp near exhaustion Check the lamp time on the information menu Prepare a new lamp unit or replace as soon as possible when the lamp is near exhaustion Reference page 78 to 81 The uni...

Page 86: ... used in this unit has been input Input video signals that can be used The names of input terminals such as COMP will be displayed in yellow BACK Back Lamp replacement This message is displayed when the accumulated lamp time has exceeded 2900 hours To clear the message press the Back button Get ready a new lamp unit and replace as soon as possible Reset the lamp time after replacing the lamp Refer...

Page 87: ...eive P AC Please perform this operation after con rming the operating status of the projector again after establishment of a TCP connection if you cannot send within 5 seconds P _NG or could not receive P NA RS 232C Speci cations Pin No Signal Function Signal Direction 2 RxD Receive data 3 ĺ7KLV XQLW 3 TxD Transmit data 7KLV XQLWĺ3 5 GND Signal ground 1 4 6 9 N C Mode Non synchronous Character Len...

Page 88: ...command is accepted without error it returns to PC Unit ID 7KLV FRGH VSHFL HV WKH XQLW 7KH ELQDU FRGH LV HG DW 8901 Command and data Operating command and data Binary code Command Type Description 0000 Connection check Check whether communication is available between this unit and the PC during standby 5057 Power supply During standby 31 Turn on the power During power on 30 Turn off the power Stan...

Page 89: ...3 34 36 COLOR SPACE 37 33 43 44 COMP 37 33 34 44 LENS MEMORY 37 33 44 34 ANIME 37 33 36 36 3D SETTING 37 33 44 35 STAGE 37 33 36 37 3D FORMAT 37 33 44 36 CINEMA 37 33 36 38 USER 37 33 44 37 FILM 37 33 36 39 Reference command and data Binary code Command Type Data description 5057 Power supply During standby or power on 30 Standby mode 31 Power on mode 32 During Cool Down mode 34 Warning mode 4950 ...

Page 90: ...de from power on mode Input COMP 3 ĺ7KLV XQLW 7KLV XQLWĺ3 06 89 01 49 50 0A When video input is set to component Remote Control MENU 3 ĺ7KLV XQLW 7KLV XQLWĺ3 06 89 01 52 43 0A When the same operation as pressing the MENU button on the remote control is made Reference command Type Command Description Power On 3 ĺ7KLV XQLW 7KLV XQLWĺ3 7KLV XQLWĺ3 When information of power on mode is acquired Input H...

Page 91: ... greatly depending on the usage and environment Please consult your authorized dealer for replacement Maintenance Procedures Dirt on the cabinet Gently clean dirt on the cabinet with a soft cloth In the case of heavy soiling soak a cloth in water wring dry and wipe followed by wiping again with a dry cloth Pay attention to the following as the cabinet may deteriorate in condition or paint may come...

Page 92: ... pin 2 HDCP compliant 4 Compatible with the HDMIv1 4a standard 5 PC Input 1 system D Sub 15 pin VGA 90 70 Output terminal Trigger terminal 1 system Φ 3 5mmDC Power Jack DC OUT 12V 0 1A 3D synchro 3D synchro emitter dedicated terminal 1 system mini DIN 3pin Control terminal RS 232C terminal 1 system D sub 9 pin male x1 External control Remote terminal 1 system stereo mini jack x1 Remote Control LAN...

Page 93: ...the pixels are either missing or would remain permanently lit up 4 HDCP is the abbreviation for High bandwidth Digital Content Protection system The image of HDMI input terminal may not be displayed due to HDCP speci cation change 5 Ethermet is not supported Design and speci cations are subject to change without prior notice Please note that some of the pictures and illustrations may have been abr...

Page 94: ... mm 455 5 337 59 227 5 Ǟ60 24 103 5 178 5 290 472 91 110 32 110 92 Lens center Lamp cover Top Surface Front Bottom Surface Back Surface Connection terminal section of the illustration is Lens Lens 90 70 http www pureglare com au ...

Page 95: ...2 Input Signal Page 60 Zoom of 3 1 Lens Control Page 65 Mask Mask of 2 Input Signal Page 61 Screen Menu Table Menu Structure Page 42 1 Picture Adjust Page 42 2 Input Signal Page 45 3 Installation Page 47 Index 4 Display Setup Page 48 5 Function Page 48 6 Information Page 49 Operating procedure Page 51 Batteries Types Page 14 How to insert batteries Page 21 Gamma Glossary Page 74 Gamma of 1 Picture...

Page 96: ...nced Page 57 Lamp reset of 5 Function Page 72 How to reset the lamp time Page 80 81 Notes of Caution Page 4 Remote control Button placement Page 20 Instructions Page 25 Remote Code Page 72 See Dry battery section Lens 3 1 Lens Control Page 65 Focus of 3 1 Lens Control Page 65 oom of 3 1 Lens Control Page 65 Shift of 3 1 Lens Control Page 65 Cleaning the lens Page 91 Index continued http www puregl...

Reviews: