


Chapter 2 4VetJ Settings and Functions
35
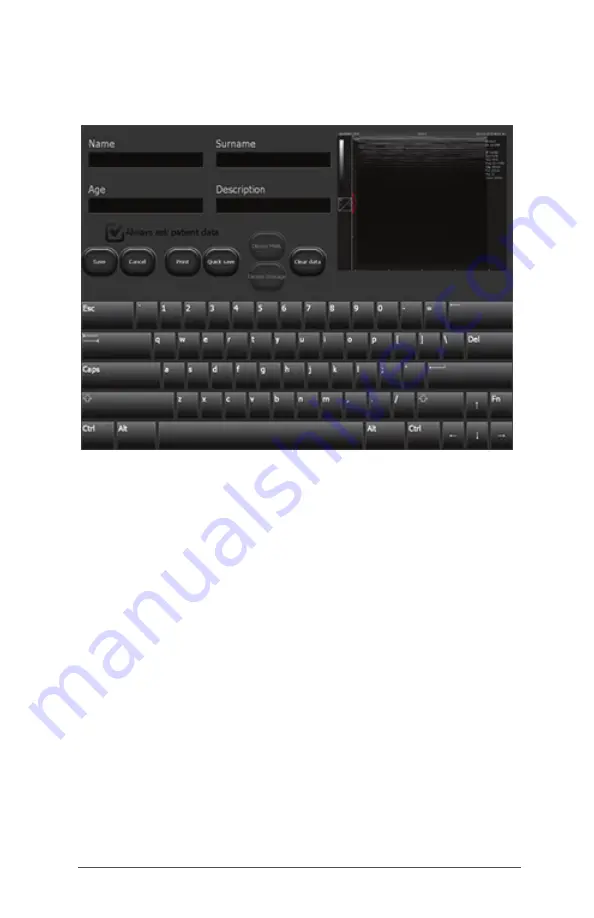
Press the [Patient] button from the basic panel. The
following dialogue box with a virtual keyboard is shown.
Enter the desired patient data.
The [Save] button saves your information and [Cancel]
deletes it.
By selecting the option [Always ask about patient’s data],
this dialogue box appears every time you save an image
or cine loop. If this option is not selected, this dialogue
box does not appear and saved images are attributed to
previously entered data.
Importing Data From the DICOM the Modality Work List
Open the patient record by pressing on the [Patient] button
on the basic panel. Press /Dicom MWL/. The Modality Work
List with patients expecting to be examined opens. Select a
particular patient on the list, and press [Load].
Note: To import patient data from the Modality Work List,
the scanner has to be configured correctly to work with a
DICOM printer. See
DICOM
under
Advanced Settings
later
in this chapter.
Summary of Contents for 4VETJ
Page 1: ...U S E R S M A N U A L ...
Page 5: ...C H A P T E R GettingStarted 1 ...
Page 17: ...2 C H A P T E R 4VetJSettingsand Functions ...
Page 53: ...Clean Store Transport and Recycle A A P P E N D I X ...
Page 57: ...B A P P E N D I X WarrantyandRepair Information ...
Page 63: ...Warnings Regulatory Information and Licensing C A P P E N D I X ...
Page 67: ...A P P E N D I X Specifications D ...
Page 71: ...Index ...