background image

ENGLISH 


8

ENGLISH 

Read the Operating Instructions carefully before use!  

SAFETY INSTRUCTIONS 


Turn off the repeller if a pet is playing in the protected area. 


Also turn off the repeller to save the battery if there is a person in the protected area. 


Do not immerse the repeller in water or any other liquid. 


Do not change or tamper with the repeller's internal components. Do not cover or paint over the 
speaker at the front. This can damage the repeller and cause malfunction. 


The PIR system is activated by the movements of the animals (and their thermal radiation). 


Make sure the lens is clean. Do not touch the lens with your fingers. Wipe it clean with a damp 
cloth. Do not use petrol, alcohol or thinner. 


If the repeller is used indoors, the dog or cat must have somewhere else they can go. 

TECHNICAL DATA 

Dimensions 

114 x 88 x 60 mm 

Weight 

180 grams (re mounting shelter) 

Operating voltage 

1 x 9 volt alkaline battery 

Idle current 

0.16 mA 

Shut-off delay for ultrasound 

Approx. 25 seconds 

Heat-up time 

Approx. 30 seconds 

Frequency 

Approx. 23,000 Hz 

Protected area 

70° fan-shape up to a distance of 9 metres 
(see the lower illustration in the original 
manual) 

Accessories 

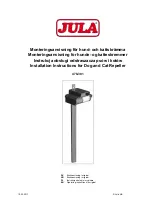
Screws, plastic post (45 cm) 

ASSEMBLY 

11.  Disconnect the main module from the mounting shelter by inserting a thin, blunt blade down into 

the rear of the unit and twisting carefully. The repeller then slides out of the shelter. 

12. 

Open the battery cover on the rear of the repeller and insert a new 9 volt alkaline battery. 

13.  Reinstall the dog and cat repeller in the shelter. You can use the screw supplied to secure the 

mounting shelter in the screw hole on the plastic post if you want to place the repeller 30-40 cm 
above ground level. You can also screw the shelter in its mounting hole on a wall or post 30-90 cm 
above the ground. 

14.  Turn the power switch to 

ON

. The built-in red LED indicator inside the IR lens comes on after 

heating up for approximately 30 seconds to confirm that the repeller is activated. 

15. 

Leave the repeller turned on for 24 hours. 

Replace the battery if the red LED does not come on when the repeller detects movement within the 
protected area. Turn the switch to OFF and repeat steps 1 and 2 above. 

HANDLING 

Description 

This PIR and ultrasonic dog and cat repeller conveniently and effectively keeps dogs, cats, hares and 
squirrels away from your garden, lawn and other outdoor areas, without harming the animals. 
The repeller uses sophisticated PIR (passive infrared) technology to monitor a 70º fan-shaped area up to 
9 metres in length, for an effective range of approximately 50 square metres. Any animals (or people) 
encroaching this area are detected. When the system is triggered, the repeller emits an ultrasound signal 
at a frequency of 23,000 Hz to scare away the intruder. 
The PIR technology allows the service life of the battery (1 x 9 volt alkaline battery) to be optimised. 
Battery operation means you can position the repeller wherever you want. For example, on the wall 
outside your house or at ground level using the enclosed plastic post. 
The repeller is weather-proof, although you should disconnect it from the mounting shelter and bring it 
inside if severe stormy weather is approaching. 
The ultrasound is inaudible to humans, but causes animals discomfort. They react by moving away from 
the source of the discomfort as quickly as possible. 

Summary of Contents for 478-301

Page 1: ...nde og katteskremmer Instrukcja obsługi odstraszacza psów i kotów Installation Instructions for Dog and Cat Repeller 478 301 SV Bruksanvisning i original NO Bruksanvisning i original PL Instrukcja obsługi w oryginale EN Operating instructions in original 10 03 2011 Jula AB ...

Page 2: ...dföljande skruv för att fästa konsolen i skruvhålet screw hole på plaststolp en plastic post om du vill placera skrämman på 30 40 cm höjd ovan mark Du kan också skruva fast konsolen i dess monteringshål mounting hole på en vägg eller stolpe på 30 90 cm höjd ovan mark 4 Ställ strömbrytaren power switch i läge ON Den inbyggda röda lysdioden LED indicator innanför IR linsen tänds efter en uppvärmning...

Page 3: ...or och andra uteplatser Om den röda lysdioden inte tänds när skrämman de tekterar rörelser inom skyddsområdet är det dags att byta ut batteriet Ställ strömbrytaren i läge OFF och upprepa steg 1 och 2 ovan Med reservation för tryckfel och konstruktionsändringar som vi inte kan råda över Vid eventuella problem kontakta vår serviceavdelning på telefon 0200 88 55 88 Jula AB Box 363 532 24 SKARA www ju...

Page 4: ...av skremmeren og sett inn et nytt 9 volts alkalisk batteri 3 Sett hunde og katteskremmeren tilbake i holderen Du kan bruke den medfølgende skruen for å feste holderen i skruehullet screw hole på plaststolpen plastic post hvis du vil plassere skremmeren 30 40 cm over bakken Du kan også skru fast holderen i monteringshullet mounting hole på en vegg eller stolpe 30 90 cm over bakken 4 Sett strømbryte...

Page 5: ...te fuglebad og fuglekasser For å beskytte hager gressplener og andre uteplasser Hvis den røde lysdioden ikke tennes når skremmeren detekterer bevegelser innenfor detekteringsområdet må batteriet byttes Sett strømbryteren på OFF og gjenta trinn 1 og 2 ovenfor Med forbehold om trykkfeil og konstruksjonsendringer utenfor vår kontroll Ved eventuelle problemer kontakt vår serviceavdeling på telefon 67 ...

Page 6: ...strą blaszkę na spodzie obudowy i ostrożnie obróć Odstraszacz wysunie się wtedy ze wspornika 7 Otwórz pokrywę pojemnika na baterię z tyłu odstraszacza i włóż nową baterię alkaliczną 9 V 8 Załóż ponownie odstraszacz kotów i psów na wspornik Możesz użyć dołączonych wkrętów aby zamocować wspornik w otworach na plastikowym słupku jeżeli chcesz umieścić odstraszacz na wysokości 30 40 cm ponad ziemią Mo...

Page 7: ...eżeli nadchodzi silna burza Ultradźwięki nie są słyszalne dla ludzi ale stwarzają nieprzyjemne odczucia dla zwierząt które reagują na nie natychmiastowym oddaleniem się od źródła dźwięku Zakres użytkowania W pomieszczeniach zamkniętych aby utrzymać z dala koty i psy Przy sadzawkach aby uchronić ryby Przy rabatach kwiatowych Do ochrony miejsc pojenia i karmienia ptaków Do ochrony ogrodów trawników ...

Page 8: ... to secure the mounting shelter in the screw hole on the plastic post if you want to place the repeller 30 40 cm above ground level You can also screw the shelter in its mounting hole on a wall or post 30 90 cm above the ground 14 Turn the power switch to ON The built in red LED indicator inside the IR lens comes on after heating up for approximately 30 seconds to confirm that the repeller is acti...

Page 9: ...otect the fish In flower beds To protect birdbaths and nesting boxes To protect gardens lawns and other outdoor areas Subject to printing errors and design changes over which we have no control In the event of problems please contact our service department www jula com ...

Reviews: