−
29
−
(5)
(4)
A
(1)
(2)
(1)
(Adjusting the feed adjustment components)
*
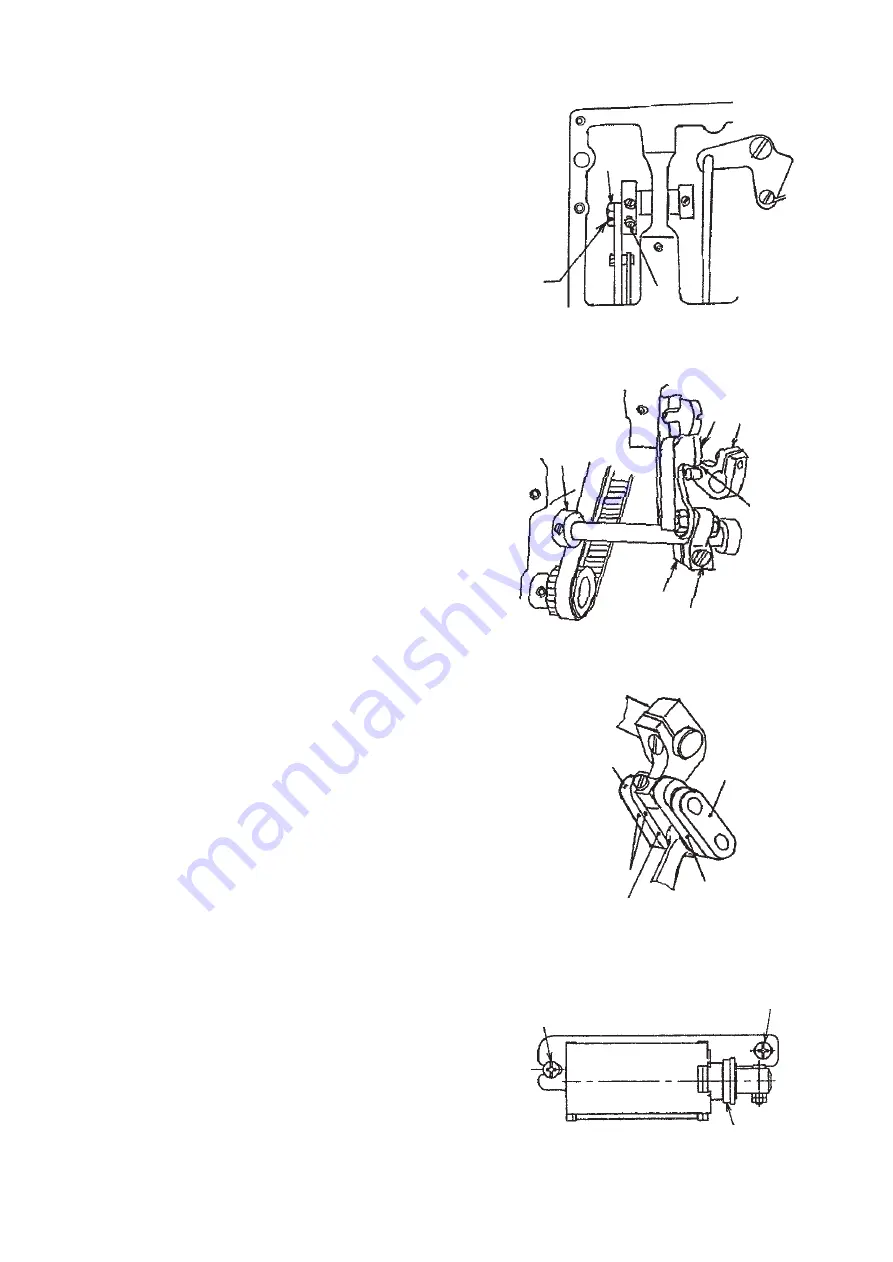
When there is a lateral play in feed changing shaft (16),
lever snarl, or longitudinal play of the feed dog will be
large. Securely tighten setscrew (17) in the feed changing
shaft arm A with a rather large-sized screwdriver, and
assemble the shaft with thrust collar (18) so that it smoothly
turns without play. (Refer to the illustraion on the previous
page.)
[Adjusting the feed “0” point]
Adjust the initial position from the adjusting link to the feed
adjusting base in the following procedure.
1) Remove the side plate, loosen two setscrews (4) in the
feed adjusting base, turn feed adjusting pin (5) with
wrench, and temporarily tighten two setscrews (4) of the
feed adjusting pin in the state that notch A of the pin comes
to the side plate side.
2) Remove the reverse feed solenoid, and set the feed dial
to “0”.
3) Loosen setscrew (7) in feed changing shaft arm B (6),
move adjusting link (5) (illustration on the previous page)
with fingers, and securely tighten setscrew (7) in feed
changing shaft arm B (6) at the position where connecting
link A (8) is aligned with connecting link B (9).
*
Set the lateral position of feed changing shaft arm B to
the position where a clearance of 1 mm is provided
between the arm and the metal, and check that strain does
not occur in adjusting rod (11).
[Adjusting the ratio of normal to reverse feed]
1) After adjusting feed “0” point, and actually place a piece
of paper under the presser foot. Then, make normal feed
of 10 stitches and reverse feed of 10 stitches by operation
of the feed lever to check that proper ratio of normal to
reverse feed is obtained. Adjust the feed dial with three
graduations. If the ratio of normal to reverse feed is not
proper, gradually turn the feed adjusting base pin with
wrench and securely tighten two setscrews (4) of the pin
at the position where the ratio of normal to reverse feed is
proper since feed adjusting base pin (5) is eccentric.
*
Turning clockwise feed adjusting base pin (5) increases
normal feed, and counterclockwise increases reverse feed.
[Adjusting the position of the feed lever]
1) Adjust the tightening position of feed lever arm (10), when
the feed dial is set to graduation “5”, so that a clearance is
provided between the arm and the claw section of feed
adjusting rod (11).
After the adjustment, make a slight play when the
graduation of the feed dial is “5” and the feed lever is lightly
pressed. If the play is excessive, operability is deteriorated,
and if it is excessively small, the feed lever may move by
the shock at the time of automatic reverse feed.
[Automatic back solenoid]
1) Loosen setscrew (1) and move the solenoid up or down
to adjust the position of the automatic back solenoid.
Setting the graduation of the feed dial at “5”, press the
feed lever until it will go no further. At this time, make a
state that plunger rubber (2) in the solenoid exactly moves,
and securely tighten setscrew (1) in the solenoid installing
base with a rather large-sized screwdriver.
(6)
(7)
(10)
(11)
(18)
Clearance
(8)
(9)
(8)
(9)
To be aligned.


