


position will remain the same.)
4)
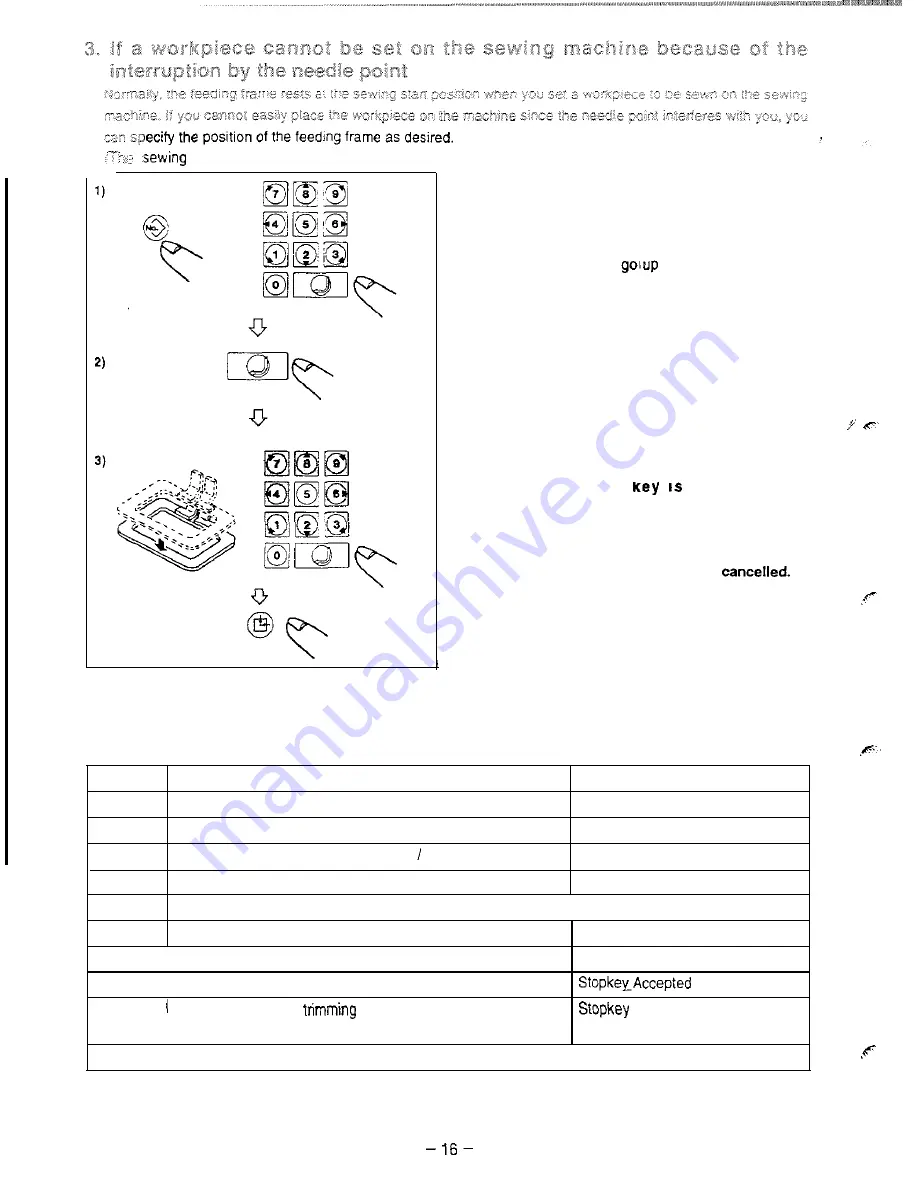
1) Insert a floppy disk into the slot and input a sewing
pattern No. desired.
2) Press the [Enter] key, and the sewing machine will
read the sewing pattern data from the floppy disk and
the feeding frame will
at the start position of
sewing.
3) Depress the pedal to make the feeding frame come
down. Then, press the direction key and the needle
point will move.
4) After you have moved the needle to a position at which
the needle point does not interfere with the workpiece
to
be set, press the return-to-origin key or depress
again the pedal.
(Caution)
1. If the [Enter]
pressed twice
continuously, the turn-out point specified will
be cancelled.
2. If you specify a new turn-out point, the
previously specified one will be
.
If error indication is shown on the operation box while the machine is in operation, refer to “Table of error
indications”.
4. Table of error indication
No.
10
1 1
20
2 1
25
3 1
32
50
5 1
52
Error description
Indication
Pattern No. specified is not input.
No Pattern Found
Floppy disk is not inserted.
No Disk in Drive
Outside the setting range of enlarging reducing.
Scaling Range
10
through 4000
Malfunction in computing or press down of the stop key.
Processing Aborted
Bobbin thread counter has reached the point specified.
Reset Counter
Air pressure for the sewing lowered.
Air Pressure Drop
Air pressure recovered.
Air Pressure, OK
Stop by means of the stop key during operation or the like.
Informing that thread
is not made because of the stop
Accepted
by means of the stop key during operation.
Not Trimmed Yet
Stop by means of detecting the needle thread breakage.
Thread Broken