background image

www.joy

-

it.net


Pascalstr. 8 47506 Neukirchen

-

Vluyn


4.


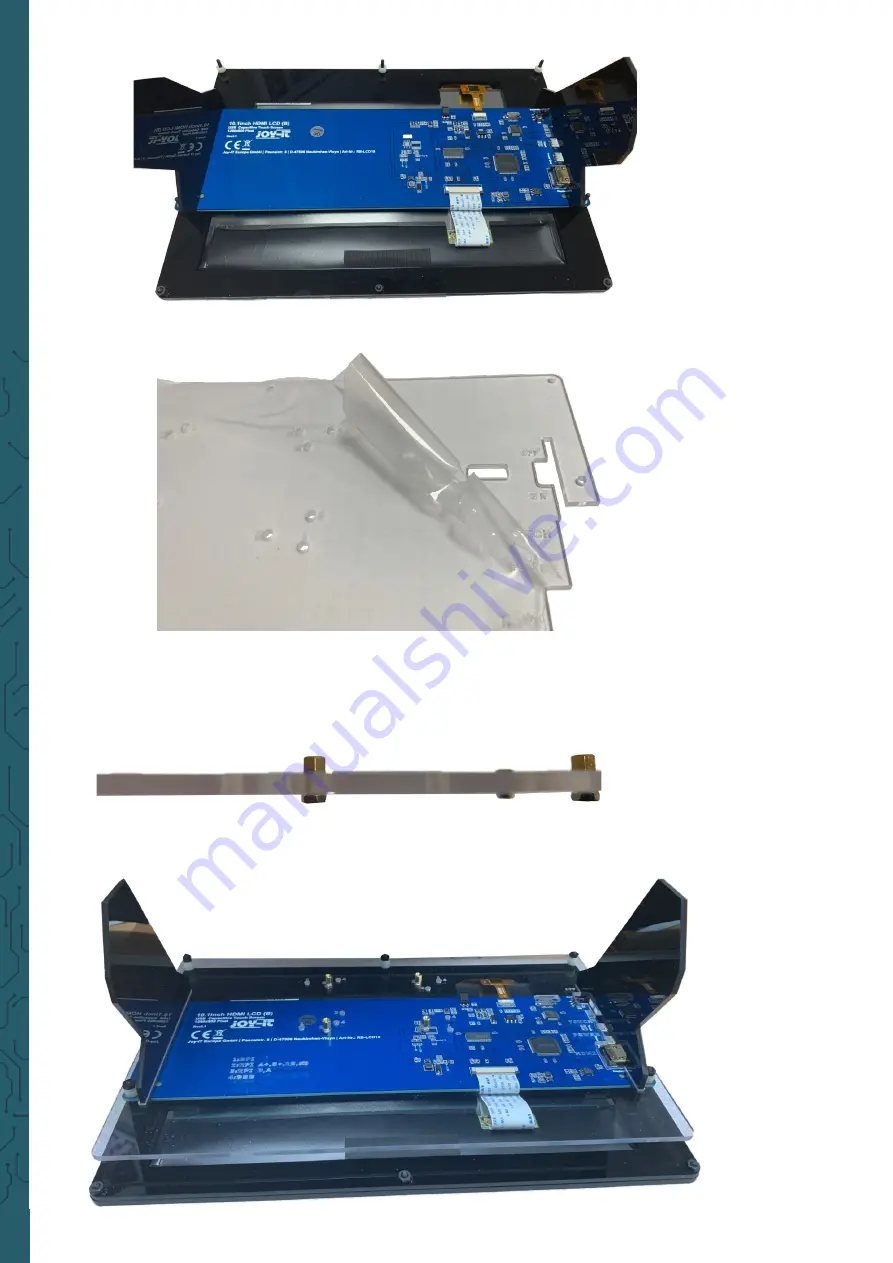
Now, remove the protective film of the protective cover.


5.


Now fix the spacers with the supplied nuts to the openings provided 

for them. Note that the numbers on the cover represent the 


different single board computers compatible with the display.


6.


After you put the spacers you removed earlier, back on the board, 


put the cover plate back on the board and fasten the screws.


Summary of Contents for RB-LCD-10B

Page 1: ...D DISPLAY VERSION B RB LCD 10B 1 GENERAL INFORMATION Dear customer Thank you for purchasing our product In the following we will show you which things should be noted during the use Should you encount...

Page 2: ...bracket 1 First loosen the screws of the protective cover and remove it 2 Now remove the protective film from the feet 3 Now you first have to remove the spacers which are on the screws with which the...

Page 3: ...w fix the spacers with the supplied nuts to the openings provided for them Note that the numbers on the cover represent the different single board computers compatible with the display 6 After you put...

Page 4: ...uence or the or the LCD may not work flawlessly 1 Connect the Power Only port of the LCD to a 5 V and 2 5 A microUSB power supply 2 Connect the touch port of the LCD to one of the USB ports of your co...

Page 5: ...rmat to your PC After unzipping the file you will get a file in img format 2 Connect a microSD card to your PC and open a program like Win32 Disk Imager 3 Now select the downloaded image file and the...

Page 6: ...Touch Rotation If the screen is rotated the touch function is not automatically rotated it must be adjusted separately First you have to install a new package if it is not already installed sudo apt g...

Page 7: ...s 90 Option CalibrationMatrix 0 1 0 1 0 1 0 0 1 180 Option CalibrationMatrix 1 0 1 0 1 1 0 0 1 270 Option CalibrationMatrix 0 1 1 1 0 0 0 0 1 If you want to have the initial state you simply remove th...

Page 8: ...nterface of the LCD with the HDMI interface of your Raspberry Pi with a HDMI cable 3 Connect the touch interface of the LCD to one of the USB interfaces of your Raspberry Pi 4 Insert a microSD card in...

Page 9: ...B 3 Start the program Win 32 Disk Imager and select the image file and also the mircoSD card which should be written Then click the Write button to write the image on the microSD card 2 Device connect...

Page 10: ...w product in normal household quantities 1 Possibility of return at our company location during our opening hours Simac Electronics Handel GmbH Pascalstr 8 D 47506 Neukirchen Vluyn 2 Possibility of re...

Reviews: