FRICK
®
QUANTUM
™
LX/HD RETROFIT
INSTALLATION INSTRUCTIONS
090.040-I (MAR 2012)
Page 3
INSTRUCTIONS
NOTE: Before proceeding, read the instructions for "Proper
Installation of Electronic Equipment in an Industrial Envi-
ronment" on page 7.
1.
Push
[STOP]
key to shut down the unit. Open the
disconnect switch for the compressor motor starter
and (if applicable) oil pump motor starter.
2.
Close the discharge, and liquid injec tion (if applicable)
service valves.
3. SLOWLY
vent the separator to low-side system pres sure
using the suction check valve bypass. Close suction valve
and suction check valve bypass.
NOTE: Recover or transfer
all refrigerant vapor in accordance with local ordinances
before opening to atmosphere.
The separator
MUST
be
equalized to atmospheric pressure.
Oil-entrained refrigerant may va-
porize, causing a separator pressure
increase. Repeat venting and recov-
ery procedure if neces sary.
4.
Drain the oil from the oil separator if an oil separator
temperature probe well is to be installed.
5.
Remove the existing panel from the compressor package.
DO NOT CUT WIRES OR TUBING LINES.
They will be used
to connect to the new panel.
6.
If converting from an RWB II to a
QUANTUM
™
LX/HD
,
remove the front panel assembly. Remove wires on the I/O
board which run from the micro enclosure to the junction
box. Remove the analog wires from the FRK-1 board. Remove
ground, +5VDC, ±12VDC and +24VDC from the FRK-1, SBC
and I/O boards. Be sure all of the above wires are labeled
because all except ±12VDC and +24VDC will be connected
to the
QUANTUM
™
LX/HD
.
7.
Remove existing thermometers, temperature switches
and pressure switches (if applicable) from the compressor
package.
8.
Mount the
QUANTUM
™
LX/HD
panel on the compressor
package by bolting the panel to the existing panel mounting
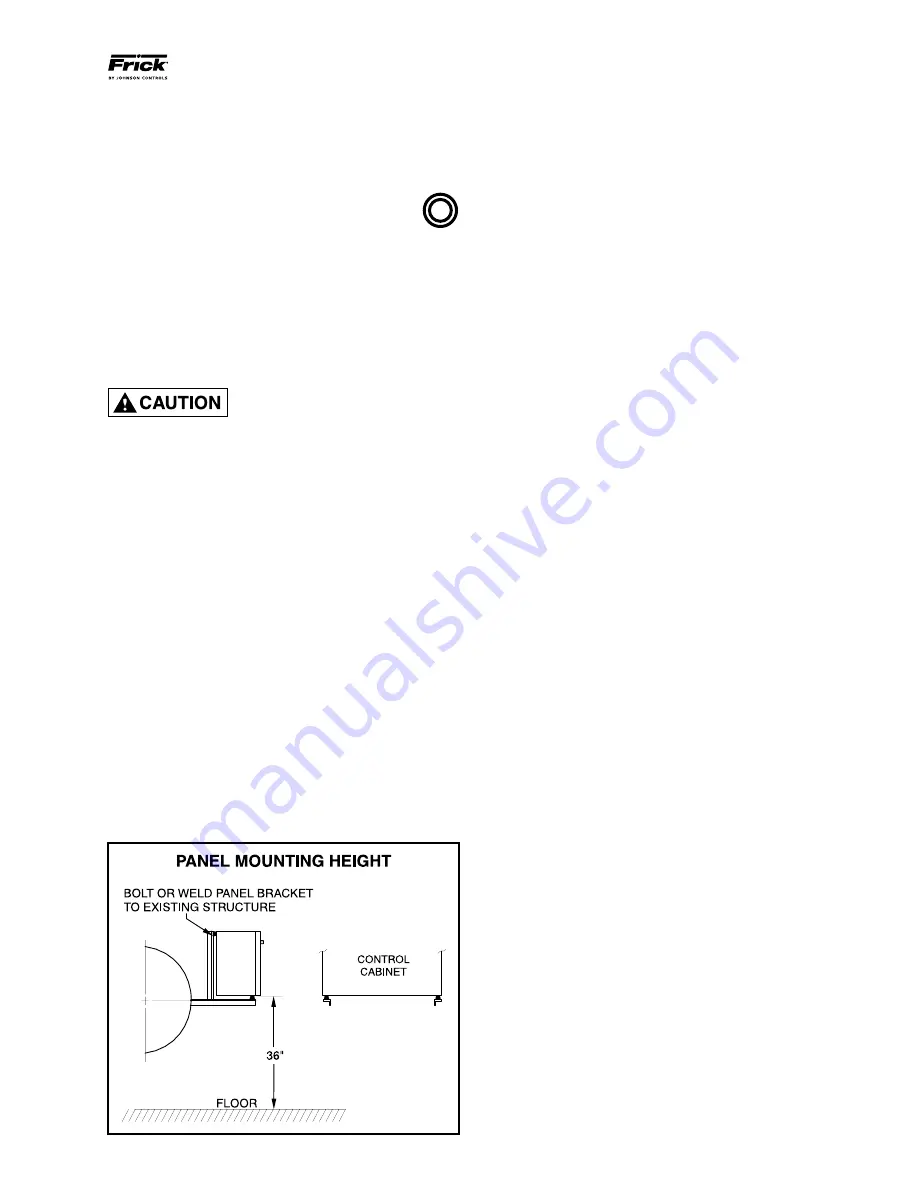
structure. It may be necessary to weld new panel mounting
brackets to the screw compressor package to accommo-
date the proper panel height. If so,
DO NOT WELD TO THE
PRESSURE VESSEL.
Weld only to existing mounts or other
structural material.
DO NOT WELD WITH THE CONTROL
PANEL IN PLACE.
Welding currents can cause damage to
the electronic components. Refer to the PANEL MOUNTING
HEIGHT diagram below.
9.
Install the temperature probe wells at the locations indi-
cated on the TRANSDUCER CONNECTION DIAGRAM. Existing
connections may require reducers to fit the new temperature
wells. Some of the required locations may not have a con-
nection available and will require cutting a hole and welding
in a connection for the temperature well. Seal all threaded
connections to prevent leaks.
10.
Place silicone heat transfer compound on the tip of the
temperature probes and install them in the temperature wells.
11.
Run separate electrical conduit between the control
panel and the temperature probe electrical boxes.
DO NOT
RUN THE TEMPERATURE PROBE WIRING WITH THE AC
CONTROL WIRING.
12.
The wiring between the control panel and the tempera-
ture probes must be shielded twisted-pair wire. Belden part
number 8761 or equivalent is recommended.
13.
Refer to the panel wiring diagrams in the S70-200 IOM
and connect the white wire of the twisted pair to the nonblack
temperature probe wire. The temperature probe wire colors
may vary on this wire. Connect the black wire of the twisted
pair to the temperature probe black wire. Cut off the shield
wire on the temperature probe end and place tape or heat
shrink tubing around the exposed shield so that it will not
come in contact with the electrical box.
14.
Connect the shield wire of the twisted pair to the control
panel ground block in the control panel.
15.
Connect the white and black twisted-pair wires to the
microprocessor board, as shown on the panel wiring dia-
grams in the IOM.
16.
Install stainless steel tubing from the points indicated in
the TRANSDUCER CONNECTION DIAGRAM to the pressure
transducer pressure block located behind the control panel.
Properly brace all pressure lines so that excessive vibration
will not cause transducer error.
DO NOT PLACE VALVES
BETWEEN DISCHARGE OR OIL LINES AND THE PRESSURE
TRANSDUCER.
17.
Refer to the panel wiring diagrams in the Maintenance
manual (090.020-M or 090.040-M) and connect the red,
black, and white wires of the pressure transducers to the
QUANTUM
™
LX /HD
analog board. The shield of the transducer
cable is grounded inside the transducer and should not be
grounded inside the cabinet.
18.
Determine if there is a slide valve potentiometer on the
slide valve indicator assembly. If a potentiometer is provided,
it should be 1,000 OHMS single turn or 10,000 OHMS ten
turn with a calibration resistor. If a potentiometer is not
provided, contact Frick for ordering proper potentiometer
and drive assembly.
19.
Run separate electrical conduit between the control panel
and the slide valve indicator assembly.
DO NOT RUN SLIDE
VALVE WIRING WITH AC CONTROL WIRING.
20.
The wiring between the control panel and the slide valve
indicator must be shielded twisted-three wire. Belden part
number 8770 or equivalent is recommended.


