User’s Guide
26
2.4 Installation
Here the hardware installation takes KMDA-3230 series for example.
2.4.1 HDD/SSD Installation
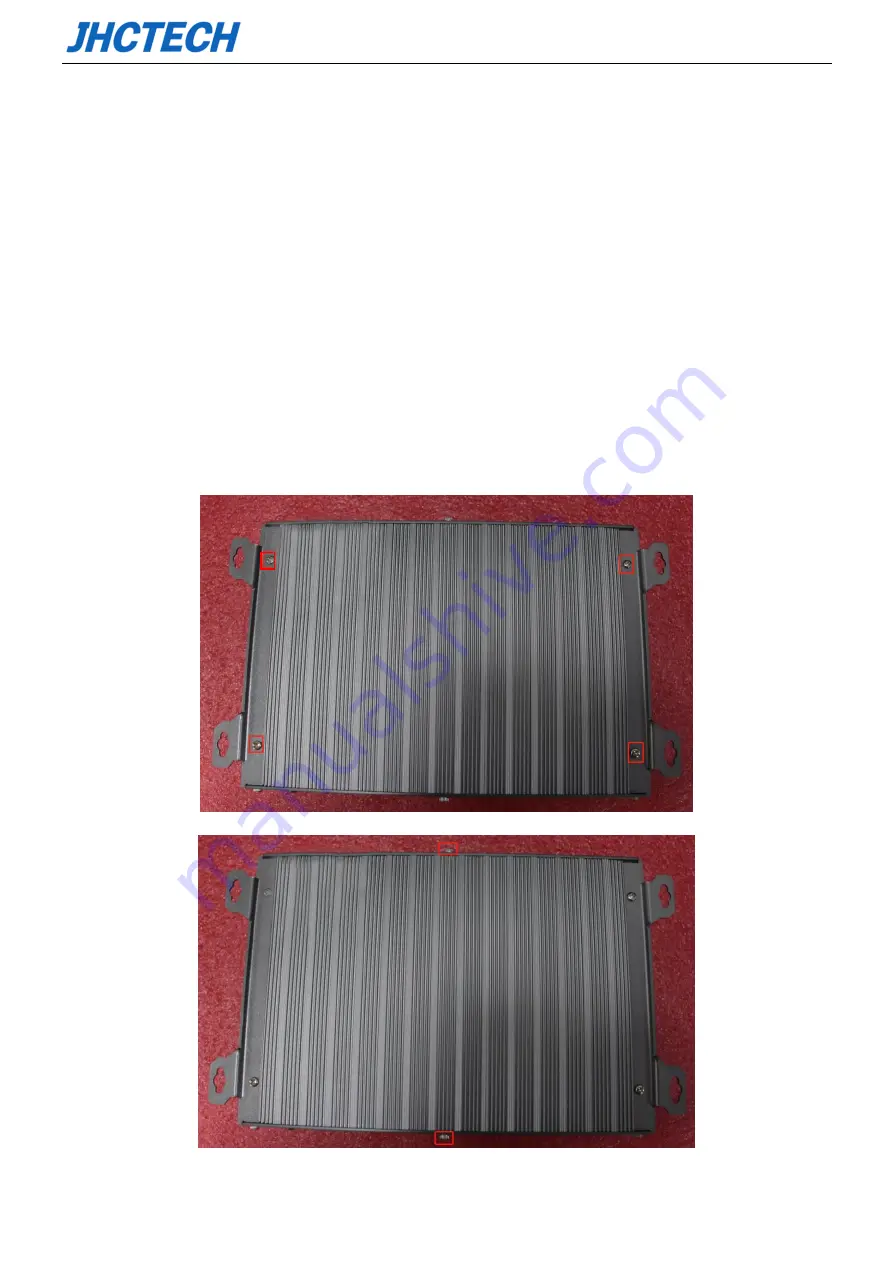
Step 1: Unscrew the 4 screws on the edge of the bottom cover and take out the mounting bracket;
Step 2: Unscrew the 2 screws on the side of the bottom cover and take out the bottom cover;
Step 3: Put the HDD/SSD into the HDD/SSD bay and screw 4 screws as the picture shows;
Step 4: Fix the HDD/SSD bay on the bottom cover with 4 screws as shown in the picture.
Step 5: Connect the SATA cable and SATA power cord to the corresponding interface as the picture
shows;
Step 6: Tighten the bottom cover with 2 screws.
Step 7: Tighten the mounting bracket with 4 screws.
Summary of Contents for KMDA-3230
Page 1: ...User s Guide User s Guide KMDA 3230 Ver A1 0 Date 01 Jul 2020 ...
Page 2: ...User s Guide Version Note No Ver Note Date Writer 1 A1 Final publish 20200701 Echo Guo ...
Page 10: ...User s Guide 1 General Information CHAPTER 1 ...
Page 16: ...User s Guide 7 Figure 1 4 KMDA 3230 Rear Panel Figure 1 5 ...
Page 17: ...User s Guide 8 KMDA 3230 Dimension Unit mm Figure 1 6 ...
Page 18: ...User s Guide 9 Hardware Installation CHAPTER 2 ...
Page 36: ...User s Guide 27 ...
Page 43: ...User s Guide 34 BIOS Setup CHAPTER 3 ...
Page 51: ...User s Guide 42 ...
Page 60: ...User s Guide 51 External Gfx Card Primary Display Configuration ...
Page 63: ...User s Guide 54 USB Configuration ...
Page 69: ...User s Guide 60 Driver Installation CHAPTER 4 ...


