background image

ENGLISH

OPERATION MANUAL

JB SYSTEMS

®

5/30

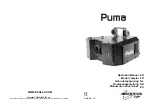
PUMA

OPERATING INSTRUCTIONS

The

PUMA

can be linked together as master/slave with 2 or 4 units and run the built in program chase

sequences by sound activation. When sound stops, all the lights will shut down (blackout) immediately and
the bulbs will turn off 15 seconds later. Please refer to the unit dipswitch-setting table for the
dipswitchsettings to achieve master/slave linking.

In master/slave mode, the dipswitch 10 on the master unit must be in the position “ on “.

Connect the optional CA-8 controller for more control:

The CA-8 controller can only be used in standalone or master/slave mode. Connect the controller to the CA-
8 input of the first unit (master). Now you can control all the connected units:

Controlled by universal DMX-controller:

Connect all units together. (don’t
forget to address all units properly!)

Connect all units to the mains and
turn on the DMX controller.

Since each unit has its own DMX-
address,

you

can

control

them

individually. Remember that each unit
uses 4 DMX-channels as shown in the
DMX chart below:

2-Channels dip switches setting

Master

Slave 1

4-Channels dip switches setting

Master

Slave 1

Slave 2

Slave 3

Stand by

Blackout the unit

Function

Hold on for gobo strobe effect

Press shortly for gobo change

Mode

Fast mode: Sound activated
(LED off )

Slow mode: Not sound activated
(LED on)

ENGLISH

OPERATION MANUAL

JB SYSTEMS

®

6/30

PUMA

MAINTENANCE

Make sure the area below the installation place is free from unwanted persons during servicing.

Switch off the unit, unplug the mains cable and wait until the unit has been cooled down.

During inspection the following points should be checked:

All screws used for installing the device and any of its parts should be tightly fastened and may not be
corroded.

Housings, fixations and installations spots (ceiling, truss, suspensions) should be totally free from any
deformation.

When an optical lens is visibly damaged due to cracks or deep scratches, it must be replaced.

The mains cables must be in impeccable condition and should be replaced immediately when even a
small problem is detected.

In order to protect the device from overheat the cooling fans (if any) and ventilation openings should be
cleaned monthly.

The interior of the device should be cleaned annually using a vacuum cleaner or air-jet.

The cleaning of internal and external optical lenses and/or mirrors must be carried out periodically to
optimize light output. Cleaning frequency depends on the environment in which the fixture operates: damp,
smoky or particularly dirty surroundings can cause greater accumulation of dirt on the unit’s optics.

Clean with a soft cloth using normal glass cleaning products.

Always dry the parts carefully.

Clean the external optics at least once every 30 days.

Clean the internal optics at least every 90 days.

Attention: We strongly recommend internal cleaning to be carried out by qualified personnel!

SPECIFICATIONS

Mains Input:

AC 230V, 50Hz

Fuse:

20mm Glass 5A Fast Blow(20mm glass)

Sound Control:

Internal microphone

DMX connections:

3pin XLR male / female

Lamp:

ELC 250W/24V

Size:

263 x 314 x 202 mm

Weight:

7.7 kg

Every information is subject to change without prior notice

You can download the latest version of this user manual on our website: www.beglec.com

Summary of Contents for Puma

Page 1: ...7 by BEGLEC cva Reproduction or publication of the content in any manner without express permission of the publisher is prohibited Operation Manual Mode d emploi Gebruiksaanwijzing Bedienungsanleitung...

Page 2: ...t toestel en de gebruikte batterijen op een milieuvriendelijke manier conform de in uw land geldende voorschriften DU ENTSORGUNG DES GER TS Entsorgen Sie das Ger t und die Batterien auf umweltfreundli...

Page 3: ...ars after some minutes To prevent fire or shock hazard do not expose this appliance to rain or moisture CAUTION ENGLISH OPERATION MANUAL JB SYSTEMS 2 30 PUMA To avoid condensation to be formed inside...

Page 4: ...ce or see the technical specifications in this manual to know which lamp should be used Never install lamps with a higher wattage Lamps with higher wattage generate temperatures the device was not des...

Page 5: ...nplug the mains cable and wait until the unit has been cooled down During inspection the following points should be checked All screws used for installing the device and any of its parts should be tig...

Page 6: ...ientez quelques minutes pour laisser l appareil s adapter la temp rature ambiante lorsqu il arrive dans une pi ce chauff e apr s le transport La condensation emp che l unit de fonctionner en performan...

Page 7: ...s l tiquette l arri re de l appareil ou aux sp cifications techniques de ce manuel pour savoir quelle ampoule utiliser Ne jamais installer d ampoules puissance plus lev e De telles ampoules produisent...

Page 8: ...MAINTENANCE Assurez vous que la zone au dessous du lieu d installation ne comporte pas de personnes ind sirables lors de la maintenance Mettez l unit hors tension d branchez le cordon d alimentation...

Page 9: ...verpakkingsmateriaal te recycleren Een nieuw lichteffect kan soms ongewenste rook en of reuk veroorzaken Dit is normaal en verdwijnt na een paar minuten Stel dit apparaat niet bloot aan regen of voch...

Page 10: ...ad Houd de lampenhouder vast terwijl U de nieuwe lamp rustig in de lampenhouder drukt Opgepast Controleer het etiket achter op het toestel of kijk naar de technische karakteristieken in deze gebruiksw...

Page 11: ...nen tijdens het onderhoud Zet het toestel uit trek de netstekker uit het stopcontact en wacht tot het toestel is afgekoeld Bij inspectie moeten de volgende punten worden gecontroleerd Alle schroeven g...

Page 12: ...wischen Projektor und dem belichteten Gegenstand mu mehr als 1 Meter sein Aus Umweltschutzgr nden Verpackung bitte wiederverwenden oder richtig trennen Ein neues Ger t kann Geruch oder Rauch entwickel...

Page 13: ...n dieser Bedienungsanleitung beachten damit stets das richtige Leuchtmittel eingesetzt wird Keine Leuchtmittel mit h herer Wattanzahl einsetzen Diese Leuchtmittel erzeugen h here Temperaturen f r die...

Page 14: ...WARTUNG UND INSTANDHALTUNG Sicherstellen dass sich keine unbefugten Personen unterhalb des Ger ts befinden w hrend es gewartet wird Ger t ausschalten Netzstecker ziehen und warten bis es sich abgek h...

Page 15: ...os minutos Para evitar incendios o riesgos de descarga no exponga la unidad a la lluvia o a la humedad Para evitar que se forme condensaci n en el interior deje que la unidad se adapte a la temperatur...

Page 16: ...de la l mpara mientras empuja suavemente la nueva l mpara en el casquillo Atenci n Compruebe la etiqueta en el lado posterior del dispositivo o lea las especificaciones t cnicas en este manual para sa...

Page 17: ...dad se haya enfriado Durante la inspecci n deber comprobar los siguientes puntos Todos los tornillos utilizados para instalar el dispositivo y cualquiera de sus piezas deber n apretarse firmemente y n...

Reviews: