ENGLISH
OPERATION MANUAL
JB SYSTEMS
®
3/30
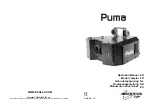
PUMA
DESCRIPTION:
1. LENS
with focus adjustment
2. DMX INPUT:
3pin male XLR-connector. For receiving DMX signals.
3. DMX OUTPUT:
3pin female XLR-connector. Used to connect the Puma with the
next unit in the DMX chain
4. MAIN FUSE
5. INTERNAL MICROPHONE
6. 1/4” JACK
used to connect the optional CA-8 controller
7. HANGING BRACKET
with 2 knobs on both sides to fasten the unit and a
mounting hole to fix a mounting hook
8. COOLING FAN
9. MAINS CABLE
10. LAMP COMPARTMENT
11. EARTH CONNECTION
12. DIP-SWITCHES,
used to set the DMX-starting address of the unit.
How to set the DIP-switches to obtain the right starting address:
Each of the first 9 DIP-switches corresponds to a certain DMX-value (DIP-switch
10 is not used):
Dip
#1
#2
#3
#4
#5
#6
#7
#8
#9
Value
1
2
4
8
16
32
64
128
256
You can combine the values of these switches to obtain any starting address between 1 and 512:
Begin address = 01
switch 1=ON
values: 1
Begin address = 05
switch 1+3=ON
values: 1+4 = 5
Begin address = 09
switch 1+4=ON
values: 1+8 = 9
Begin address = 13
switch 1+3+4=ON
values: 1+4+8 = 13
…
Begin address = 62
3+4+5+6=ON
values: 2+4+8+16+32 = 62
ENGLISH
OPERATION MANUAL
JB SYSTEMS
®
4/30
PUMA
LAMP (RE)PLACEMENT
In case of replacement of the lamp or maintenance, do not
open the fixture within 10 minutes until the unit cools down
after switching off. Always unplug the unit before
servicing!
Always use the same type of spare parts (bulbs, fuses, etc.)
When replacing parts, please only genuine spare parts.
Switch off the unit and unplug the mains cable.
Wait for about 10 minutes until the unit has been cooled down.
Use a screwdriver to unscrew the 2 screws that close the lamp compartment of
the fixture. ( A on the picture )
On the inside you will see the lamp socket. Tear the lamp socket gently out of
the lamp compartment. ( A on the picture )
Unplug the old lamp. Hold the lamp socket while unplugging the lamp
instead of pulling the cable!
Hold the lamp socket while pressing the new lamp gently in the socket.
Attention!
Check the label on the backside of the device or see the
technical specifications in this manual to know which lamp should be used.
Never install lamps with a higher wattage! Lamps with higher wattage
generate temperatures the device was not designed for. If the device uses
a lamp transformer, it will burn due to current overload.
Don’t touch the bulb inside the reflector with bare hands! This drastically
shortens the lifespan of the lamp. If you touched the lamp, clean it with a
cloth and a little denatured alcohol. Wipe the lamp off before installing.
Put the new lamp back inside the unit. Be sure that the wires don’t touch
the lamp. (B on the picture)
Close the lamp compartment with the screws.
Done!
OVERHEAD RIGGING
Important: The installation must be carried out by qualified service personal only. Improper
installation can result in serious injuries and/or damage to property. Overhead rigging requires
extensive experience! Working load limits should be respected, certified installation materials
should be used, the installed device should be inspected regularly for safety.
Make sure the area below the installation place is free from unwanted persons during rigging, de-rigging
and servicing.
Locate the fixture in a well ventilated spot, far away from any flammable materials and/or liquids. The
fixture must be fixed
at least 50cm
from surrounding walls.
The device should be installed out of reach of people and outside areas where persons may walk by or be
seated.
Before rigging make sure that the installation area can hold a minimum point load of 10times the device’s
weight.
Always use a certified safety cable that can hold 12times the weight of the device when installing the unit.
This secondary safety attachment should be installed in a way that no part of the installation can drop
more than 20cm if the main attachment fails.
The device should be well fixed; a free-swinging mounting is dangerous and may not be considered!
Don’t cover any ventilation openings as this may result in overheating.
The operator has to make sure that the safety-relating and machine-technical installations are approved by
an expert before using them for the first time. The installations should be inspected every year by a skilled
person to be sure that safety is still optimal.

