


38
c
x
e
z
x
z
v
q
w
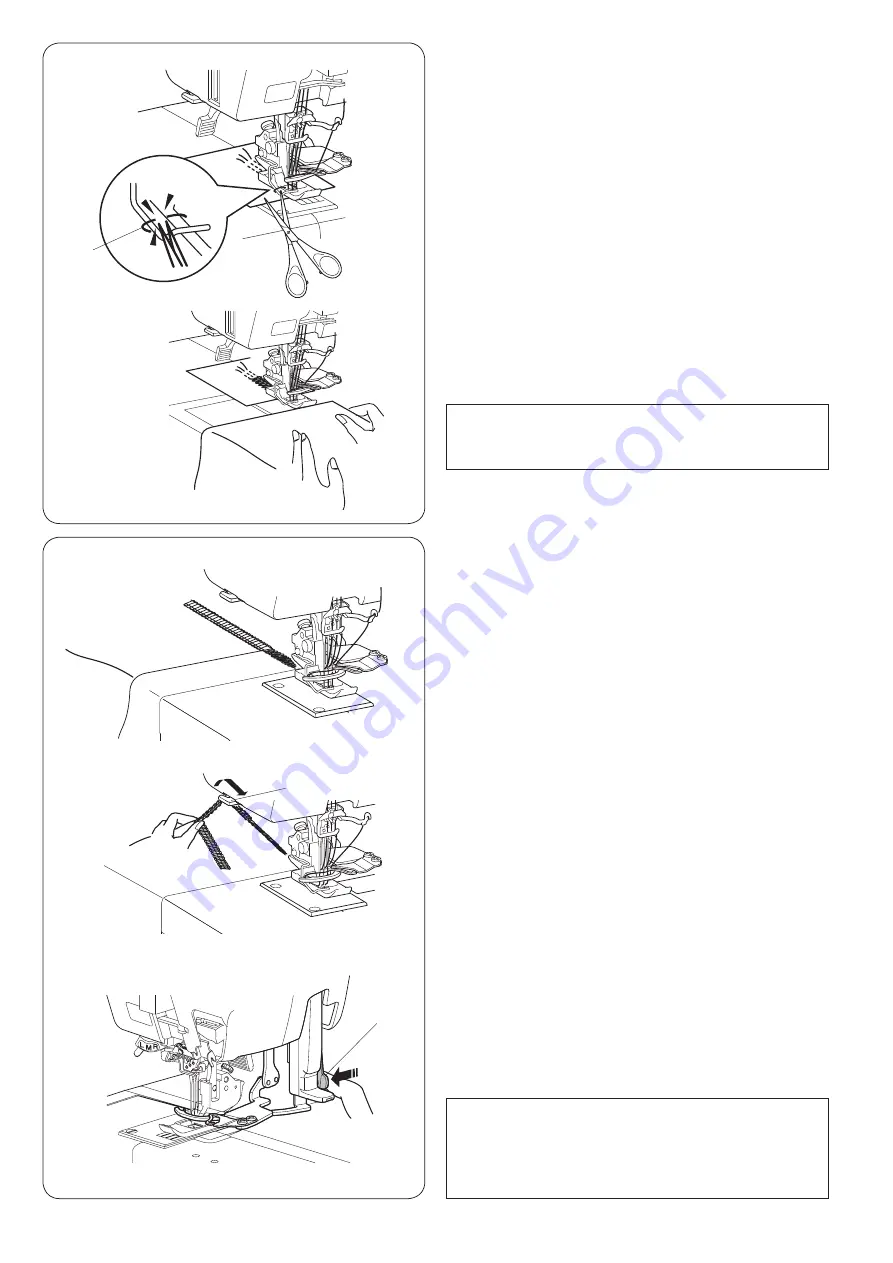
Beginning of the seam for top cover stitch
c
Raise the needle to the highest position after sewing.
Raise the presser foot lifter.
Remove the top cover stitch thread from the top cover
stitch spreader.
v
Pull the top cover stitch release lever toward you to
store the top cover stitch spreader to the machine.
e
Top cover stitch release lever
NOTE:
If the threads are cut in the middle of sewing, remove
the top cover stitch thread from the top cover stitch
spreader and start the threading from the beginning.
Refer to pages 12 - 18 and 22 - 25 for theading.
z
After threading the top cover stitch thread, turn the
handwheel toward you for several times and sew 3 to
5 top cover stitches on a piece of scrap fabric.
Cut the loose top cover thread.
q
Loose top cover stitch thread
z
At the end of the seam, slowly produce approximately
5" (12 cm) of thread chain while gently pulling the
thread chain to the back (A thread chain is a chain of
threads knit without fabric).
x
Cut the thread chain with thread cutter as shown,
leaving a thread chain approximately 2˝ (5 cm) long
on the end of the fabric.
w
Thread cutter
x
Depress the foot control to start sewing slowly.
Stop sewing at the end of the scrap fabric.
Insert the work fabric after the scrap as shown, then
start sewing on the work fabric.
NOTE:
Always keep low to middle speed while sewing the
top cover stitches.
End of the seam for top cover stitch
Summary of Contents for CoverPro 3000
Page 2: ...Instruction Book...
Page 25: ...22 Threading the Top Cover Stitch Guides and Spreader...
Page 48: ......
Page 49: ...778 800 055 EN...