6
4
5
DE
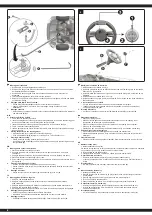
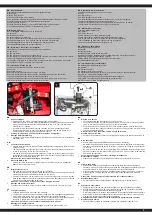
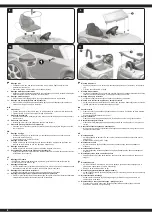
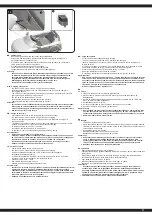
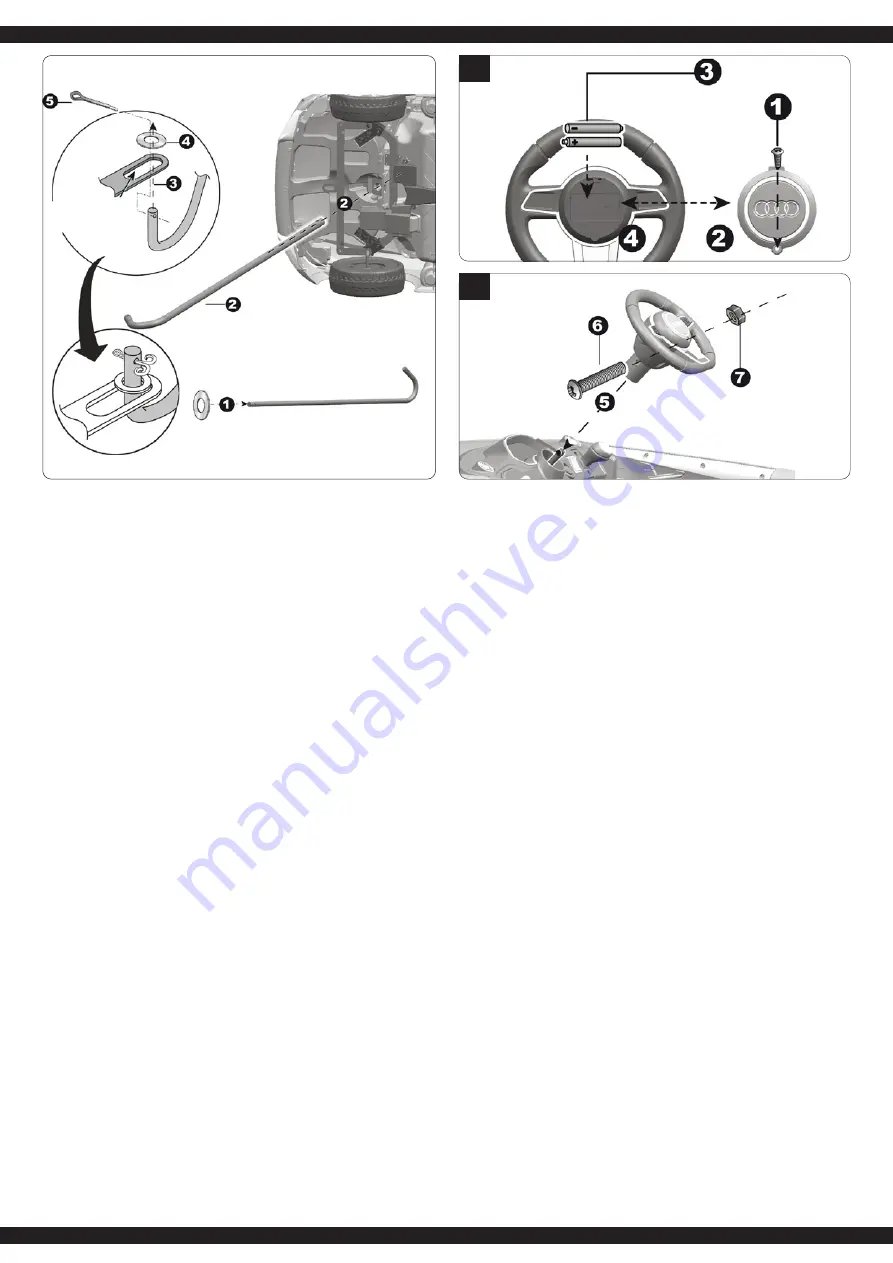
3. Montage der Lenksäule
1. Schieben Sie eine Unterlegscheibe auf die Achse.
2. Schieben Sie das gerade Stück der Lenkachse nach oben durch das Loch der Lenkplatte,
der Karosserie und der Armaturen
3. Schieben Sie das gebogene Ende der Lenkachse durch das Loch in der vorderen
Achsplatte
4. Jetzt eine Unterlegscheibe (Ø10) auf die Achse schieben
5. Setzen Sie einen Splint in das Loch der Lenkachse ein und verbiegen die Enden des Splints
mit Hilfe einer Zange
4. Einlegen der Batterie in das Lenkrad
• Öffnen Sie den Batteriefachdeckel an der Vorderseite des Lenkrades.
• Legen 2 AA Batterien ein. Achten Sie auf die richtige Polung. Schließen Sie das
Batteriefach.
5. Montage Lenkrad
• Setzen Sie das Lenkrad auf die dafür vorher gesehene Stelle
(5)
. Schrauben Sie Mutter
(7)
und Schraube
(6)
fest
GB
3. Attach the Steering Column
1. Fit a washer to the steering column
2. Insert the straight end of steering column up through the hole in the hole in the steering gear
box from the bottom side, and out through the hole in the dash
3. Insert the bent end of steering column through the hole in the front axle linkage.
4. Fit a Ø10 washer to the steering column.
5. Insert a split pin into the hole in the steering column, bend the ends of split pin back using a
long nose pliers.
4. Placing the battery in the steering wheel
• Open the battery cover on the front of the steering wheel.
• Put 2 AA batteries making sure that it is corectly put in. Then close the cover.
5. Steering wheel assembly
• Please install the steering wheel to the specific place
• Use Screw
(7)
and Hexnut
(6)
to screw it tightly after you make sure the steering wheel is in
the right place
(5)
.
FR
3. Montage de la console de direction
1. Placez maintenant une rondelle sur l’axe.
2. Engagez la partie droite de l’axe directionnel vers le haut dans le trou a de et de la
carrosserie.
3. Engagez la partie courbée de l’axe directionnel dans le trou de la platine d’axe avant.
4. Placez maintenant une rondelle (Ø10) sur l’axe.
5. Puis mettez une goupille dans le trou de l’axe directionnel. A l’aide d’une pince tordez le bout
de la goupille.
4. Place de la batterie dans le volant
• Enlevez le couvercle du compartiment de pile au dos de volant
• Placez 2 piles AA dans celui-ci, en vérifiant toujours la polarité. Refermez le couvercle du
compartiment.
5. Montage du volant
• Placez le volant sur ce site imprévu
(5)
. Vissez l‘écrou
(7)
et la vis
(6)
.
IT
3. Montaggio della colonna di guida
1. Spingere una rondella sull asse.
2. Spingere il pezzo diritto del asse volante sul alto nel buco
della piastra di sterzo e
della carrozzeria.
3. Spingere la parte finale piegato della asse volante nell buco della piastra asse anteriore.
4. Spingere una rondella (Ø10) sull asse.
5. Un coppiglia nel buco dell’ asse volante. Con l´aiuto di una pinza puo piegare la coppiaglia.
4. Montaggio delle pile nel volante
• Aprite il coperchio del vano batterie sul fronte del volante.
• Introducete 2 pile AA facendo attenzione alla polarità. Chiudere il vano batterie.
5. Montaggio volante
• Posizionare il volante nella posizione prevista
(5)
. Fissare il dado
(7)
e la vite
(6)
.
ES
3. Montaje de la columna de dirección
1. Ahora deslice una arandela en el eje.
2. Deslice la pieza recta del eje de dirección hacia arriba a través del agujero en la placa de
dirección y en la carrocería.
3. Deslice la parte final acodado del eje de dirección a través del agujero en la placa de eje
delantero.
4. Ahora deslice una arandela (Ø10) en el eje.
5. Deslice pasador en agujero en el eje de dirección. Con el ayudo de una pinza deformar el
final del pasador.
4. Colocar las pilas en el volante
• Abra la tapa de las baterías ubicada en la parte delantera del volante
• Introduzca 2 pilas AA, prestando atención a la polaridad. Vuelva a ponerla tapa del
compartimiento de las pilas.
5. Montaje del volante
• Coloque el volante en el sitio previsto
(5)
. Atornille la tuerca
(7)
y el tornillo
(6)
.
NL
3. Stuurkolom monteren
• Schuif de sluitring op de as.
• Schuif het rechte gedeelte van de stuurwielas naar boven door de opening in het
stuurpaneel, de carrosserie en de instrumenten.
• Schuif het gebogen uiteinde van de stuurwielas door de opening in de voorplaat.
• Zet nu op de as de sluitring Ø10.
• Plaats nu de pen in de opening van de stuurwielas en buig de uiteinden met de tang.
4. De batterij in het stuurwiel plaatsen
• Open het deksel van het batterijvak aan de voorzijde van het stuurwiel.
• Plaats twee batterijen type 2 AA. Zorg ervoor dat de polen niet worden vergist. Sluit het
batterijvak.
5. Stuurwiel monteren
• Plaats het stuurwiel op aangegeven plaats
(5)
. Draai de schroef
(6)
en de moer
(7)
vast.
CZ
3. Montáž sloupku řízení
1. Nasuňte podložku na nápravu.
2. Nasuňte rovnou část osy volantu nahoru otvorem v ovládacím panelu, karoserii a nástrojích.
3. Vysuňte ohnutý konec osy volantu do otvoru v přední desce.
4. Nyní umístěte na osu podložku Ø10.
5. Vložte závlačku do otvoru v řídicí ose a ohněte její konce pomocí kleští.
4. Umístění baterie do volantu
• Otevřete kryt prostoru pro baterie umístěný na přední straně volantu.
• Vložte dvě baterie typu 2 AA. Ujistěte se, že nejsou obráceny póly. Zavřete prostor pro
aterie.
5. Montáž volantu
• Umístěte volant na jeho místo
(5)
. Utáhněte matici
(7)
a šroub
(8)
.
PL
3. Montaż kolumny kierownicy
1. Nasunąć podkładkę na oś.
2. Wsunąć prostą część osi kierownicy do góry przez otwór w płycie sterującej, karoserii i
instrumentach.
3. Wsunąć wygięty koniec osi kierownicy przez otwór w przedniej płycie.
4. Teraz na oś nałożyć podkładkę Ø10.
5. Włożyć zawleczkę do otworu w osi kierującej i zagiąć szczypcami jej końcówki.
4. Umieszcanie baterii w kierownicy
• Otworzyć pokrywę komory baterii znajdującą się po przedniej stronie kierownicy.
• Włożyć dwie baterie typu 2 AA. Upewnić się, że nie zostały zamienione bieguny.
Zamknąć komorę baterii.
5. Montaż kierownicy
• Umieścić kierownicę w wyznaczonym miejscu. Dokręcić nakrętkę
(7)
i śrubę
(6)
.


