background image

Kwik-Way 

SVS II Deluxe Valve Refacer 

Copyright © 2018 by Irontite Products Inc. 

All Rights Reserved.    Rev. 180802 

pg. 41


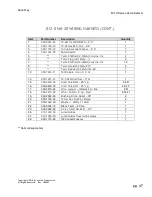
PN: 012-1006-71  WHEEL DRESSER BRACKET ASSEMBLY 


Item 

Part Number 

Description 

Quantity 

1. 

000-0213-85


¼ - 2- x 1 – ¼ Round Head Machine Screw


2. 

000-0482-67


10 – 24x3/16 Socket cup Point Set Screw 

3. 

000-0500-16


¼ - 20 x ¼ Socket Flat Point Set Screw


4. 

000-1800-76


Compression Spring


5. 

012-1006-20


Diamond Holder Bracket


6. 

023-0129-55 

Valve Diamond


7. 

031-1118-03


Brass Plug


Note: Setscrew (Item 2) is used to retain the Plug (Item 7) until the Diamond (Item 6) is in 

position. After this bracket assembly is installed, the setscrew must be backed off to 
allow the plug to contact the Diamond threads. 


Summary of Contents for Kwik-Way SVS II Deluxe

Page 1: ...ite Products Inc 2525 18th Street SW Suite D Cedar Rapids IA 52409 USA 800 553 5953 1 319 377 9421 www kwik way com www irontite com www van norman com Copyright 2018 by Irontite Products Inc All Rights Reserved Rev 180802 Equipment specifications options and accessories subject to change without notice ...

Page 2: ...Kwik Way SVS II Deluxe Valve Refacer Copyright 2018 by Irontite Products Inc All Rights Reserved Rev 180802 pg 2 ...

Page 3: ...rmal operation of the machine Additionally this warranty does not cover the following items dresser diamonds ball bearings grinding wheels belts carbide tool bits and other accessory items except at the full discretion of the company The warranty on electric motors or electrical component parts is for a period of ninety days from date of delivery This warranty is at no time intended to mean the en...

Page 4: ...Kwik Way SVS II Deluxe Valve Refacer Copyright 2018 by Irontite Products Inc All Rights Reserved Rev 180802 pg 4 ...

Page 5: ...to promote safety through the use of accepted practice READ THE SAFETY AND OPERATING INSTRUCTIONS THOROUGHLY BEFORE OPERATING THE MACHINE In order to obtain maximum life and efficiency from your machine follow all the instructions in the operating manuals carefully The specifications put forth in this manual were in effect at the time of publication However owing to the Company s policy of continu...

Page 6: ...s work area be marked off Make certain the work area is well lighted and ventilated Provide for adequate workspace around the machine 5 Guards Keep all machine guards in place at all times when machine is in use 6 Do Not Overreach Maintain a balanced stance and keep your body under control at all times 7 Hand Safety NEVER wear gloves while operating this machine 8 Machine Capacity Do not attempt t...

Page 7: ...or otherwise damaged DO USE MOUNTING BLOTTERS Most modern wheels are supplied with blotters attached If not it is your responsibility to use appropriate mounting blotters DON T USE EXCESSIVE PRESSURE WHEN MOUNTING the wheel between flanges Tighten the nut only enough to hold the wheel firmly DO be sure the WHEEL HOLE threaded or unthreaded FITS the machine arbor PROPERLY and that flanges are clean...

Page 8: ...O NOT attempt to remove the rocker arm while grinding wheel is still turning Found on page 20 WARNING Disconnect the machine from its power source BEFORE beginning any adjustments WARNING Disconnect the machine from its power source before cleaning the chuck Found on page 24 WARNING Never use any penetrating oil or cleaning solutions on your chuck ONLY LUBRICATE WITH AUTOMATIC TRANSMISSION FLUID o...

Page 9: ...erall Width 22 559 mm Overall Height 16 406 mm Shipping Weight 310 lbs 141 kg STANDARD ACCESSORIES WITH THE SVS II DELUXE DESCRIPTION PART NUMBER 1 Gallon 3 8L Grinding Oil 000 2112 73 Chuck Assembly Disassembly Tool 012 1054 60 Spanner Wrench 025 0150 02 Diamond Dressing Tool Tip Grinding 024 0131 11 Diamond Dressing Tool Face Grinding 023 0129 44 Rocker Arm Attachment Assembly 012 1120 00 Coolan...

Page 10: ... rib 8 Connect a filtered and lubricated air supply 65 PSI Min to the air inlet at the rear of the machine after attaching your shops style of air supply fitting SETTING THE SWIVEL PLATE ANGLE The swivel plate is marked in 1 increments from 13 to 60 Actual setting for 15 30 and 45 are indicated with these numbers To set the angle 1 Loosen the Locking Handle Item 1 Figure 1 and set the edge of the ...

Page 11: ...ize yourself with all controls and switches and the functions of each MAIN SWITCH Item 1 Figure 2 below This switch has three positions In the left position both the spindle and the chuck motor are on With the switch in the right position only the spindle motor will run When centered both chuck and spindle motors are off CHUCK SPEED CONTOLLERS Item 2 Figure 2 above Your SVSII Deluxe Valve Facer is...

Page 12: ...l keep the spindle from turning while removing the grinding wheel nut 3 With the special spanner wrench PN 025 0150 02 remove the grinding wheel nut Right Hand Threads and then the grinding wheel 4 Make certain the grinding wheel bushing is tight 5 Install the new grinding wheel and grinding wheel nut then tighten 6 Remove special pin and re install wheel guard STEM GRINDING WHEEL REMOVAL INSTALLA...

Page 13: ...10 Surface Grinding Micro Feed Wheel 3 Traverse Handle 11 Micro Feed Dial 4 Valve Feed Hand wheel 12 Spindle Slide Adjustable Stops 5 Chuck Open Close Button 13 Valve Stop Screw 6 Rocker Arm Grinding Assembly 14 Chuck Cover 7 Surface Grinding Assembly 15 Chuck Speed Dial 8 Swivel Plate Lock 16 Valve Counter NOTE These items are not visible in this view of machine Figure 4 ...

Page 14: ... first covering the chuck 1 Turn the main switch to the OFF center position 2 Loosen the lock arm and swing the diamond toward the left 3 Using the traverse handle locate the grinding wheel so that the diamond point just contacts the center of the face and lock in place 4 Position the wheel to the left of the diamond 5 Depress the right side of the main switch turning on the spindle and coolant pu...

Page 15: ...er switch spindle and move the traverse handle to the left until the spindle motor comes on 2 Leave the spindle slide in this location and turn the motor off center position on the main switch 3 Loosen the adjustable spindle slide stop move it up tight against the fixed stop and tighten it to prevent the spindle slide from moving while dressing the stem wheel 4 Install the round diamond in the V b...

Page 16: ... the valve Never allow the coolant to be directed into the chuck Suspended grit in the coolant will cause damage to the chuck balls and collars 3 Bring the valve face into contact with the grinding wheel by SLOWLY turning the feed hand wheel clockwise while at the same time slowly passing the wheel back and forth 4 As the last low spot is removed stop feeding the hand wheel in and pass the wheel a...

Page 17: ...or on and take a light cut across the end of the valve stem Before removing the valve move the V block back to the rest position and adjust the valve stop screw and jam nut until it contacts the end of the valve stem This sets the stop screw even with the front edge of the wheel and all other valve stems can be set in the V blocks against the stop 4 Set calibration ring to zero rotate the V block ...

Page 18: ...averse speed 3 Decreasing the infeed or 4 Dressing at a slower traverse speed It s beneficial to use quality grinding stones and to match the stone to the material being ground If you are grinding titanium valves then you should use a stone designed for use on titanium Irontite Products uses the same formulation on the stones we offer as Kwik Way has always used The combination of our specially fo...

Page 19: ... SET UP 1 Move the traverse handle to the extreme right and depress the spindle switch 2 Slowly move the traverse handle to the left until the spindle motor starts 3 Allow the traverse handle to remain in this position and turn the spindle motor off 4 Loosen the stops slide them against the fixed stop and lock in place 5 Mount the rocker arm between the cones See Figure 9 and position the attachme...

Page 20: ...up CAUTION DO NOT stop rocker arm movement while shoe is in contact with the grinding wheel If rocker arm is allowed to dwell in one location a flat spot will occur 3 Turn off the spindle motor and remove the finished rocker arm WARNING DO NOT attempt to remove the rocker arm while the grinding wheel is still turning 4 When the rocker arm grinding process has been completed return both this attach...

Page 21: ...dle can be cycled through its entire range and a noticeable amount of smooth drag is achieved 1 The next adjustment is to the screw nearest the small diameter grinding wheel Tighten this screw until once again the spindle slide cannot be moved with the traverse handle 2 SLOWLY loosen this setscrew while rocking the traverse handle back and forth stop when the slide moves smooth and free yet drag c...

Page 22: ...ted will shut off the chuck motor before the chuck yoke pin Item 3 engages the chuck flange Item 4 This switch is a safety device to prevent stripping the gears in the chuck motor 1 Disconnect the machine from the power source and air supply and remove the chuck cover 2 Move the chuck yoke Item 2 by hand you should hear a click in the micro switch before feeling the chuck yoke pin Item 3 and engag...

Page 23: ...uld be snug They are not intended to stop lateral movement of the chuck Lateral movement is prevented by the position of the belt pulley on the end of the chuck being tight up against the chuck mount bearing mount 5 Bearing Cap Screws PROPER BEARING CAP SCREW ADJUSTMENT Start with the bearing cap screw closes to the Valve end of the chuck While rotating the check with your left hand tighten the be...

Page 24: ...p that comes with your machine put the 8 x 32 screws 3 into the chuck shaft in a 1 4 of an inch Put the 1 4 x 20 Hex Head Bolt finger tight against the End Plate 4 Remove the Chuck Yoke 5 Loosen the 1 4 x 20 Hex head bolt counter clockwise As you release the 1 4 x 20 bolt the spring pressure should begin to release NOTE You may need to soak the chuck in Automatic Transmission Fluid to remove grit ...

Page 25: ...IMPIAR UN MANDRIL 1 Mientras el mandril está en la máquina de rectificar válvulas remueva el tapón del eje del mandril 2 Enrosque la herramienta de ensamblaje dentro del eje del mandril vea el dibujo Esté seguro de que los tornillos de cabeza redonda están por lo menos 1 4 dentro del eje del mandril 3 Vire el tornillo de cabeza hexagonal hasta que los collares del mandril se empujen hacia atrás 4 ...

Page 26: ...t the chuck shaft can turn freely Then tighten the setscrew HELPFUL HINTS 1 GET ACQUAINTED WITH YOUR KWIK WAY VALVE FACER We recommend that you use scrap valves and practice before beginning an actual job This will avoid any undue pressure or failure while learning a new procedure 2 ALWAYS cover the chuck before dressing the valve grinding wheel 3 ALWAYS dress a grinding wheel after installation w...

Page 27: ...s of oil placed on either side of the V block on a weekly basis The Chuck Collar Area This area should only be lubricated with Automatic Transmission Fluid Use a spray bottle and use sparingly If you notice the chuck opening and closing slowly or in a sticky motion use a little ATF spray and actuate the open can close switch several times to spread the lubrication DO NOT USE WD 40 or any other SPR...

Page 28: ...Kwik Way SVS II Deluxe Valve Refacer Copyright 2018 by Irontite Products Inc All Rights Reserved Rev 180802 pg 28 SPINDLE ASSEMBLY DRAWING 115V 230V 60HZ AND 220V 50HZ ...

Page 29: ...036 00 Wheel Guard Plate 1 18 001 1949 95 Motor 115 230 60 50 1 1 19 000 0165 19 1 4 20 x 1 2 Soc Hd C S 4 20 000 1155 25 1 4 SAE Washer 4 21 000 1170 48 1 4 Int Lock washer 4 22 012 1000 20 Motor Sheave 60Hz 1 22 012 1000 30 Motor Sheave 50Hz 1 23 000 0485 24 1 4 20 x 3 8 Nylon Soc Cup S S 1 24 012 1004 00 Grinding Wheel Nut 1 25 012 1003 00 Grinding Wheel Bushing 1 26 010 0709 00 Grinding Wheel ...

Page 30: ...Kwik Way SVS II Deluxe Valve Refacer Copyright 2018 by Irontite Products Inc All Rights Reserved Rev 180802 pg 30 CHUCK BEARING SLIDE ASSEMBLY ...

Page 31: ... 18 003 0050 00 Cap 1 19 000 7205 65 1 4 x 1 1 2 Roll Pin 1 20 012 3012 00 Chuck Bearing Slide 1 21 000 1900 12 1 4 Snap Lid Oiler 5 22 012 1032 10 Chuck Hand wheel 1 23 000 0168 02 5 16 18 x 1 socket head cap screw 2 24 060 1102 50 Thumbscrew Assembly 2 25 013 0370 19 Chuck Valve Stop 4mm H P Chuck 1 26 000 0171 24 1 4 20 x 7 8 socket head cap screw 2 27 000 0515 35 5 16 24 x 1 4 brass set screw ...

Page 32: ...Kwik Way SVS II Deluxe Valve Refacer Copyright 2018 by Irontite Products Inc All Rights Reserved Rev 180802 pg 32 CHUCK BEARING SLIDE ASSEMBLY ...

Page 33: ...m Chuck only 1 25 013 0370 19 Chuck Valve Stop 4mm H P Chuck 1 57 000 1100 32 12mm Hex Nut Zinc Plated 1 58 000 0590 99 8 32 x 3 8 Socket Head Cap Screw 3 60 000 1155 25 1 4 SAE Washer 4 64 000 6611 12 Hand wheel Decal Std 1 64 000 6611 19 Hand wheel Decal Metric 1 65 000 1740 09 Felt Strip cut into two pieces 1 67 003 0076 50 Speed Controller Knob 1 See part description for part number that appli...

Page 34: ...Kwik Way SVS II Deluxe Valve Refacer Copyright 2018 by Irontite Products Inc All Rights Reserved Rev 180802 pg 34 BASE ASSEMBLY ...

Page 35: ... Socket Head Cap Screw 1 21 013 1002 09 5 8 Nylon Pivot 1 22 000 1020 08 1 4 20 Hex Full Nut 1 23 013 1003 06 Crankshaft Arm 1 24 000 0487 63 5 16 18 x 5 16 Socket Cup Set Screw 1 25 025 0251 05 Stop Screw 1 26 000 7000 37 1 4 x 1 1 4 Dowel Pin 1 27 000 0485 10 1 4 20 x 3 16 Socket Cup Point Set Screw 1 28 000 0482 67 Set screw 1 29 000 1034 89 5 16 18 Hex Full Nut 1 30 000 1035 35 1 2 13 Hex Full...

Page 36: ...Kwik Way SVS II Deluxe Valve Refacer Copyright 2018 by Irontite Products Inc All Rights Reserved Rev 180802 pg 36 BASE ASSEMBLY CONTINUED ...

Page 37: ...rm Attachment Base 1 56 000 0167 64 5 16 18 x 1 2 Soc Hd C S 1 57 000 1158 00 1 1 8 x 3 4 x 3 16 Felt Washer 1 58 000 1624 00 Thrust Needle Bearing 1 59 012 1051 50 New Style Gib 1 60 012 1064 08 Feed nut Assembly Standard 1 61 000 1142 12 3 4 Machine Bushing 1 62 000 0488 70 5 16 18 x 1 Nyl Soc SS 3 63 012 1007 01 Clamp Lever 1 64 000 1502 74 1 2 x 3 1 2 Pipe Nipple TBE 2 65 000 1540 83 1 2 Black...

Page 38: ...3 000 0760 82 Thumbscrew Cap 5 16 1 14 081 0911 02 Cam Setscrew plug 1 15 000 0500 16 1 4 20 X 1 4 Socket Flat Point Setscrew 1 16 025 0635 46 Valve Stop 1 17 025 0636 00 Valve Stop Rod 1 18 060 1130 05 5 16 24 x T Bar Assembly 1 Standard on 50 Hertz Machine Only These are Optional Items and can be purchased separate from the Assembly The Valve Stop with 3 additional parts listed above is used to ...

Page 39: ...Plate 1 5 000 1170 48 1 4 Int Lock washer 2 6 000 0213 77 1 4 20 x 3 8 Rd Head MS 2 7 003 0002 49 1 4 O D Tubing 1 Ft 8 Gasket now included with parts 3 9 000 1563 37 10 32 Max 1 4 Str Fitting 1 10 000 1563 29 3 Way Air Valve 1 11 000 1599 25 1 4 x 1 4 Tube In Str Fitting 1 12 000 1559 34 Bulkhead Fitting 1 13 000 1530 28 1 4 x 90 Street Elbow 1 AIR VALVE SWITCH ASSEMBLY PN 012 1094 00 Pictured on...

Page 40: ...lant Nozzle Mount 1 4 000 1563 68 Plug Valve 2 5 000 1550 10 Flex Nozzle 2 6 000 1567 95 90 Elbow 1 4 Barb x 1 8 MP Brass 1 7 000 1551 10 Barbed Tee 1 4 ID Hose 1 8 000 1560 34 1 4 Barb x 1 4 FPT Brass Fitting 1 9 000 1919 00 Pump 115 50 60 1 1 9 000 1919 04 Pump 220 50 60 1 1 10 004 0018 57 1 4 ID x 1 16 Wall PVC Tube 2 1 2 Long 1 Ft 11 004 0018 57 1 4 ID x 1 16 Wall PVC Tube 10 Long 1 Ft 12 004 ...

Page 41: ...000 0482 67 10 24x3 16 Socket cup Point Set Screw 1 3 000 0500 16 20 x Socket Flat Point Set Screw 1 4 000 1800 76 Compression Spring 1 5 012 1006 20 Diamond Holder Bracket 1 6 023 0129 55 Valve Diamond 1 7 031 1118 03 Brass Plug 1 Note Setscrew Item 2 is used to retain the Plug Item 7 until the Diamond Item 6 is in position After this bracket assembly is installed the setscrew must be backed off ...

Page 42: ...Kwik Way SVS II Deluxe Valve Refacer Copyright 2018 by Irontite Products Inc All Rights Reserved Rev 180802 pg 42 115V 60HZ 1PH WIRING DIAGRAM ...

Page 43: ...6 14GA 10 2 10 Term Hook 12 10GA 10 1 11 000 1252 18 Lamp Fixture no bulb 1 001 1601 76 115v LED Light Bulb not shown 1 12 000 1261 01 Set Cord 115V 16 3 1 13 000 1919 00 Pump 115V 50 60Hz Ph 1 14 000 2401 92 Wire Blue 16GA 20 Lg 2 Ft 15 000 2403 38 Cord 16 3SJO 28 Lg 3 Ft 16 000 2403 70 Cord 16 4SJO 55 Lg 5 Ft 17 000 2410 24 Wire Black 16GA 4 Lg 2 18 000 2410 59 Wire Red 16GA 4 Lg 1 19 800 8063 3...

Page 44: ...Kwik Way SVS II Deluxe Valve Refacer Copyright 2018 by Irontite Products Inc All Rights Reserved Rev 180802 pg 44 220V 50HZ 1PH WIRING DIAGRAM ...

Page 45: ...4 10 Term Hook 16 14 10 2 11 Term Hook 12 10 10 1 12 000 1252 18 Lamp no bulb 1 13 000 2403 38 Set Cord 16 3SJO 1 14 Included w 23 Fuse AGC 6 Amp 1 15 000 1919 04 Pump 220V 50 60Hz 1Ph 1 16 000 2401 92 Wire Blue 16GA 20 Lg 2 Ft 17 000 2403 38 Cord 16 3SJO 28 Lg 3 Ft 18 000 2403 70 Cord 16 4SJO 55 Lg 5 Ft 19 000 2410 24 Wire Black 16GA 4 Lg 2 Ft 20 000 2410 59 Wire Red 16GA 4 Lg 1 Ft 22 800 8063 33...

Page 46: ...Kwik Way SVS II Deluxe Valve Refacer Copyright 2018 by Irontite Products Inc All Rights Reserved Rev 180802 pg 46 012 0140 20 WIRING HARNESS ...

Page 47: ...15 8 Term Hook 16 14GA 10 2 9 Term Spade 16 14GA Ins 6 1 10 000 1243 11 3303 Cable Conn K O 1 12 000 1261 01 16 3 SJO Cord Set 115v 1 15 000 2403 38 Cord 16 3 SJO 28 Lg 2 4 Ft 16 000 2403 70 Cord 16 4 SJO 55 Lg 4 6 FT 17 000 2410 24 Wire Jumper 16GAx4 LG Bk 8 Ft 18 000 2410 59 Wire 16GA 4 Lg Red 8 34 Ft 19 000 2602 26 Bushing Strain Relief 90º 2 20 000 1100 32 12mm Hex Nut Zinc Plated 2 21 000 114...

Page 48: ...rline System assures alignment and accuracy providing precision valve refacing VALVE REFACER CHUCKS MODEL VALVE STEM DIAMTER CAPACITY ITEM NUMBER SVS II D 0 157 0 5625 4 0 mm 14 3 mm 012 1575 00 w disassembly tool 012 1575 94 without tool SVS II D 7 16 13 16 11 11 mm 20 6 mm 012 1025 21 Requires 012 1035 21 Chuck Yoke Existing machines in the field may require the chuck cover to be modified to fit...

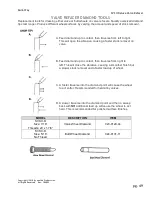
Page 49: ... faster stock removal on valve B Feed diamond up to contact then traverse from right to left This will close the abrasive causing a smoother finish but a slower stock removal and a faster load up of wheel C A faster traverse into the diamond point will cause the wheel to act softer Recommended for hard alloy valves D A slower traverse into the diamond point and then a sweep back with NO additional...

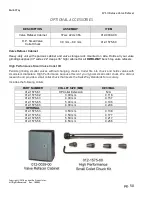
Page 50: ...op valve refacers High Performance Small Valve Collet Kit Permits grinding smaller valves without changing chucks Collet fits into chuck and holds valves with small stem diameters High Performance because this isn t your typical small collet chuck We did our research and provide a small collet chuck that meets the Kwik Way standards for accuracy Includes the following collets PART NUMBER COLLET SI...

Page 51: ...place 3 Diamond tool holder not locked tight 4 Blunt diamond Replace 5 Poor finish on valves Chatter 1 Check wheel dress 2 Chuck out of adjustment 3 Slide out of adjustment 4 Spindle bearings worn 5 Chuck Motor Belt too tight should be as loose as possible without it slipping NOTE See page 18 on varying wheel performance 6 Grinding sounds heavier on one side of the valve face over the other 1 Chec...

Page 52: ...Rev 180802 pg 52 by Irontite Products Inc Manufacturer of Kwik Way Van Norman and Irontite Brands 2525 18th St SW Cedar Rapids IA 52404 USA PO Box 9877 Cedar Rapids IA 52409 9877 USA 319 377 9421 319 377 9101 FAX 800 553 5953 service irontite com www kwik way com www van norman com www irontite com ...

Reviews: