background image

3        

For more information, visit global.irobot.com

EN

Dual Mode Virtual Wall

®

 Barrier   

(compatible with all models) 

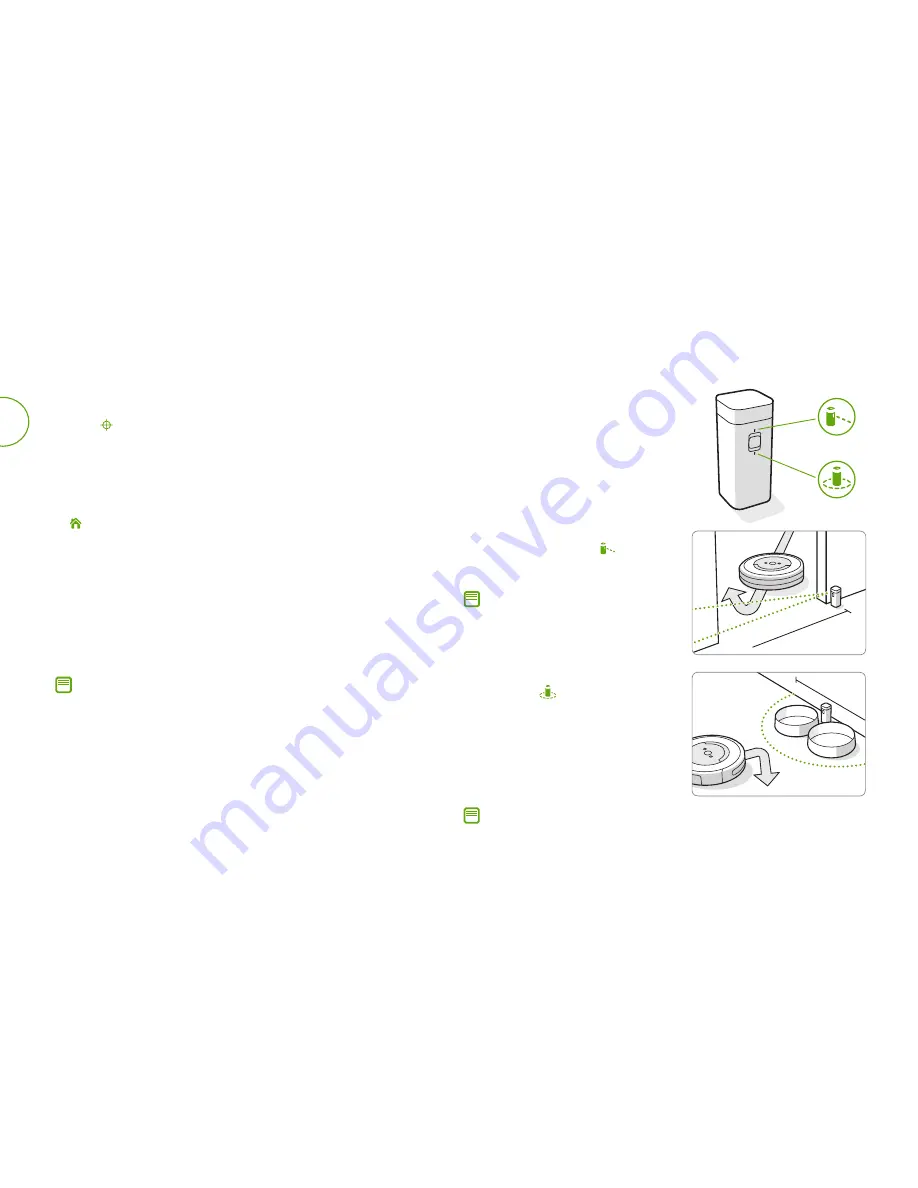
Use the Dual Mode Virtual Wall

®

 barrier to  

keep the robot in the places you want  

cleaned — and out of the ones you don’t. 

It creates an invisible barrier that only the  

robot can see. You can leave the device in  

position between cleanings. 

Choose the mode to meet your needs:

Virtual Wall Mode:


When the switch is in 

the Virtual Wall position ( 

), the device 

will create a linear barrier to block  

openings up to 10 feet (3 meters). 

Note: 

This barrier gets wider as it gets  

further from the device (refer to illustration). 

Accessories

10ft 

/ 3m

24in / 60 cm

Halo Mode:


Toggle the switch to the 

Halo position (

), to create a circular 

barrier. This will prevent the robot from 

approaching zones you want to protect 

such as a pet bowl, vase, or under a desk. 

The Halo barrier extends approximately 

24 inches (60 centimeters) from the  

center of the device.

•   You can use the Spot Clean feature to have the robot go after 

specific spills. Just place the robot in the center of the debris and 

press   (Spot Clean). The robot will clean the area by spiraling 

outward about 3 feet (1 meter) and then spiral inward to end 

where it started.

•   Keep the robot on the Home Base

®

 charging station so it’s always 

ready to clean when you need it. If you need to store the robot off 

of the charging station, turn off the battery by removing the robot 

from the Home Base charging station and holding down the 

     (Home) button for 9 seconds, all indicators will turn off and you 

will hear an audible tone, then store the robot in a cool, dry place. 

To wake the robot up and turn on the battery, plug in the Home 

Base charging station and place the robot on the  

charging station.

•   When the robot is charging, it will turn off the indicator lights  

to save energy. You can check the status by pressing the CLEAN 

button. The Battery Indicator icon will illuminate amber when  

the battery is charging, and green when the battery is fully 

charged.Battery charge status can also be viewed in the  

iRobot HOME App.


Note: 

After each use, empty the bin and clean the filter. 

Note: 

The batteries will last about 8-10 months under normal use. If you are not 

planning to use your Virtual Wall barrier for an extended period of time, be sure 

to turn the switch to the Off, or middle position.

Summary of Contents for Roomba e5

Page 1: ...d above and persons with reduced physical sensory or mental capabilities or lack of experience and knowledge if they have been given supervision or instruction concerning use of the appliance in a safe way and understand the hazards involved Children shall not play with the appliance Cleaning and user maintenance shall not be made by children without supervision Safety Information Important Safety...

Page 2: ...ur robot is not a toy Small children and pets should be supervised when your robot is operating Do not sit or stand on your robot or Home Base charging station Do not use unauthorized chargers Use of an unauthorized charger could cause the battery to generate heat smoke catch fire or explode Your robot comes with a region approved power supply cord and is designed to be plugged into a standard hou...

Page 3: ...ries may burst causing injury Always contact Customer Care for the correct replacement of your battery Battery Charger model 17070 Input AC 100 240V 50 60Hz 0 68A 33W Output DC 20 5V 1 25A To prevent the risk of your robot falling downstairs ensure that the Home Base Charging Station is placed at least 4 feet 1 2 meters away from stairs NOTICE Product may not be used with any type of power convert...

Page 4: ...ON Sensor Charging Contacts Caster Wheel Cliff Sensor Cliff Sensor Cliff Sensor Edge Sweeping Brush Multi Surface Brushes Cliff Sensor Brush Frame Release Tab Brush Caps Dust Bin and Filter Home Base Buttons Indicators Home Button CLEAN Power Button Troubleshooting Indicator Battery Indicator Spot Clean Button Wi Fi Indicator About your Roomba Robot Vacuum Bin Release Button ...

Page 5: ...thoroughly The CLEAN button will pulse when the robot engages Dirt Detect mode When finished the robot will continue its cleaning job Place the Home Base charging station WARNING To prevent the risk of your robot falling downstairs ensure that the Home Base Charging Station is placed at least 4 feet 1 2 meters away from stairs Place the Home Base in an open uncluttered area leaving the following d...

Page 6: ... debris and press Spot Clean The robot will clean the area by spiraling outward about 3 feet 1 meter and then spiral inward to end where it started Keep the robot on the Home Base charging station so it s always ready to clean when you need it If you need to store the robot off of the charging station turn off the battery by removing the robot from the Home Base charging station and holding down t...

Page 7: ...eplaced if visible wear appears Emptying the Bin Open bin door to empty bin Press bin release button to remove bin 1 2 Place bin back in the robot 3 Cleaning the Filter Release the bin Remove the filter by grasping both ends and pulling out Shake off debris by tapping the filter against your trash container Reinsert filter with ridged grips facing out Place bin back in the robot 1 2 3 Important Th...

Page 8: ...y on the front wheel to remove it Remove any debris from inside the wheel cavity Reinstall all parts when finished Make sure the wheel clicks back into place Use a coin or small screwdriver to remove the screw holding the Edge Sweeping Brush in place Remove the Edge Sweeping Brush clean the brush and the brush post and then reinstall the brush Important A front wheel clogged with hair and debris c...

Page 9: ...rushes Remove any hair or debris from the square and hexagonal pegs on the opposite side of the brushes Remove the bin from the robot and clear any debris from the vacuum path Reinstall the brushes in the robot Match the shape of the brush pegs with the shape of the brush icons in the cleaning head module 1 2 3 4 5 Cleaning the Sensors and Charging Contacts Wipe sensors and charging contacts with ...

Page 10: ...ity You can put the robot in a further reduced power state when not in use For instructions and more details on this Reduced Power Standby Mode refer to the iRobot HOME App Lithium Ion Battery For best results only use the iRobot Lithium Ion Battery that comes with your Roomba robot vacuum WARNING Lithium ion batteries and products that contain lithium ion batteries are subject to stringent transp...

Page 11: ...es This information can also be found in the iRobot HOME App If you need further assistance call our Customer Care team at 877 855 8593 iRobot Customer Care Hours Monday to Friday 9AM 9PM Eastern Time Saturday and Sunday 9AM 6PM Eastern Time Outside USA Canada Visit global irobot com to Learn more about iRobot in your country Get hints and tips to improve your Roomba robot vacuum s performance Get...

Page 12: ...ed in accordance with the instructions may cause harmful interference to radio communications However there is no guarantee that interference to radio communication will not occur in a particular installation If this equipment does cause harmful interference to radio or television reception which can be determined by turning the equipment off and on the user is encouraged to try to correct the int...

Reviews: