IPU 40151 Issue 1
4 of 16
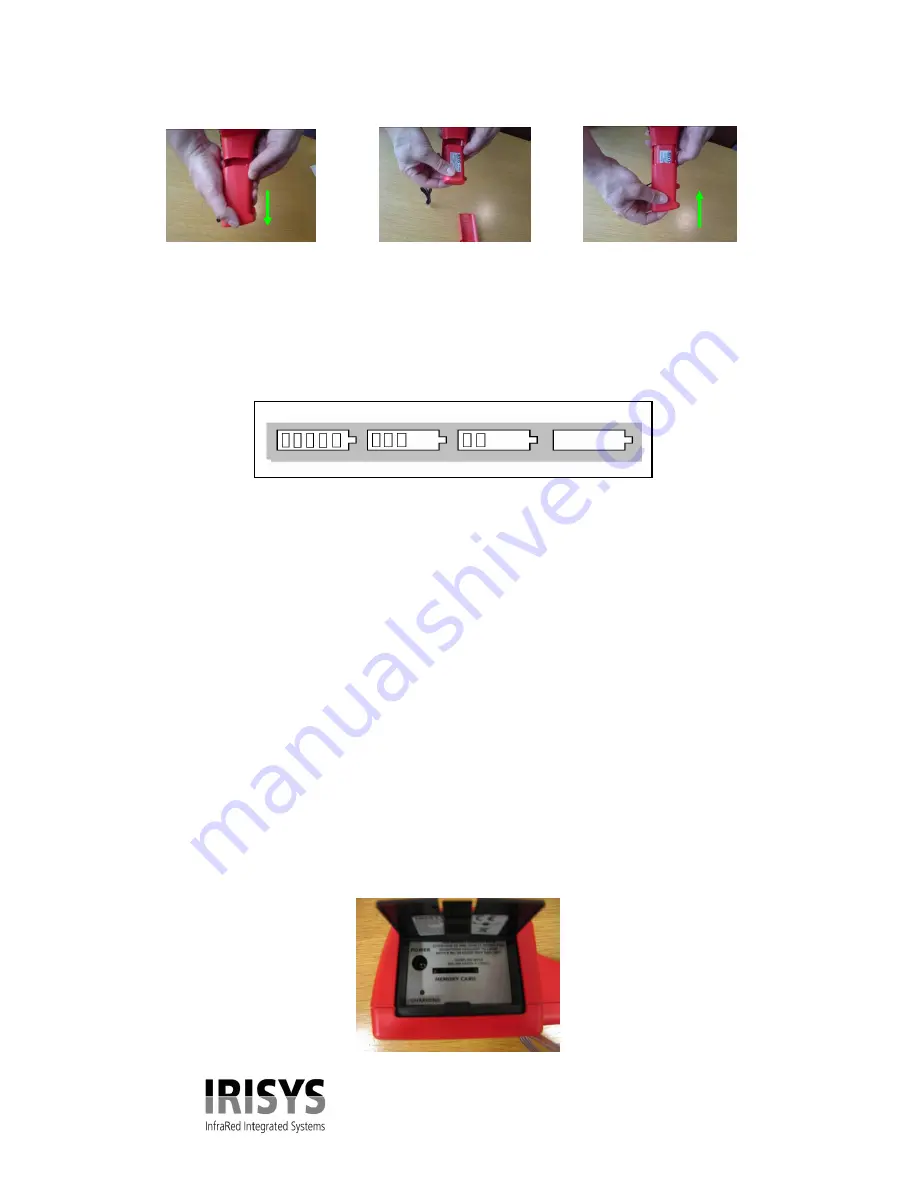
Figure 2.
Inserting the Rechargeable Battery.
Remove Battery Cover Insert Battery Replace Battery Cover
1.5 Battery Recharge Time.
The rechargeable battery will power the IRI 1020 thermal imager for approximately 6 hours.
The battery indicator appears on the screen when the imager is switched on. It has the following four
stages and each stage corresponds to approximately two hours of operation as seen in figure 3.
Figure 3.
Battery Indicator Levels
.
CAUTION: If the IRI 1020’s battery indicator flashes, the battery power is running low and it needs
to be charged or replaced within 10 minutes.
1.6 Using AC Mains Power.
1.
Make sure the thermal imager is turned off.
2.
Connect the provided 12V power supply into the socket on the side of the IRI 1020 imager as
seen in figure 4.
3.
Attach the appropriate supplied regional adapter to the power supply.
4.
Plug the power supply into a mains socket.
5.
Switch on the thermal imager.
CAUTION: When using AC mains, use only the power supply included with the IRI 1020. Using
other power supplies may damage the IRI 1020 Thermal Imager.
NOTE:
The mains power supply included with the IRI 1020 is for powering the IRI 1020; it
will also recharge the batteries.
1.7 Battery Charging.
The IRI 1020’s battery can be charged in the imager by inserting the included 12V power supply into
the DC socket under the door on the side of the IRI 1020 imager, as seen in figure 4. It takes
approximately 6 hours to fully charge a fully depleted battery if the imager is switched off. Charging
the battery with the imager switched on takes longer.
Figure 4.
Connecting the Mains AC Power Supply.
6hrs
4hrs
2hrs
0hrs


