background image

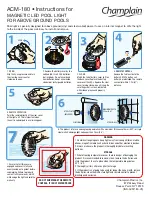
(178)  MODEL SF10110 SAND FILTER PUMP  ENGLISH  7.5” X 10.3”  PANTONE 295U  07/08/2012

178


SAVE THESE INSTRUCTIONS

Page 23

English

 MAINTENANCE

1. 

Before emptying your pool for long term storage, or relocation, be sure the water is    


directed towards an acceptable drain water receptacle away from the house. Check local  


regulations for specific directions regarding disposal of swimming pool water.

2.

  Switch off the unit, and disconnect power cord from electrical outlet.

3.

  When the pool is empty, disconnect all hoses from pump and plunger valves and  


remove the strainers/plunger valves from the pool wall.

4.

  In a counter clockwise motion unscrew the drain valve cap 

(9) 

from the drain valve


to  


thoroughly drain the tank. The drain valve is located at the bottom of the filter tank. 

5.

  Disassemble the pump motor from the tank base.

6.

  Leave sand filter pump pieces and hoses outside to thoroughly air dry.

7.

  Coat the following o-rings and washers with petroleum jelly for long term storage:


•  L-shape o-ring 

(11).


•  o-ring A 

(18).


•  Pump hose O-rings 

(22)

.


•  Strainer valve assembly step washers 

(23)

.


•  Flat strainer rubber washers 

(25)

.

8. 

Depress the 6-way valve handle and rotate so as to set the pointer on the valve top    


“N” position. This allows the water to drain from the valve. Leave the 6-way valve in this  


inactive position.

9.

  It is best to place all dry pieces and pump motor in the original packaging for storage. To   


avoid condensation or corrosion problem, do not cover or wrap pump motor with plastic bags.

10. 

Store the pump motor and accessories in a dry place. The storage's temperature  


should be controlled, between 0 degrees Celsius (32 degrees Fahrenheit) and 40    


degrees Celsius (104 degrees Fahrenheit).

POOL CARE & CHEMICALS 

• 

All pools require care to keep the water clear and hygienically clean. With proper 


chemical control, your filter will help attain this objective. Consult your pool supply dealer  


for instructions regarding the proper use of chlorine, algaecide and other chemical    


agents required for sparkling clear water.

• 

Keep pool chemicals away from children.

• 

Do not replenish chemicals in pool while pool is occupied. Skin or eye irritations could  

 occur.

• 

Daily pH checking and chemical treatment of the water is very important and cannot be  


overemphasized. Chlorine, algaecide and maintenance of proper pH levels are required  


when filling the pool as well as during the season. Consult your local swimming pool   


supply store for instructions.

• 

The season's first filling of the pool may have brackish water requiring extra water 


additives and extra filtering time. Do not allow swimming in pool until the pH level is 


balanced. Consult your local swimming pool supply store for instructions.

• 

Chlorinated water may damage lawns, gardens or shrubbery as children play in the pool  


and  splash water outside the pool. Lawn areas underneath the pool liner will be  


destroyed. Note that some types of grass may grow through the liner.

• 

Filter run time depends on pool size, weather and usage level. Experiment with various  


run times so as to produce clean clear water.

LONG TERM STORAGE & WINTERIZATION

CAUTION

Concentrated chlorine solutions may damage the pool liner. Always follow the 

chemical manufacturer’s directions, and the health and hazard warnings.

CAUTION

Allowing the water to freeze will damage the sand filter and void the warranty.  

If anti-freeze solution is needed, use only propylene glycol. Propylene glycol is 

non-toxic and will not damage plastic system components; other anti-freezes 

are highly toxic and may damage plastic components in the system.

Summary of Contents for Krystal Clear SF10110

Page 1: ...ts available at fine retailers or visit our website Due to a policy of continuous product improvement Intex reserves the right to change specifications and appearance which may result in updates to th...

Page 2: ...CONTENTS Warnings 3 Parts List References 4 8 Setup Instructions 9 16 Product Specifications 11 Operating Instructions 17 19 Intex Pools Operating Time Table 20 Non Intex Pools Operating Time Table 21...

Page 3: ...unit to electric supply provide a properly located outlet Do not attempt to plug in or unplug this product while standing in water or when your hands are wet Do not use an appliance leakage current i...

Page 4: ...LISH 7 5 X 10 3 PANTONE 295U 07 08 2012 178 SAVE THESE INSTRUCTIONS Page 4 English PARTS LIST NOTE Drawings for illustration purpose only Actual product may vary Not to scale 7 1 9 4 5 2 6 8 10 11 12...

Page 5: ...PANTONE 295U 07 08 2012 178 SAVE THESE INSTRUCTIONS Page 5 English PARTS LIST NOTE Drawings for illustration purpose only Actual product may vary Not to scale PARTS LIST continued 23 25 22 24 26 27 28...

Page 6: ...tested and found to comply with the limits for Class B digital device pursuant to part 15 of the FCC Rules These limits are designed to provide reasonable protection against harmful interference in a...

Page 7: ...TS REFERENCE PARTS REFERENCE continued Before assembling your product please take a few minutes to check the contents and become familiar with all the parts NOTE Drawings for illustration purpose only...

Page 8: ...13 SAND FILTER INTERCONNECTING HOSE 1 11390 14 LEAF TRAP NUT 1 11479 15 LEAF TRAP O RING 1 11232 16 BASKET 1 11260 17 FILTER HOUSING NUT 1 11261 18 L SHAPE O RING 1 11412 19 SEDIMENT RELEASE VALVE 1 1...

Page 9: ...om the inside of the pool liner insert the connector 26 into one of the pre cut holes with the washer remaining on the connector to be placed against the inside of the liner wall 4 Before assembly lub...

Page 10: ...iner nut 24 facing the outside wall of the liner in a clockwise motion screw the strainer nut 24 back onto the threaded connector 26 see drawing 6 5 Finger tighten the adjustable pool inlet nozzle 27...

Page 11: ...sult your local pool service specialist for details TOOLS REQUIRED One 1 Phillips screwdriver Pump location and mounting The system must be installed on a solid level and vibration free base Provide a...

Page 12: ...ing 14 2 NOTE Ensure the pre filter housing water inlet hose connection is facing towards the pool IMPORTANT Some countries especially in the European community require the product to be secured to th...

Page 13: ...top of the center pipe Pour the sand into the tank at a slow rate see drawing 15 2 Fill the tank approximately half way remove the sand shield 6 from the top see drawing 16 3 Evenly distribute the sa...

Page 14: ...o valve is aligned with the motor outlet see drawing 20 SETUP INSTRUCTIONS SETUP INSTRUCTIONS continued WARNING Improper tank valve and clamp assembly could cause the valve and clamp to blow off and c...

Page 15: ...nozzle Ensure the hose nuts are securely tighten 3 The third hose connection port drain waste outlet on the 6 way valve shall be directed to a proper draining receptacle using a hose or pipe not provi...

Page 16: ...is in place Connect adaptor B 28 to plunger valve union 3 Remove wall plug and then insert the strainer 29 31 into the lower position of protruding hose connection and the nozzle 29 30 into the upper...

Page 17: ...ng 23 Normal filtration and regular vacuuming of pool From pump through filter media to pool BACKWASH see drawing 24 Reverses water flow to clean filter media From pump through filter media to valve w...

Page 18: ...directed to a proper draining receptacle 3 Ensure the pump is off depress the 6 way valve and turn it to the BACKWASH position see drawings 24 29 IMPORTANT To prevent damage to the 6 way valve always...

Page 19: ...e reading is in the yellow zone it is time to backwash the sand media see BACKWASH under initial startup and operation section Vacuuming device i e Intex auto pool cleaner attached to the system may a...

Page 20: ...18 x 48 549cm x 122cm 5455 20647 6 18 x 52 549cm x 132cm 5894 22309 6 ROUND METAL FRAME POOL 12 x 36 366cm x 91cm 2086 7896 4 15 x 36 457cm x 91cm 3282 12422 4 15 x 42 457cm x 107cm 3861 14614 4 15 x...

Page 21: ...RATING TIME TABLE Water Capacity Sand filter pump operating time For one cycle Gals Liters Hours 4 4 6 6 8 8 12 12 12 12 3000 4000 5000 6000 7000 8000 9000 10000 11000 12000 11355 15140 18925 22710 26...

Page 22: ...opening the sediment release valve 19 located on the lower side of the pre filter housing see drawing 32 4 In a counter clockwise motion unscrew the leaf trap cover 14 then remove the basket 16 and l...

Page 23: ...Fahrenheit POOL CARE CHEMICALS All pools require care to keep the water clear and hygienically clean With proper chemical control your filter will help attain this objective Consult your pool supply...

Page 24: ...nd ensure the o ring is in place Clean sand tank o ring with garden hose water Tighten the clamp with wrench supplied Contact Intex service center Tighten reinstall hose nut Ensure o ring L shape o ri...

Page 25: ...Super chlorinate with shock treatment Correct pH to your pool store s recommended level Vacuum pool bottom Maintain proper chlorine level Adjust pH level to the recommended level Run filter until wate...

Page 26: ...ompetent adult should be appointed as a lifeguard or water watcher especially when children are in and around the pool Learn to swim Take the time to learn CPR and first aid Instruct anyone who is sup...

Page 27: ...and all disputes regarding the provisions of this Limited Warranty shall be brought before an informal dispute settlement board and unless and until the provisions of these paragraphs are carried fort...

Reviews: