


4
truVision DVR 31 Quick Start Guide
Mouse toolbar
Use the USB mouse to navigate and make changes to
settings in the user interface. While in live, playback, or
sequence mode, point to the date and time display the
mouse toolbar, also right-click in Live mode for a drop-
down menu. This interface lets you carry out any
operation. Click (with the left mouse button) to confirm a
selection. Right-click to save and exit a screen. Connect
the mouse using the USB port located on the front panel.
Note:
To move the mouse toolbar to a different position,
drag the date and time display. Mouse sensitivity can be
adjusted in the Systems menu.
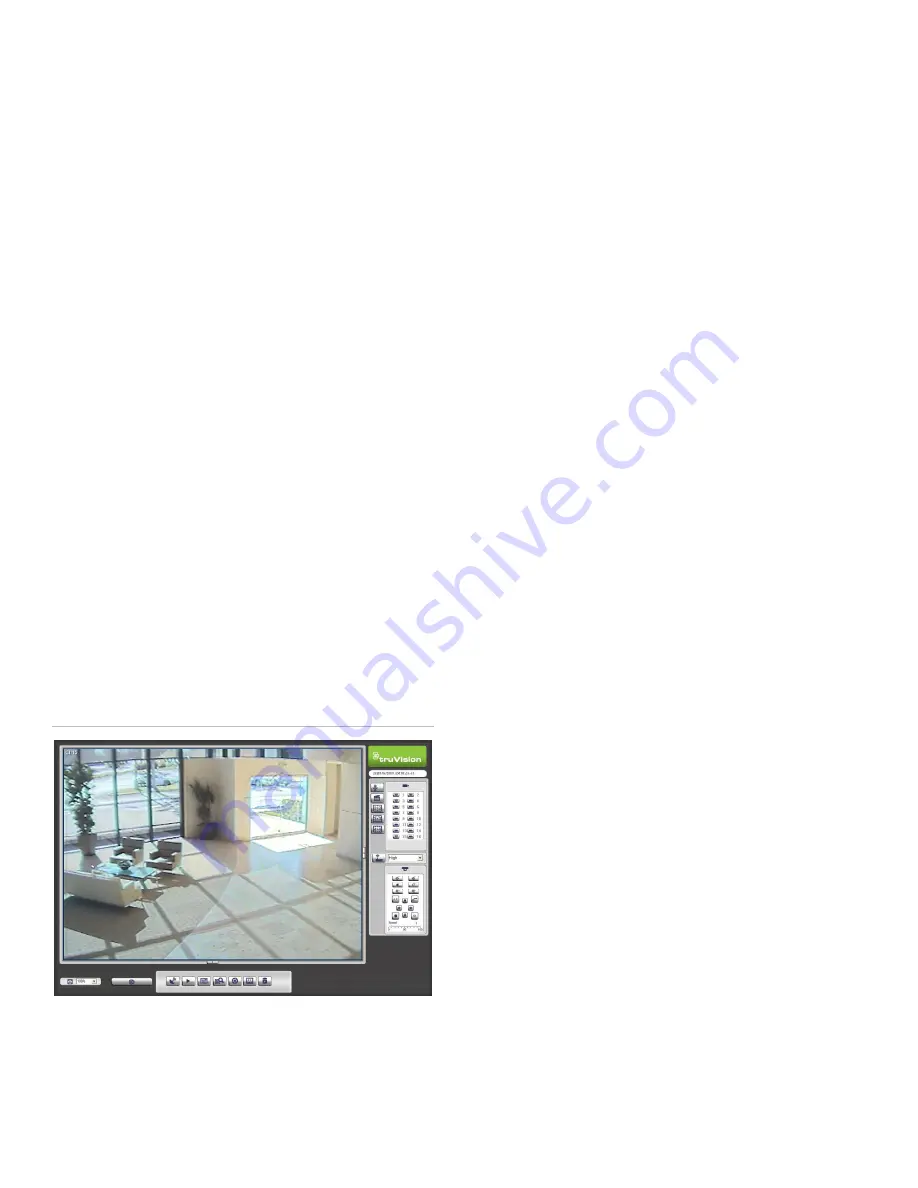
Web browser control
The DVR 31 Web browser lets you view, record, and
play back videos as well as manage all aspects of the
system from any PC with Internet access. The browser’s
easy-to-use controls give you quick access to all DVR 31
functions.
To access the DVR 31, open a Web browser and enter
the IP address assigned to the DVR 31 as a Web
address. On the log on screen, enter the default user ID
and password.
User ID: admin
Password: 1234
The Web browser uses the following defaults:
•
IP address - 192.168.1.82
•
Subnet mask - 255.255.255.0
•
Gateway address - 192.168.1.1
•
HTTP Port - 80
Figure 3: Web browser
Windows Vista and 7 users
Internet Explorer for Windows Vista and Windows 7
operating systems has increased security measures to
protect your PC from any malicious software being
installed. When using the DVR 31 Web browser
interface, you can install ActiveX controls to connect and
view video using Internet Explorer. However, you cannot
download data, such as video, images, and the DVR
player due to the increased security measure.
To have complete functionality of the Web browser
interface and the DVR player with Windows Vista and
Windows 7, do the following:
•
Run the Browser interface and the DVR player
application as an administrator in your workstation
•
Add the DVR’s IP address to your browser’s list of
trusted sites
Note:
The ‘Microsoft Visual C++ 2008 Redistributable
9.0.21022.8’ needs to be installed to the operating
system in order to assure that every browser component
is installed correctly. This is only required if the user
does not have already have the redistributable package,
otherwise it will prompt to install the package the first
time requiring the user to restart Internet Explorer or the
PC if necessary.
To add the DVR’s IP address to Internet Explorer’s
list of trusted sites:
1. Open Internet Explorer.
2. Click Tools, and then Internet Options.
3. Click the Security tab, and then select the Trusted
sites icon.
4. Click the Sites button.
5. Clear the “Require server verification (https:) for all
sites in this zone” box.
6. Enter the IP address or DDNS name in the “Add this
website to the zone” field.
7. Click Add, and then click Close.
8. Click OK in the Internet Options dialog screen.
9. Connect to the DVR 31 for full browser functionality.
DDNS settings
The DDNS function lets you define the device’s domain
name for access through a Web browser. Use the DDNS
Setting screen to define the settings for the DDNS
function.
To define the DDNS settings:
1. Verify you have a valid connection to the Internet.


