background image

truVision DVR 31 Quick Start Guide 

PTZ mode 

PTZ mode lets you control the PTZ operation of the 
cameras using any DVR 31 user interface. You can 
control PTZ cameras using the buttons on the front 
panel and IR remote control or by using the PTZ control 
buttons on the mouse toolbar. You must have PTZ 
control access privileges to enter PTZ mode. 

To enter PTZ mode: 

1.  Select a camera using a numeric button. 

2.  Press the PTZ button. The PTZ control interface 

displays. 

Note: 

You can only display the PTZ control interface 

while in live mode. 

PTZ control buttons 

When you enter PTZ mode, the PTZ control interface 
displays. In PTZ mode, the numeric buttons control 
additional PTZ functions. Table 10 below lists the front 
panel buttons and their PTZ control functions. 

Table 3: Front panel PTZ control function 

Front panel key 

8-channel     16-channel    

PTZ control 

8 8 

Zooms 

out 

5 16 

Zooms 

in 

4 15 

Focuses 

near 

7 7 

Focuses 

far 

6 6 

Closes 

iris 

3 14 

Opens 

iris 

Enter Enter 

Auto 

focus/iris 

Esc 

Esc 

Exits PTZ mode 

Enter Preset Dialog 


Logging on 

Use passwords to limit access to the DVR 31. Only 
authorized users should be able to modify menu settings 
or carry out certain tasks. 

The DVR 31 is shipped with one predefined user 
configured as the system administrator and seven 
predefined standard users. The default system 
administrator log on uses admin as the account name 
with a default password of 1234. The seven predefined 
standard users are labeled User1 to User7 with a default 
password of 4321 and level 4 access. Only the system 

administrator can manage users. The administrator can 
customize the standard users and allocate their access 
rights. 

You can modify the admin password but not the admin 
user name. We recommend that you change the admin 
password once you have completed the installation and 
setup to protect against unauthorized access. 

Caution: 

Keep the admin password in a safe place. If 

you should forget it, you must return the DVR 31 to the 
service center to be reconfigured. 

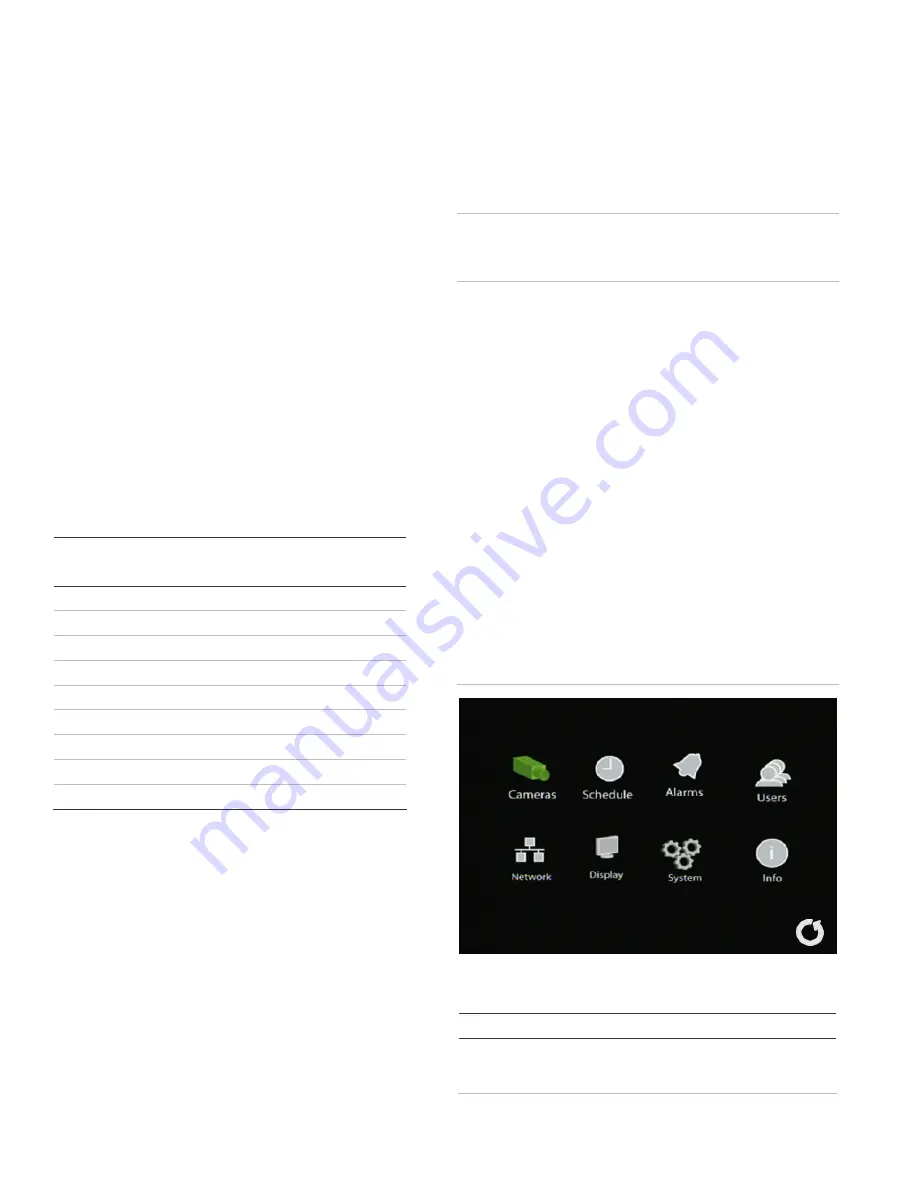
Overview of the main menu 

The main menu lets you set up the DVR 31 or change 
the default settings to suit your installation. You must be 
in live mode to access the main menu. Use the mouse, 
remote control, or front panel to navigate through the 
menu commands and display the configuration screens. 
To access the main menu, click Menu on the mouse 
toolbar or press the Menu button on the front panel or 
remote control. 

Access to different dialog screens varies depending on 
your access privileges. Most screens will only be 
available to system administrators. 

The main menu has eight commands. Each command 
displays a screen that lets you modify a group of DVR 31 
settings. 

Figure 5: Main menu 


Table 4: Main menu descriptions 

Command Description 

Cameras 

Configures camera settings including motion 
detection, PTZ, video image adjustments, covert, 
and camera title. 

Summary of Contents for truVision DVR 31

Page 1: ... truVision DVR 31 User Manual truVision DVR 31 Quick Start Guide truVision DVR 31 Quick Chart Video player application Record duration calculator Installation environment Refer to the user manual for detailed information but observe these important requirements Place the DVR 31 in a secure location Do not expose the unit to rain or moisture Setting up the DVR 31 To quickly put the DVR 31 into oper...

Page 2: ...es it after completing the setup Connecting the devices Use Figure 1 above as a visual guide to connect the various peripherals to the DVR 31 Resolution options 800 x 600 1024 x 768 1280 x 1024 720P and 1080P See Appendix A in the truVision DVR 31 User Manual for a list of compatible HDMI monitors Turning on the DVR 31 Turn on the DVR 31 using the power switch on the back panel When you turn on th...

Page 3: ...ow keys to change the value of a selected field Press Enter to confirm the selection or display additional screens 4 USB ports Connect USB devices 5 CD DVD drive Insert media for archiving Item Name Description 6 Archive button Begin archiving or display the Archive screen Press once to begin copying a video segment for export while in playback mode Press again to stop copying 7 Status LEDs Displa...

Page 4: ...install ActiveX controls to connect and view video using Internet Explorer However you cannot download data such as video images and the DVR player due to the increased security measure To have complete functionality of the Web browser interface and the DVR player with Windows Vista and Windows 7 do the following Run the Browser interface and the DVR player application as an administrator in your ...

Page 5: ...rol To archive recorded video using Quick Archive 1 Insert the backup device If using a USB memory drive insert the device into the USB port on the front panel If using a digital video disc DVD insert the disc into the DVD drive If both media are found in the DVR 31 the USB device takes precedence over the DVD 2 Press the Archive button on the front panel or the remote control The Quick Archive hi...

Page 6: ...ator log on uses admin as the account name with a default password of 1234 The seven predefined standard users are labeled User1 to User7 with a default password of 4321 and level 4 access Only the system administrator can manage users The administrator can customize the standard users and allocate their access rights You can modify the admin password but not the admin user name We recommend that ...

Page 7: ...ut for each camera with alarms 3 On the Alarms screen enable the buzzer if desired 4 On the Alarms screen ensure that Video Loss Protection is disabled for unused camera input channels 5 On the Display screen enable the event indicator to display an on screen indicator when an event occurs To set up motion alarms 1 On the Cameras screen use the Motion Detection command and functions to define moti...

Page 8: ...8 truVision DVR 31 Quick Start Guide DVR 31 screen map ...

Reviews: