TIP:
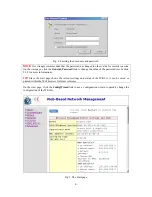
You can view the default gateway of the WIASA on the start page of the Web-based Net-
work Manager.
NOTE:
If the WIASA is set to be in
Router with a PPPoE-Based DSL/Cable Connection
or
Router with a Dial-up Connection
, it needs some time to establish a PPPoE or PPP link to the
ISP. Therefore, this step will fail but the WIASA will be triggered to establish a link to the ISP.
Wait for a few seconds, and then try again.
5. Type
“
ping
wiasa_1st_dns_server
”, where
wiasa_1st_dns_server
is a placeholder for the IP ad-
dress of the primary DNS server of the WIASA. Then press
Enter
.
If this DNS server responds, go to the next step; else, see Appendix B-2, “TCP/IP Settings Prob-
lems” for troubleshooting.
TIP:
You can view the primary and secondary DNS servers of the WIASA on the start page of
the Web-based Network Manager.
6. Type
“
ping
wiasa_2nd_dns_server
”, where
wiasa_2nd_dns_server
is a placeholder for the IP
address of the secondary DNS server of the WIASA. Then press
Enter
.
If this DNS server responds the client should have no problem with TCP/IP networking; else,
see Appendix B-2, “TCP/IP Settings Problems” for troubleshooting.
2.9. Installing the Print Client Components (Switch
Router)
The print server components on the WIASA work in conjunction with the print client components on
a client computer, and they communicate through TCP/IP. The print client components expose a
vir-
tual communication port
on the client computer, so that, on the client computer, the driver of the
printer must be configured to print to this virtual port. When an application on the client computer is
printing, the print data is sent through the virtual port by the print client components to the WIASA.
And then, the print data is directed to the printer, which is connected to the parallel port of the WI-
ASA, by the print server components.
To install the print client components on a client computer:
1. Connect the printer to the
Printer
port of the WIASA with a parallel cable.
2. Insert the companion CD-ROM disk of the WIASA into drive D of the client computer, where
“D” is the name of the CD-ROM drive; substitute the real name of your CD-ROM drive for “D” if
necessary.
3. Run
“
D:\PrntClnt\Setup.exe
” on the client computer.
4. Specify the IP address of the WIASA’s
LAN interfaces
when prompted by the setup program.
5. Restart Windows as prompted by the setup program.
6. Add a new local printer using “
Start, Settings, Printers, Add Printer
” and select the WIASA
Print Client port for the local printer within the Add New Printer Wizard.
7. Print a test page to check if the client computer can print to the printer that is connected to the
WIASA.
18

