


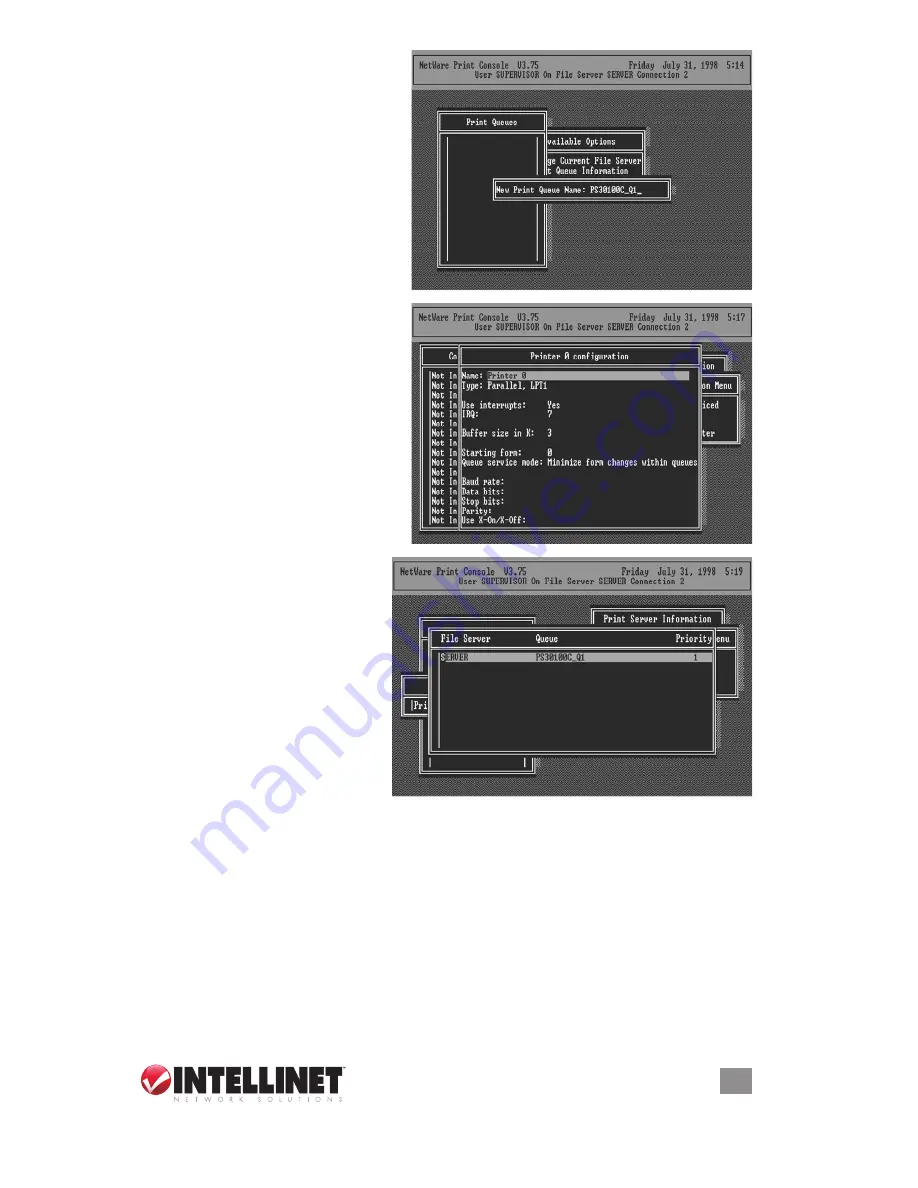
6. You’ve now successfully created
the print queue that your print
server will serve. Press the
escape key until the Available
options main menu is displayed.
7. Select “Print Server Information.”
8. Press the Insert key to add a new
NetWare print server object. The
print server name can be identical
to the PSxxxxxx name printed on
the label of the print server.
9. Press enter to select the newly
created print server.
10. Select “Print Server
Configuration.”
11. Select “Printer Configuration.”
12. Select “Printer 0” (or “Printer 1,”
“Printer 2”) and press enter, then
select “P1” (or “P2,” “P3”) in the
“Type” field.
NOTE:
If your print
server has only one port, you do
not need to configure this field.
13. Press escape, and answer
“Yes” to the “Save Changes?”
prompt.
14. Select “Queues Serviced by
Printer,” then select “Printer 0”
(or “Printer 1,” “Printer 2”) and
press enter.
15. Press Insert and add your
newly created print queue to
the list of queues serviced by
the printer. enter a priority
number for the queue service,
or press enter to accept the
default.
16. Repeatedly press escape to
exit the PCoNSole program.
17. Reset the print server so the changes take effect.
NOTE:
If the print server you have has multiple printer connectors, you may create
multiple print queues and printer objects. Your print server should now be ready to
use. You should be able to redirect printing to your print server using a CAPTURe
command such as the one shown in the previous section.
27
NT/2000/SERVER 2003
Summary of Contents for 509060
Page 1: ...1 Port USB Wireless Print Server user manual Model 509060 INT 509060 UM 0508 01...
Page 2: ......
Page 75: ......


