Hardware Installations and Upgrades
4.
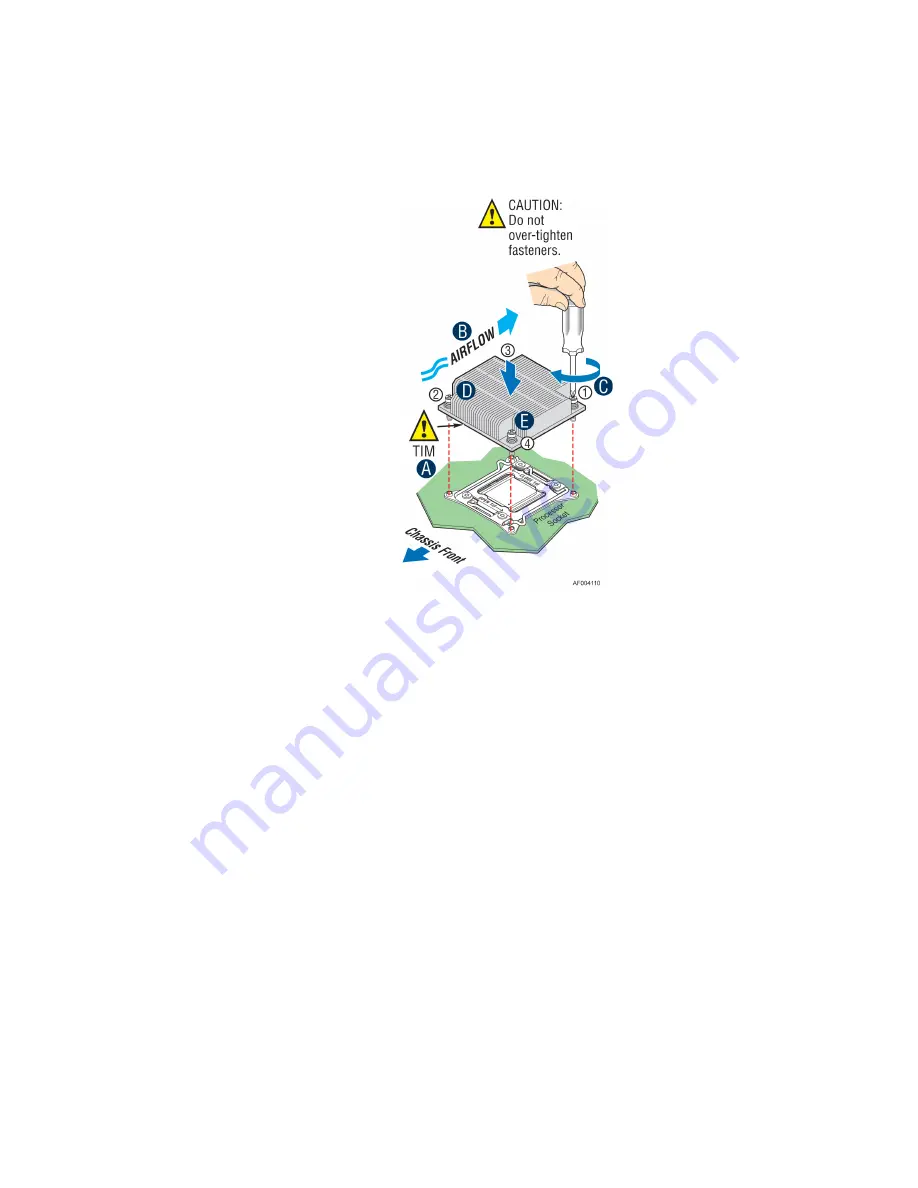
Proceed to screw 2 and engage screw threads by giving it two rotations and stop (see letter
D
).
Similarly, engage screws 3 and 4.
5.
Repeat steps
C
and
D
by giving each screw two rotations each time until each screw is lightly
tightened up to a maximum of 8 inch-lbs torque (see letter
E
).
Figure 46. Installing Processor Heatsink
Removing the Processor
1.
Remove the processor heatsink, see Figure 39
2.
Open the socket lever, see Figure 40
3.
Open the load plate, see Figure 41
4.
Remove the processor.
Installing and Removing the Memory
Before installing or removing the memory, please make sure following steps are performed.
1.
Ensure the AC power cord(s) are disconnected from the system.
2.
Remove the system cover. For instructions, see
3.
Remove the power supply modules. For instructions, see
Removing the Power Supply Module(s)
.
4.
Remove the PCI riser assemblies. For instructions, see
Removing the PCI Riser Assembly
5.
Remove the air duct. For instructions, see
Installing Memory
1.
Locate the DIMM sockets. Make sure the clips at either end of the DIMM socket(s) are pushed
outward to the open position (see letter
A
).
30
Intel
®
Server System R2000LH2/LT2 Service Guide


