19
19
Step 1:
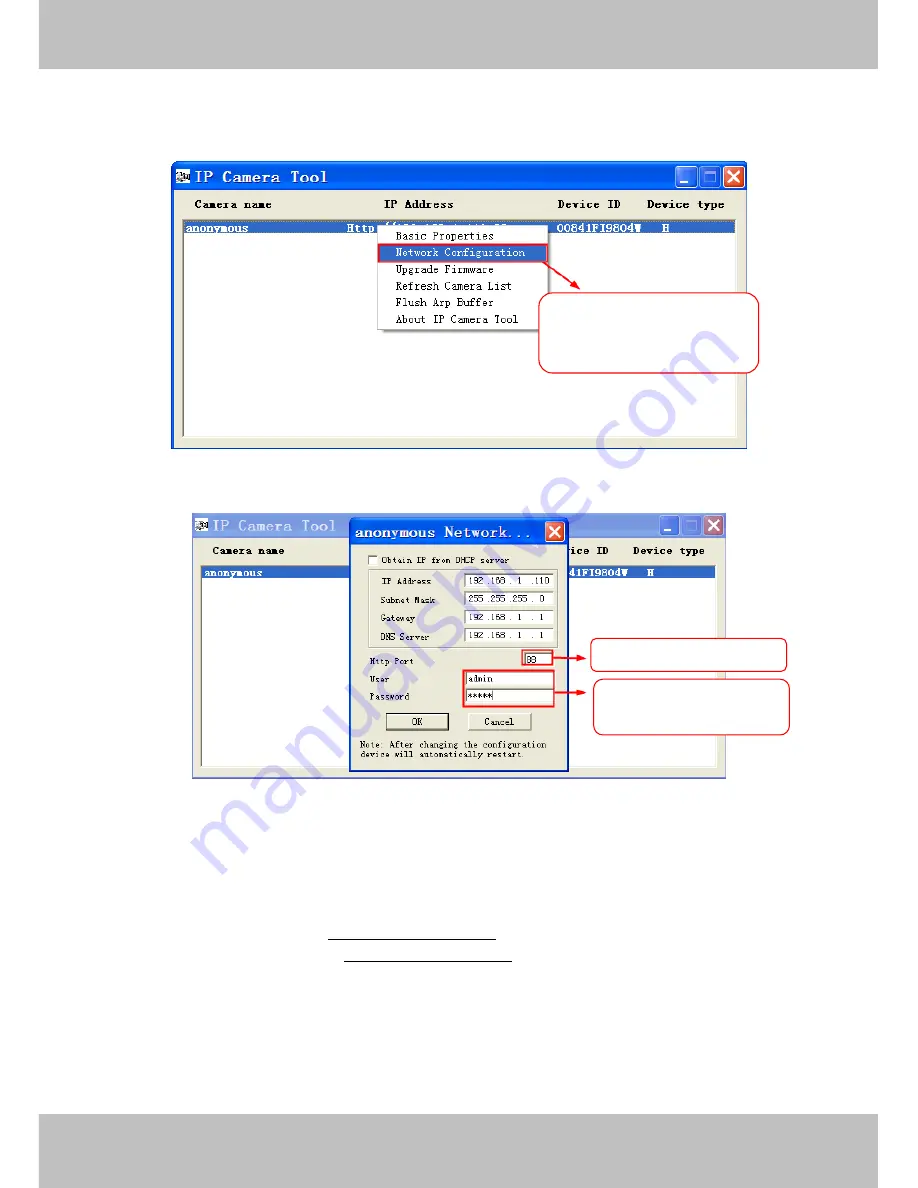
Open the IP Camera Tool, select the camera you would like to change the port of, right click on the IP
address, and click on ”Network Configuration”, this brings up the network configuration box.
Figure 2.4
Figure 2.5
Step 2:
Enter the username and password of the Administrator (default username is admin with a blank
password), and click “OK” to apply changes.
Step 3:
Wait around 10 seconds, you’ll see that the camera’s LAN IP address has changed. In our example it
was changed to 2000, so we see http://192.168.1.110:2000 in IP Camera Tool. Also, the LAN IP address is
now fixed at a static IP address of http://192.168.1.110:2000. This IP address will not change even if the
camera is powered off and back on, the camera will remain on this LAN IP address. This is very important that
a static LAN IP address is set, or you may have problems later with remote access and seeing the camera
remotely if the camera loses power and reconnects on a different LAN IP address. Make sure you set a static
LAN IP address!
Select which camera you’d
like to change the port for,
and right click
Modify the Http Port.
Enter the Username and
password, click OK.


