background image

Icon Appliance Adapter User’s Guide 


Page 5 of 15 


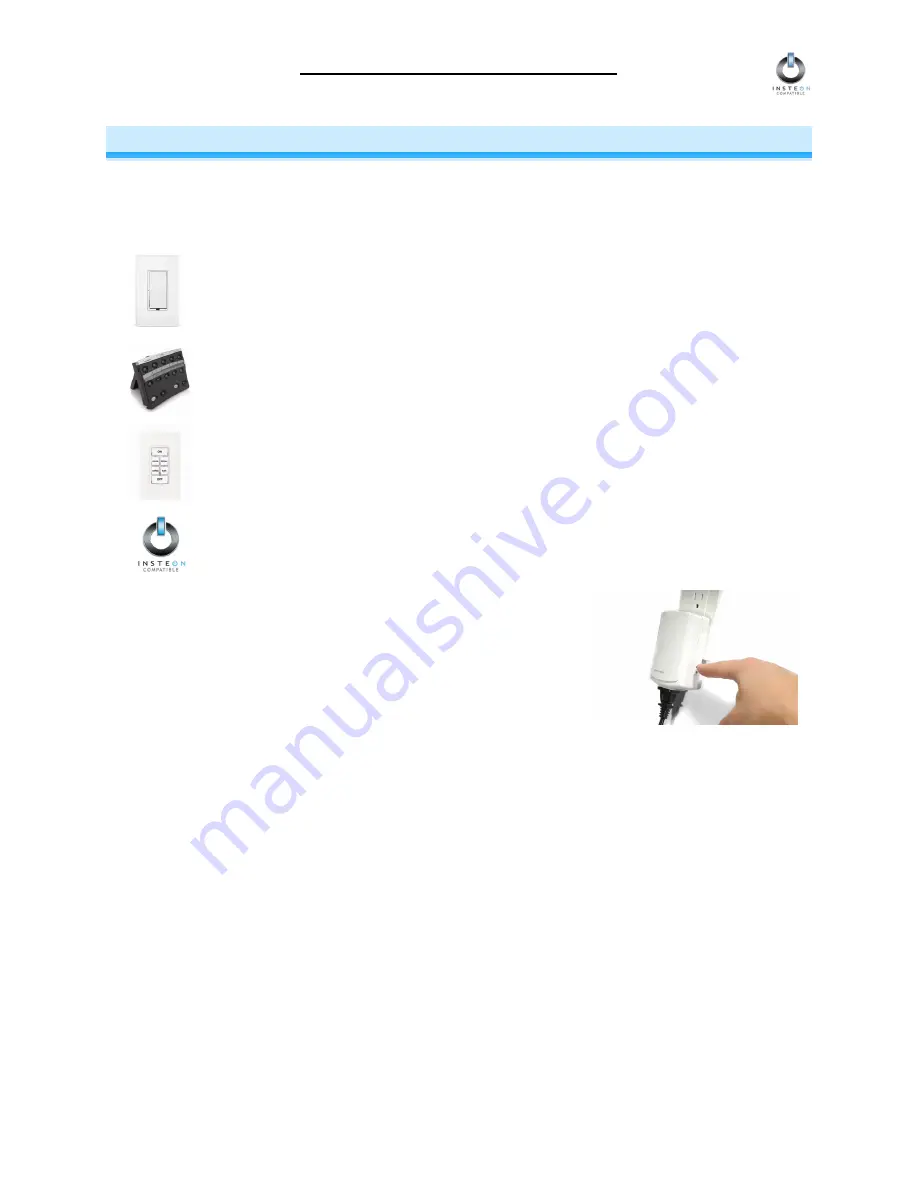
HOW TO SET UP ICON APPLIANCE ADAPTER  

Linking ICON Appliance Adapter to an INSTEON Controller 

1.  Select your INSTEON Controller from the list below and follow the method shown to put it into 

Linking Mode

A.  

ICON Dimmer Switch 

– Press and hold ICON Dimmer Switch’s 

Paddle Top

 for 10 

seconds, then release.  To confirm that it is in Linking Mode, ICON Dimmer Switch will 
flash the light that it is wired to once and begin its LED. 


B. 

ICON Tabletop Controller

 – Choose the ON/OFF Button Pair you want to use for 

controlling ICON Appliance Adapter.  Press and hold the 

ON Button

 of the pair for 10 

seconds.  To confirm that it is in Linking Mode, ICON Tabletop Controller’s Status LED 
will begin blinking. 


C. 

ICON Keypad Dimmer 

– Choose the ON Button you want to use for controlling ICON 

Appliance Adapter.  Press and hold the 

ON Button

 for 10 seconds.  To confirm that it 

is in Linking Mode, ICON Keypad Dimmer will flash the light that it is wired to once and 
begin blinking the ON Button that you pushed. 


D. 

Other INSTEON Controllers

 – See the INSTEON Controller’s User’s Guide. 


2.  Press and hold the black 

SET Button

 on ICON Appliance 

Adapter for 3 seconds.  The ICON Appliance Adapter’s Status 
LED will blink to confirm linking.  Depending on the INSTEON 
controller, you have about 4 minutes to perform this step before 
the unit automatically exits from linking mode. 

Summary of Contents for 2856S3

Page 1: ...ICON Appliance Adapter Appliance Module with INSTEON Technology For model 2856S3 2856S3B ICON Appliance Adapter...

Page 2: ...6 Creating an INSTEON Scene 7 ADVANCED FEATURES OF ICON APPLIANCE ADAPTER 8 Restoring Power to ICON Appliance Adapter 8 Resetting ICON Appliance Adapter to Its Factory Default Settings 8 X10 PROGRAMMI...

Page 3: ...every INSTEON device is a two way repeater And affordable not just because of low cost but because INSTEON also works with legacy X10 devices An INSTEON home grows in value with every INSTEON device y...

Page 4: ...at least two Access Points 2 Plug ICON Appliance Adapter into an unswitched wall receptacle The green Status LED on the side will illuminate steadily 3 Plug the non dimmable device lamp you want to co...

Page 5: ...hold the ON Button of the pair for 10 seconds To confirm that it is in Linking Mode ICON Tabletop Controller s Status LED will begin blinking C ICON Keypad Dimmer Choose the ON Button you want to use...

Page 6: ...its LED B ICON Tabletop Controller Press and hold the OFF Button of the ON OFF Button Pair you used for controlling ICON Appliance Adapter for 10 seconds To confirm that it is in Unlinking Mode ICON T...

Page 7: ...old a button down for 10 seconds for each setup step by placing the Controller in Scene Setup Mode also called Multilink Mode Refer to your INSTEON Controller s User s Guide for detailed instructions...

Page 8: ...dure can be used to clear ICON Appliance Adapter s memory and restore its factory default settings This procedure will clear the unit of all INSTEON Links and any programmed X10 Primary Address 1 Befo...

Page 9: ...section for an explanation 3 Once ICON Appliance Adapter has received the X10 Address and an ON or OFF command the Status LED on ICON Appliance Adapter will stop flashing and the X10 Primary Address w...

Page 10: ...ay to overcome signals getting weaker is to increase the coverage of the mesh network by introducing more INSTEON devices It is possible that some audio video products computers power strips or other...

Page 11: ...hat you can turn on or turn off when you set the X10 Address for the product If turned on the BoosterLinc technology may interfere with INSTEON KeypadLinc 6 with Integrated 12073W 12073WB and 12073WW...

Page 12: ...not linking or responding to an INSTEON Controller The INSTEON signal may be too weak Try linking your ICON Appliance Adapter to your INSTEON Controller with both of them plugged into the same outlet...

Page 13: ...cked up A surge or excessive noise on the powerline may have glitched it If the above doesn t work perform a Factory Reset If you have tried these solutions reviewed this User s Guide and still cannot...

Page 14: ...nal INSTEON Messages Repeated Yes X10 Features X10 Primary Address 1 optional comes unassigned X10 Scene Addresses N A X10 Status Request Supported X10 Powerline Frequency 121 KHz X10 Minimum Transmit...

Page 15: ...ber properly package the product with the RA clearly printed on the outside of the package and send the product along with all other required materials to Smarthome Inc ATTN Receiving Dept 16542 Milli...

Reviews: