42
Table 8-
3
Key Instruction Table
Key
Description
↑↓
Used to move cursor in different menus or to change values of menu options
TAB
To select the next menu option
Enter
To select a menu
Esc
To exit menu or return to previous menu from sub-menu
Table 8-
4
Menu Instruction Table
Create RAID Volume
To create an RAID volume
Delete RAID Volume
To delete an existed RAID volume
Reset Disks to Non-RAID
To reset disks in RAID volume, and to restore them to non-RAID status
Mask Disk as Spare
To mask the disks as spare disks. The data will be cleared, and these disks
can not be selected during RAID setting. It can be restored through the
Reset Disks to Non-RAID menu.
Exit
To exit SATA Host RAID configuration interface
3.2
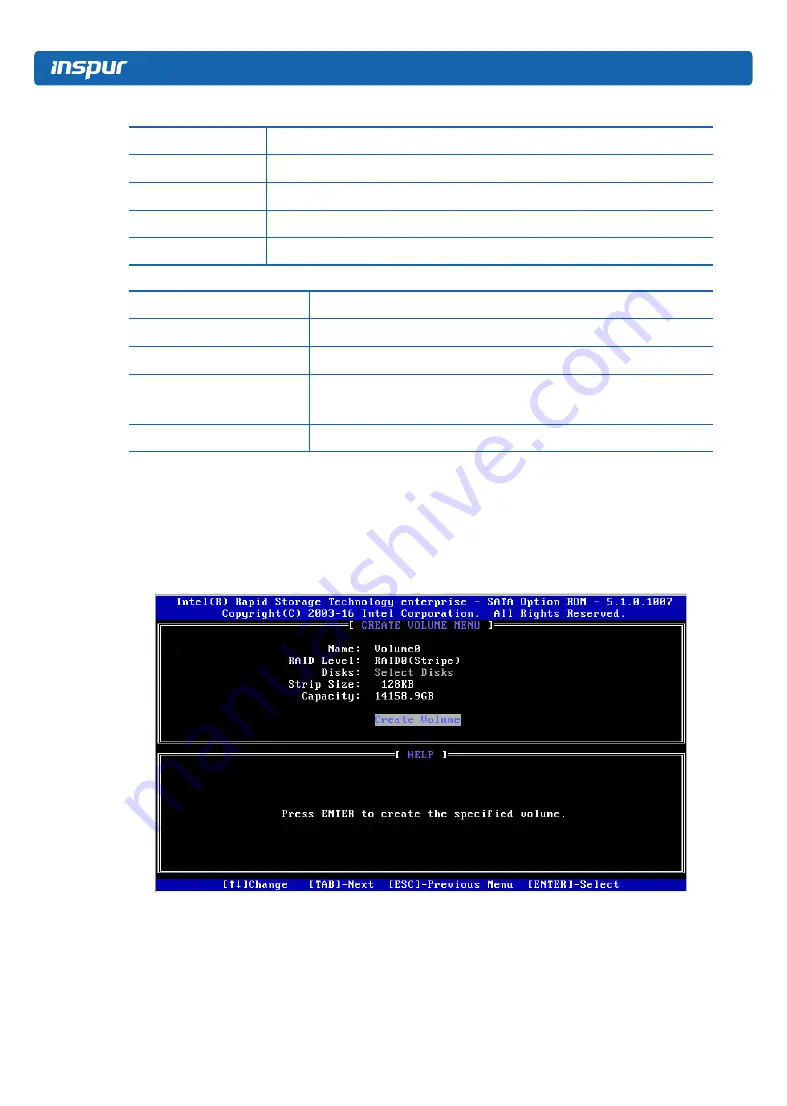
Create RAID Volume menu. After entering SATA RAID configuration interface, you could
use up and down arrow keys to select this menu, and then press Enter to enter the Create
RAID Volume menu, or directly input the number before the menu to enter the Create RAID
Volume menu. For other menu operations that are similar, it will not be repeated here.
A Create RAID Volume instance is shown in the following figure:
Figure 8-16
Summary of Contents for NF5266M5
Page 1: ...Inspur Server User Manual NF5266M5 ...
Page 109: ...BMC Settings 103 Figure 9 5 Figure 9 6 Figure 9 7 ...
Page 113: ...BMC Settings 107 Figure 9 15 Figure 9 16 Figure 9 17 Figure 9 18 ...
Page 115: ...BMC Settings 109 Figure 9 20 Figure 9 21 Figure 9 22 ...
Page 116: ...110 Figure 9 23 Figure 9 24 ...
Page 118: ...112 Figure 9 27 Figure 9 28 ...
Page 120: ...114 Figure 9 32 Figure 9 33 Figure 9 34 Figure 9 35 ...
Page 122: ...116 Figure 9 37 Figure 9 38 ...


