background image

l

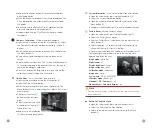
Long press the Power button (6) to cancel all calibrations 
done this operation.

l

When the cursor is moved near the PIP and prompt box, the 
PIP and prompt box are automatically moved to the top of 
the display.

l

To exit and save the Defective Pixels Calibration function, 
press and hold down the Menu button(5).

l

No operation within the 10s will exit the interface without 
saving data.

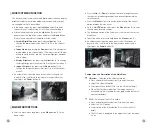
 Compass Calibration 

- Calibrate the digital compass

l

Open the sub menu by pressing the Menu button (5).Select 
the 'Compass Calibration' option with the Up (4) / Down (3) 
buttons.

l

Enter the compass calibration interface with a short press of 
the Menu button (5).

l

An icon like a triaxial coordinate system appears on the 
screen.

l

Rotate the device at least one 360° in three axial directions in 
15 seconds according to the direction shown as the icon to 
complete the compass calibration. 

l

Press the Power button (6) briefly to terminate and exit the 
calibration without saving within 30 seconds.

Time Settings

 - Reset the system date and time

l

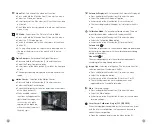
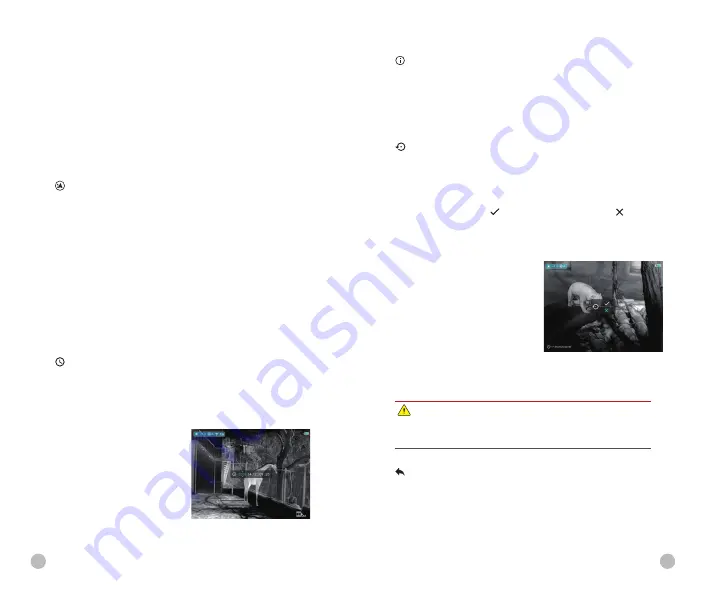
Open the sub menu by pressing the Menu button (5).

l

Select the 'Time Settings' option

l

Enter the time settings interface with a short press of the 
Menu button (5), that is displayed as Year. Month. Day 

|

 Hour: 

Minute format.

l

Short press the Menu (5) 
button to switch between 
digits.

l

Select the correct value with
a short press of the Up (4)/
Down (6) button.

l

Long press the Menu button 
(5) to exit to the upper interface.

20

21

System Information

 - View system information of this device

l

Open the sub menu by pressing the Menu button (5).

l

Select the 'System Information' option

l

Open the system information box with a short press of the 
Menu button (5).

l

Long press the Menu button (5) to exit to the upper interface.

Factory Reset 

- Restore Factory Settings

l

Open the sub menu by pressing the Menu button (5).

l

Select the 'Factory Reset' option 

l

Enter the 'Factory Reset' sub menu with a short press of the 
Menu button (5).

l

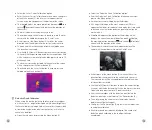
Select the option '      ' to reset to factory settings or '     ' to 
cancel with the Up (4) / Down (3) buttons.

l

Confirm your selection with a short press of Menu button (5).

The following settings will be restored to their factory state 
before being set by the user:

Image mode

 -white hot

Digital zoom

 -x1

Display brightness

 - level 3

Image sharpness 

- level 1

Calibration mode

 -automatic

Image hue 

- warm

System time

 - 00:00 2020/01/01

Ultraclear mode / Wi-Fi 

- off

Video out / PIP / Compass


- off

Motion sensor


/ Automatic Display 

- off

Return To The Main Menu

l

Open the sub menu by pressing the Menu button (5).

l

Select the 'Return to Main Menu' option 

l

Return to the main menu with a short press of the Menu 
button (5).


Note

Ø

Restore factory settings will format memory, so please save the 
date in advance.

Summary of Contents for FINDER FH25

Page 1: ...t YEDA Yantai 264006 P R China Tel 0086 400 998 3088 Web www infirayoutdoor com Email infirayoutdoor infiray com FINDER Thermal Imaging Monocular Operating Manual English Chinese FL25 FL25R FH25 FH25R...

Page 2: ...CAUTION LASER 3R wavelength 635nm maximum power 5mW WARNING...

Page 3: ...m 12 Frame refresh rate Hz 50 Optical Speci cations Objective Lens mm 25 Field of view degree 10 5 x 7 9 17 5 x 14 0 Optical magni cation x 2 5 10 0 1 5 6 0 Digital zoom x 1 1 5 2 2 5 3 3 5 4 Minimum...

Page 4: ...ight and compact l HD micro display l Long detection distance l Ultraclear mode for harsh weather conditions l Cool hue and warm hue for selection l Build in memory l Support photo and video recording...

Page 5: ...cursor to the image center Menu button Home screen state Open shortcut menu 1 Open shortcut menu 2 Open main menu Shortcut menu 1 Open shortcut menu 2 Exit the shortcut menu Shortcut menu 2 Exit the s...

Page 6: ...perating temperature for the device is Single ranging Continuous ranging Battery indication FL25R FH25R Battery charging Battery indication FL25 FH25 1 Built in battery indication 2 External battery i...

Page 7: ...kground calibration The lens cap should be closed for background calibration l A mode automatic The device is calibrated autonomously by the software algorithm The lens cap need not be secured the sen...

Page 8: ...n the memory card 12 13 LASER AND LASER RANGEFINDER FUNCTION Only for FL25R FH25R FL25R FH25R is built in laser function for laser indication and laser range nder Laser Indication Function l Turn the...

Page 9: ...t press the Power button 6 MAIN MENU FUNCTIONS l Enter the menu with a long press of the Menu button 5 in the home screen l Press the Up 4 Down 3 buttons to move through the menu functions and the bac...

Page 10: ...or Calibration Only for FL25R FH25R When the target position pointed by the laser is not consistent with the laser cursor position this function can be used to correct the cursor position l Open the s...

Page 11: ...Each time you add or reduce a blind pixel the number of defective pixels calibrated in the tooltip will change accordingly l Select the Laser Cursor Calibration option l Enter the Laser Cursor Calibr...

Page 12: ...press the Menu 5 button to switch between digits l Select the correct value with a short press of the Up 4 Down 6 button l Long press the Menu button 5 to exit to the upper interface 20 21 System Inf...

Page 13: ...sword are also restored to factory default Settings l The image in the separate window is captured from the center area of the main image and then 2x magni ed EXTERNAL BATTERY In addition to a recharg...

Page 14: ...n Correction Image is unclear with vertical lines and uneven background Calibration required Perform image calibration according to Section 9 Calibration of the Manual The image is too dark Low bright...

Page 15: ...ations However there is no guarantee that interference will not occur in a particular installation If this equipment does cause harmful interference to radio or television reception which can be deter...

Page 16: ...0 2 5 10 0 1 5 6 0 1 1 5 2 2 5 3 3 5 4 m 1 mm 20 D 4D 5D m 1 7m 0 5m P n 99 1298 LCOS 1280 960 Li ion 18500 1 N A 18500 1 N A t 25 h 8 6 8 6 m N A 600 1 N A 600 1 GB 16 APP mm 70 52 130 g 320 28 l Fin...

Page 17: ...30 1 2 3 4 5 6 7 LED 8 9 10 FL25 FH25 11 Type C 12 13 FL25R FH25R 14 FL25R FH25R LED LED LED 10 1 3 4 5 6 2 7 14 13 10 8 9 12 11 FL25R FH25R FL25 FH25 1 2 1 2 2 1 1 2 1 10 1 2 1 10 31...

Page 18: ...1 1 5 2 2 5 3 3 5 4 WiFi A M Out Finder 6 l Type C Finder Type C 11 l 5V l LED 7 LED l l l 30 40 l l 0 C 40 C l l l 10 C 50 C l FL25R FH25R FL25 FH25 1 2 2 1 32 33...

Page 19: ...M A l M FL25R FH25R FL25 FH25 FL25R FH25R FL25 FH25 l A Finder more APP APP l 3 0 5S 30 100 10 30 10 35 l 8 6 2 3 l 12 l 9 l l 6 3 0 l 6 6 Wi F i 3 34...

Page 20: ...MM SS l l 3 l 3 l l l l In ray Internal Storage l xxxx xx x x l IMG_HHMMSS_XXX jpg VID_HHMMSS_XXX mp4 10 10 00 01 HHMMSS XXX l FL25R FH25R Finder l 4 l l 4 l 4 l l Finder 4 l 4 l 1s l 600m 1m l 6 239...

Page 21: ...l 5 1 2 l 4 3 4 1 4 1 4 4 1 3 4 2 4 1 4 4 2 3 1 4 l 10s 6 l 5 2 Wi Fi PIP l 4 3 l 5 l 5 l l 5 6 l 10 l 5 l l 5 l Wi Fi Wi Fi l 5 l Wi Fi l 5 Wi Fi l Wi Fi Wi Fi l 5 l 4 3 l 5 l PIP l 5 l 4 3 38 39...

Page 22: ...Finder C W l 5 l l 5 C W l l 5 l l 5 FL25R FH25R 13 l 5 l 5 l l X Y M A 41 l 5 l 2 l 5 l 4 3 l 5 l l 5 l l 5 l l 5 l l 5 l Finder M A l 5 l l 5 A M l 40...

Page 23: ...l 5 l 4 3 1 10 l 6 l 5 l 5 l l 5 l l PIP l l X Y l 5 l 4 3 1 10 l 6 42 l l 6 l l 6 l PIP PIP l 5 l 10s l 5 l l 5 l l 30 l 30 l 5 l l 5 l l 5 l 4 3 l 5 43...

Page 24: ...Wi F i l Finder_xxxxx xxxxxx Wi Fi xxxxx xxxxxx SN l Wi Fi 12345678 l Wi Fi APP Wi Fi Finder APP Wi l APP l Wi ssid l PIP 2 l 5 l l 5 l 5 l Wi Fi 45 l 5 l l 5 l 5 l l 5 l 4 3 l l 5 1 3 1 00 00 2020 0...

Page 25: ...l 2 Finder l 5 l l 5 l l l FL25 FH25 FL25 FH25 18500 1 2 18500 l 18500 l USB 1 l APP www in rayoutdoor com Finder APP Wi Fi www in rayoutdoor com In Ray Outdoor APP In Ray Outdoor l l l l l l 46 46 47...

Page 26: ...USB USB 9 Wi Fi Wi Fi Wi Fi Wi Fi Wi Fi Wi Fi Wi Fi Wi Fi 46 48...

Reviews: