16
Tick the box before Zone number. Click the button Draw with the
mouse, and hold down the left mouse button and drag on the
screen till a blue frame displays. Then, click the button “Save”
with the left mouse button and the blue frame changes into green
which indicates successful setting.
Besides, you can set the area name and sensitivity.
To cancel a motion detection area, just cancel the box ticking.
4.5.4 Saving Path
You can set the photo saving path and video saving path in the
following interface.
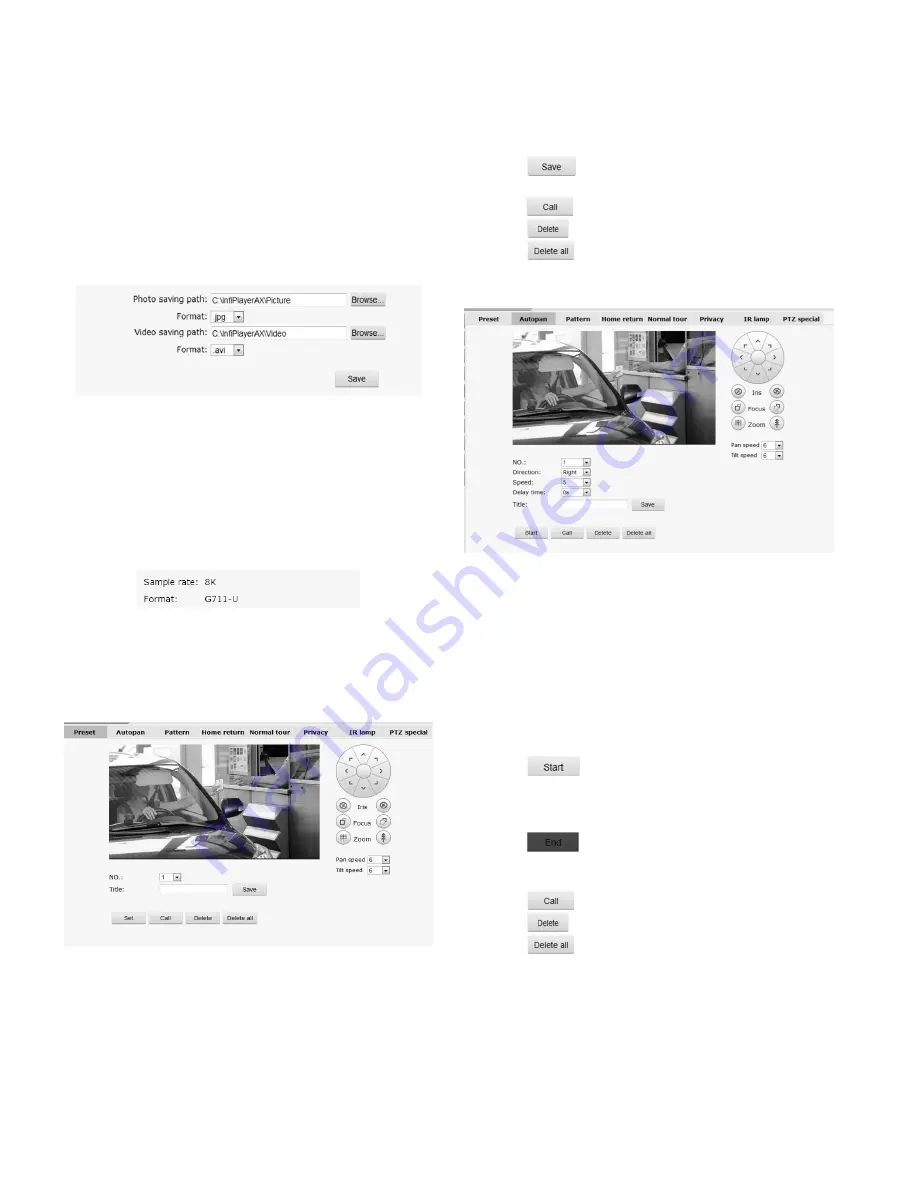
Fig. 4-32 Saving Path
Default photo saving path: C:\InfiPlayerAX\Picture.
Default video saving path: C:\InfiPlayerAX\ Video.
Photo and video formats can also be set. The default photo format
is .jpg and the default video format is .avi.
To change the saving path, click the button “Browse” and select
the path from the popup dialog box.
4.5.5 Audio Settings
Fig. 4-33 Audio Settings
Sample Rate: 8K.
Format: G.711-U.
4.6 PTZ Functions
Fig. 4-34 PTZ Functions
Click “PTZ Functions”, and you can set and call up the Preset,
Autopan, Patterns, Home return, Normal tour, Privacy, etc.
4.6.1 Presets
1.
Select the preset number. (1~255 available);
2.
Set the Preset title, which allows a maximum of 16 characters,
including a~z, A~Z, 0~9, space and underline Then click “Set”
button to save the title.
3.
Change the PTZ and lens position by clicking the direction
keys and lens function keys (iris, focus and zoom);
4.
Click
button to save the current position as a preset;
5.
Select the preset No. (1~255);
6.
Press
button to call up the preset.
7.
Click
button to clear a preset.
8.
Click
button to clear all the presets.
4.6.2 Autopans
Fig. 4-35 Autopan Settings
Select “Autopan” as shown in the figure above.
1.
Select the autopan number required to be set (1~4);
2.
Set the scanning direction, speed and the stay time in the
boundaries;
3.
Set the Autopan title, which allows up to 16 characters,
including a~z, A~Z, 0~9, space and underline Then click “Set”
button to save the title.
4.
Click the direction key to make the camera aim at the target
position;
5.
Click
button to set the current position as the
boundary A;
6.
Click the horizontal direction keys to change the camera’s
position;
7.
Click
button to set the current position as the
boundary B;
8.
Select the autopan number required to be called up (1~4);
9.
Click
button to call up the autopan.
10.
Click
button to clear an autopan.
11.
Click
button to clear all the autopans.
Summary of Contents for V1492MR-18TH
Page 30: ...26 ...


