2
Installation
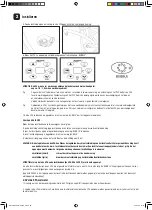
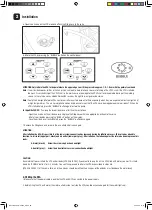
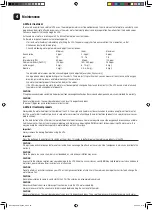
2.1 Select a safe location for the SPA
The SPA is for private use only and can be installed indoors and outdoors
WARNING
Do not install your SPA in any of the following places:
• Underneath electrical power lines or close to underground electrical installations (if in doubt, ask your electrician)
• On an uneven surface
• On a balcony or above living spaces
• In a place where water and humidity can cause damage
• On carpets or other materials that can be damaged by moisture
• On a base consisting of loose, non-loadbearing stones, wooden blocks or other materials that can shift. This can lead to damage to the
whirlpool that is not covered by the warranty.
The base must fulfil the following conditions:
•
Stable
The based must be solidified and be able to carry the weight of the water-filled SPA (see technical data) plus the maximum number of
persons for the entire duration of use. Flooring, tiles and wooden planks must be capable of supporting this weight.
• Horizontal (level)
A horizontal surface is particularly important. The water level must always be horizontal. An even and horizontal base ensures that the
weight is evenly distributed between the ground (which supports most of the weight) and the external walls, that form a self-supporting
frame providing stability. .
• Drainage system:
A functional drainage system must be provided for the collection and discharge
of any overflowing water and to empty the SPA.
Additional requirements for indoor assembly
• Make sure the floor is waterproof and has a non-slip surface.
• The room must be well ventilated to prevent excess condensation/moisture.
Additional requirements for outdoor assembly
• Do not expose the SPA to direct sunlight for prolonged periods.
• Make sure there are no sharp objects around the SPA
Important!
If the spa is placed on a surface or in a location that does not meet these requirements, any resulting damage is not covered by the warranty.
Responsibility for ensuring the requirements of the place of assembly lies with the owner of the SPA.
3. Öffnen Sie den oben am Filter-Heizungselement des Whirlpools befindlichen Luftauslass und schrauben
Sie den Füllschlauch auf.
4. Öffnen Sie das Luftventil an der Whirlpool-Hülle und stecken Sie den Füllschlauch auf das Ventil.
5. Pumpen Sie nun den Whirlpool auf, indem Sie auf der Bedienungskonsole die Taste "BUBBLE" drücken.
Wenn der Whirlpool richtig aufgepumpt ist, drücken Sie erneut die "BUBBLE" -Taste, um das Aufpumpen zu
beenden.
6. Entfernen Sie den Füllschlauch und schrauben Sie Luftauslass und Luftventil wieder zu.
ACHTUNG. Achten Sie darauf, den Whirlpool nicht übermäßig stark aufzublasen.
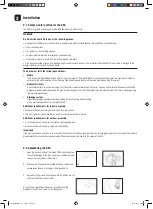
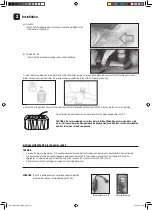
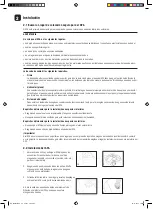
2.2 Assembling the SPA
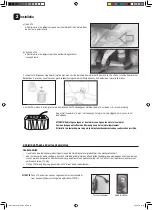
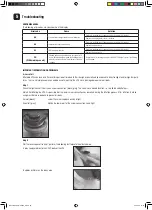
1. Open the box and pull out the folded SPA and accessories
to prevent damage to the film, do not use any bladed tools
to open the box (knives, cutters etc.).
2. Make sure that all parts are available. Please contact your
salesperson in case of missing or damaged parts.
3. Spread out the ground sheet and unfold the SPA on top of it,
with the bottom part underneath.
4. Open the air outlet located above on the filter-heating
element of the SPA and screw on the filling hose.
3. Öffnen Sie den oben am Filter-Heizungselement des Whirlpools befindlichen Luftauslass und schrauben
Sie den Füllschlauch auf.
4. Öffnen Sie das Luftventil an der Whirlpool-Hülle und stecken Sie den Füllschlauch auf das Ventil.
5. Pumpen Sie nun den Whirlpool auf, indem Sie auf der Bedienungskonsole die Taste "BUBBLE" drücken.
Wenn der Whirlpool richtig aufgepumpt ist, drücken Sie erneut die "BUBBLE" -Taste, um das Aufpumpen zu
beenden.
6. Entfernen Sie den Füllschlauch und schrauben Sie Luftauslass und Luftventil wieder zu.
ACHTUNG. Achten Sie darauf, den Whirlpool nicht übermäßig stark aufzublasen.
1-2
3
4
4
CP Manual SPA 2_4_6 2020_2.indd 49
CP Manual SPA 2_4_6 2020_2.indd 49
06-10-2020 16:48
06-10-2020 16:48


