PCIE-G41A2 PICMG 1.3 CPU card
Page 119
Step 7:
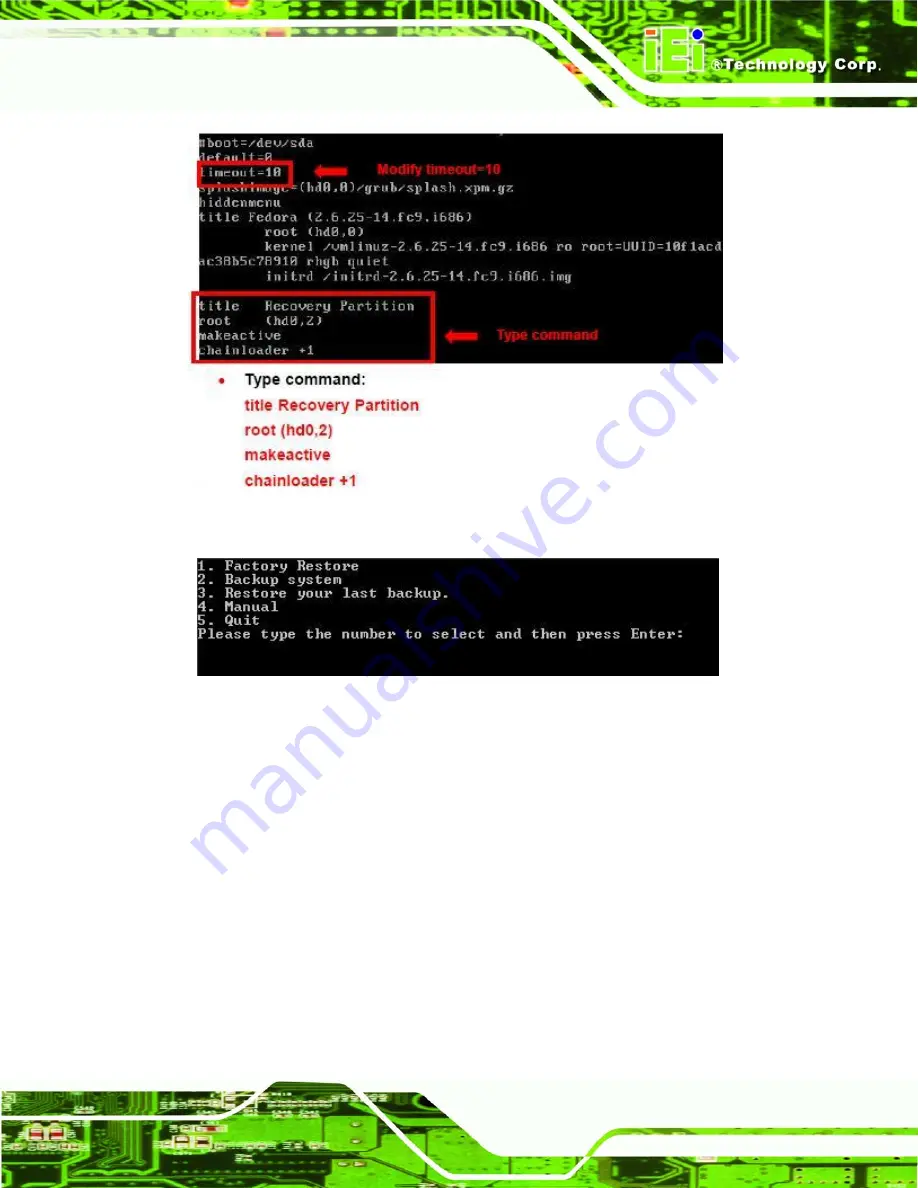
The recovery tool menu appears. (
Figure B-22
)
Figure B-22: Recovery Tool Menu
Step 8:
Create a factory default image
. Follow
Step 2
~
Step 12
described
in
Section
B.2.5
to create a factory default image.
S
te
p
0
:
B.4 Recovery Tool Functions
After completing the initial setup procedures as described above, users can access the
recovery tool by pressing <
F3
> while booting up the system. The main menu of the
recovery tool is shown below.
Summary of Contents for PCIE-G41A2
Page 13: ...PCIE G41A2 PICMG 1 3 CPU card Page 1 Chapter 1 1 Introduction...
Page 20: ...PCIE G41A2 PICMG 1 3 CPU card Page 8 Chapter 2 2 Packing List...
Page 25: ...PCIE G41A2 PICMG 1 3 CPU card Page 13 Chapter 3 3 Connectors...
Page 46: ...PCIE G41A2 PICMG 1 3 CPU card Page 34 Chapter 4 4 Installation...
Page 65: ...PCIE G41A2 PICMG 1 3 CPU card Page 53 Chapter 5 5 BIOS...
Page 108: ...PCIE G41A2 PICMG 1 3 CPU card Page 96 Appendix A A BIOS Options...
Page 111: ...PCIE G41A2 PICMG 1 3 CPU card Page 99 Load Optimal Defaults 95 Load Failsafe Defaults 95...
Page 112: ...PCIE G41A2 PICMG 1 3 CPU card Page 100...
Page 113: ...PCIE G41A2 PICMG 1 3 CPU card Page 101 Appendix B B One Key Recovery...
Page 137: ...PCIE G41A2 PICMG 1 3 CPU card Page 125 Appendix C C Terminology...
Page 141: ...PCIE G41A2 PICMG 1 3 CPU card Page 129 Appendix D D Digital I O Interface...
Page 143: ...PCIE G41A2 PICMG 1 3 CPU card Page 131 Appendix E E Watchdog Timer...
Page 146: ...PCIE G41A2 PICMG 1 3 CPU card Page 134 Appendix F F Compatibility...
Page 148: ...PCIE G41A2 PICMG 1 3 CPU card Page 136 Appendix G G Hazardous Materials Disclosure...


