A-2
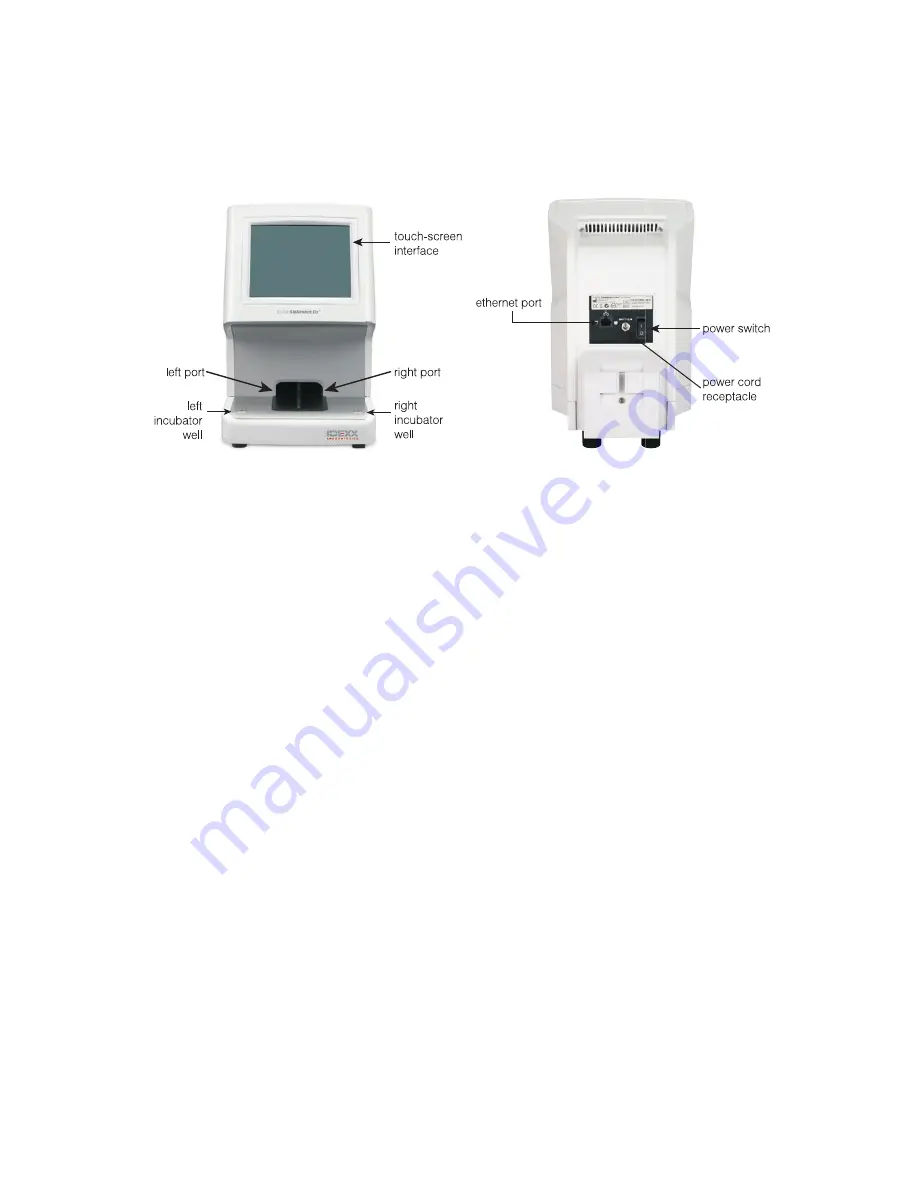
SNAPshot Dx Analyzer Components
Installing the SNAPshot Dx Analyzer
The SNAPshot Dx Analyzer must be connected to the IDEXX VetLab Station (to be used in
conjunction with the IDEXX VetLab suite of analyzers).
To Install the SNAPshot Dx Analyzer
1. Before you unpack the analyzer, choose an optimum location for the analyzer. The analyzer
should be placed on a level surface with at least 4 inches (10 cm) of clearance above
the analyzer. The area underneath the analyzer should remain clean and clear. Choose a
well-ventilated area away from obvious sources of heat, direct sunlight, cold, humidity, or
vibrations. For optimum results, room temperature should be 19°C–27°C
(66°F–81°F) and relative humidity should be 30%–85%.
2. Unpack the analyzer using the following steps:
a. Remove the analyzer, power supply, and Ethernet cable from the box and then from the
bag.
b. Position the analyzer so the power switch can be accessed and the analyzer can be
unplugged.
3. Connect the power cord using the following steps:
a. Plug the round power connector into the receptacle on the back of the analyzer.
b. Plug the power cord into a wall outlet or power strip.
Note
: Do not power on the analyzer at this time.
To Install the IDEXX VetLab Station Connectivity Router
Note
: If you already have a network router connected directly to the IDEXX VetLab Station computer,
you can skip this section and move to the “To Connect the SNAPshot Dx Analyzer to the IDEXX
VetLab Station” section on page A-3.
Getting Started
Summary of Contents for SNAPshot Dx
Page 1: ...i IDEXX SNAPshot Dx Analyzer Operator s Guide...
Page 43: ......


