SmartGate Kiosk
Mar 2021
Page 22
How to: open and close printer tray
1. Open the right hand door and passport
reader hood (see previous sections).
2. Grasp the tray securing latch and whilst
applying gentle pushing pressure onto the
front of the printer tray in order to release
the tension on the securing cam, turn the
latch 90
o
anti-clockwise to release. In the
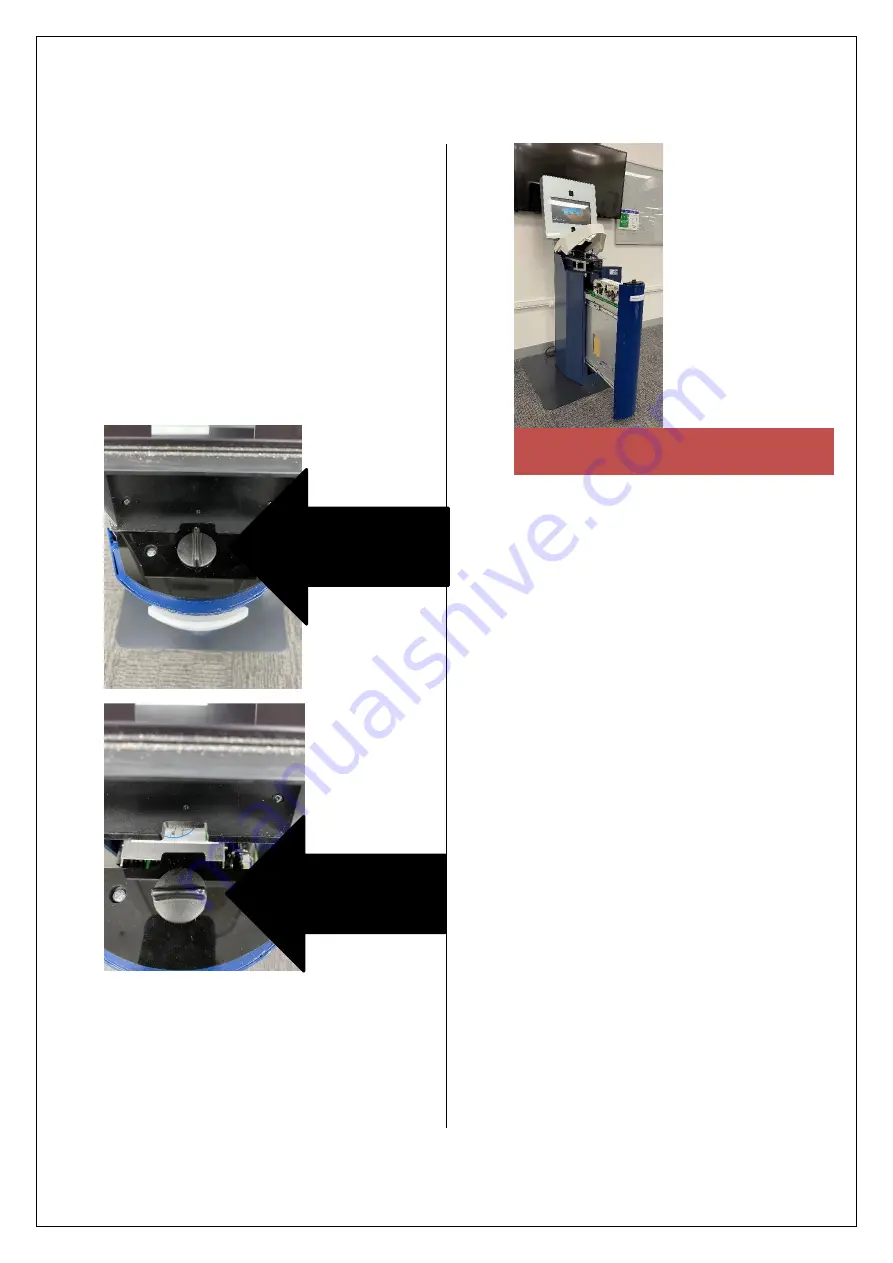
images below, the securing latch is shown
in the closed position i.e. at 12 and 6
o’clock positions and then open at 9 and 3
o’clock.
3. Slide the printer tray out as per the photo
below. There are in-built stops that prevent
the tray from being opened too far.
4. To close the printer tray ensure the printer
is correctly seated in its tray (the lower pins
should freely move forward and back in a
track. Ensure the securing latch is in the
open (9 and 3 o’clock position) – note the
tray cannot be physically closed unless the
latch is in the open position. Check there
are no cables, clothing or other items on or
near the mechanism. Push the door closed
under control. To secure in the closed
position apply pressure to the front of the
tray and turn the latch 90
o
clockwise to
secure i.e.
back to the 12 and 6 o’clock
positions.
Note: Different kiosks may need more or less
pressure applied when releasing and
securing the latch.
WHS WARNING
PINCH POINT BEHIND PRINTER
AND SURROUNDS. ENSURE
HANDS, FINGERS AND
CLOTHING ARE CLEAR
BEFORE CLOSING THE
PRINTER TRAY.
Securing latch
(closed)
Securing latch
(open)
Summary of Contents for KIOSK
Page 9: ...SmartGate Kiosk Mar 2021 Page 9...
Page 34: ...Mar 2021 Page 34...


