background image

8

STEP 6: TACK-FREE TEST

Tack-free time refers to the time elapsed between when the product is dispensed and when the foam expands and cures initially, so 

that it is no longer tacky to the touch. Tack-free time is an important property that can be used frequently before and during a job to 

obtain an indication that the product is being dispensed to the proper A/B ratio.
1.  Spray test shot. 

2.  Start timer as soon as you stop spraying. 

3.  Take a stick and gently touch the top of the foam. Each time you touch the  

foam; do so at a different point on the stick. 

4.  Watch for the foam to stop adhering to the stick. 

5.  As soon as the foam is no longer tacky, stop the timer.                                                                           

6.  Check the timer for the tack-free time. 

7.  Refer to the Technical Data Sheet (TDS) to find the proper tack-free time  

for the system being used. 

8.  For best results, perform a ratio test (see step 4). 

9.  With the nozzle removed, check that both chemicals flow with equivalent force. 
10.  Partial or complete blockage of one chemical port will result in off-ratio foam.

STEP 7: ADHESIVE APPLICATION

1.  For optimum results, the recommended chemical temperature is 70-85°F (21-29°C), see TDS for product specific process 

(core) chemical temperature recommendations.  

2.  Condition cylinders at ambient conditions to bring chemical that is too warm or too cold to optimal chemical temperature for 

several days (see figure 1 on page 3). 

3.  Release the trigger safety. When pulling the trigger for the first time, it is recommended to trigger the gun only 1/2 to 3/4 open 

until the desired output and spray pattern is achieved. 

4.  Conduct ratio shots (see step 4) before initial daily spray every two hours during the job or when a temperature change of more 

than 10°F occurs. Maintain accurate records utilizing Daily Spray Log worksheet – key to troubleshooting and tech service.

5.  Perform Adhesive Test Spray (see step 6). 

6.  Once the trigger is released, it must be reactivated within 30 seconds or a new nozzle must be installed. 

7.  Failure to do this could result in chemical leakage, spills, splashes or clogs which can ruin the dispensing unit and/or hoses. 

Important

: After releasing the trigger of the Handi-Gun

®

, activate the trigger safety to prevent accidental discharge.

APPLICATION METHODS

Polyset

®

 CR-20 (HFO) can be used to adhere TPO, PVC and KEE Fleece Back membranes to a variety of substrates including: 

polyisocyanurate (Poly-ISO) insulation boards, DensDeck

®

 and DensDeck Prime

®

, Securock

®

, structural concrete, smooth and 

granulated modified bitumen roof decks (recover).

PREPARATION

All surfaces to be bonded must be clean, dry and free of any debris and smooth with no surface contamination. Broken, delami-

nated, wet or damaged insulation or cover boards must be removed and replaced prior to application of Polyset CR-20 (HFO).

PRODUCT USE - FLEECEBACK MEMBRANE  

ADHESION (SPATTER)

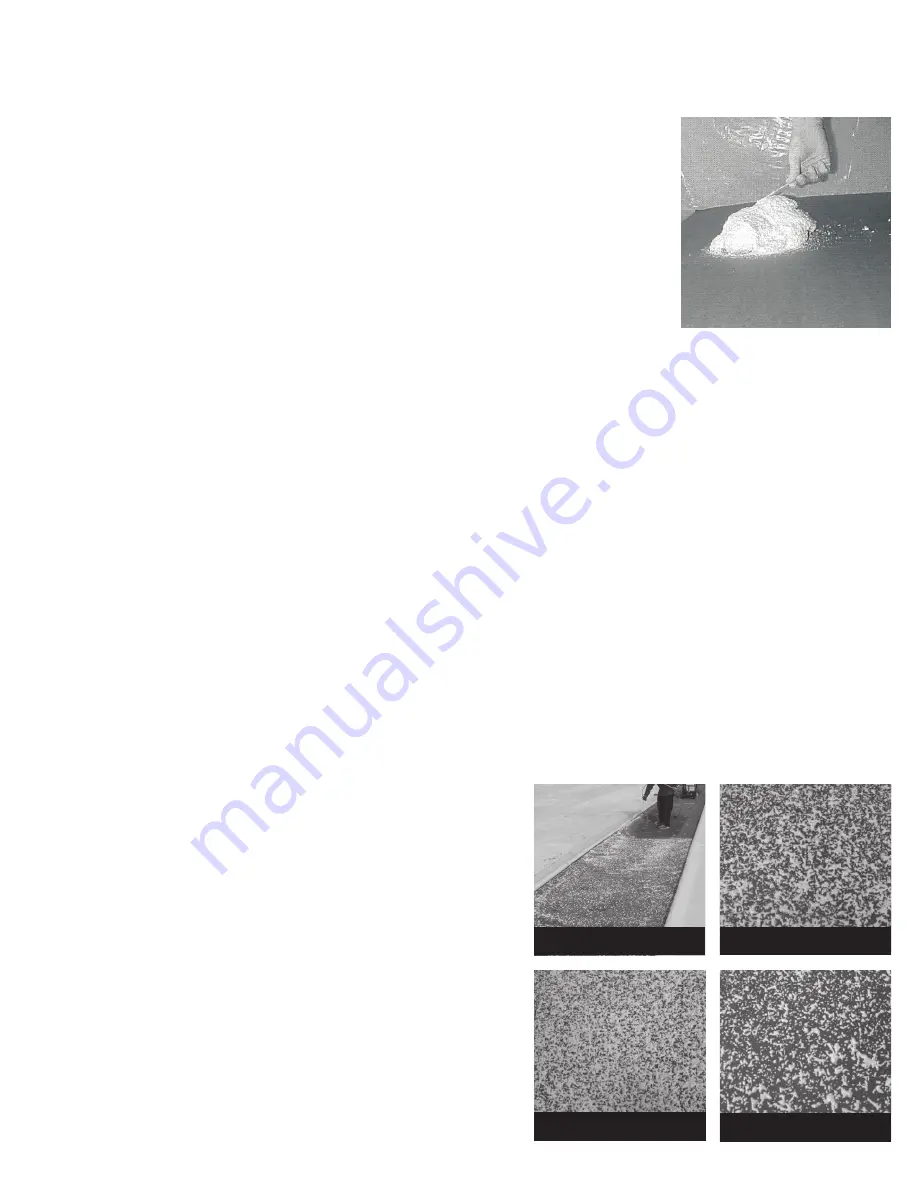
Polyset CR-20 (HFO) is a single surface adhesive. It is spray applied  

in a “Spatter Pattern” onto the roof, insulation or cover board  

substrate by dispensing the adhesive in a spray pattern similar to the  

action required when hand watering a flower bed. The spatter pattern  

should yield a heavily textured, even coating of approximately ¼” to  

½” nominal thickness height on the peaks of the spattered adhesive.
The seams of the membrane and the factory selvage edge must be  

protected from overspray of the Polyset CR-20 (HFO). If overspray  

does contaminate the seam area, immediately clean the seam area  

with seam cleaner or Polysolv while the adhesive is still wet. The  

bonding range of Polyset CR-20 (HFO) is approximately 1-10 minutes  

from start of spraying and will vary according to ambient as well as  

substrate temperature. The amount of substrate area that the  

adhesive is applied to ahead of the membrane should be monitored  

to prevent dry laid membrane. Care must be taken, particularly in  

high temperature environments [90°F (32°C) and above], to ensure  

that the adhesive has not dried or skinned over prior to embedding  

the membrane.
NOTE: Membranes can be applied once the adhesive has achieved  

sufficient bond strength to the immediate substrate to which it is adhered.  

It is recommended that the contractor inspect the installed insulation for  

proper adhesion and re-adhere any boards and/or corners that are not  

adequately attached.

HEAVY SPRAY PATTERN 

SUGGESTED SPRAY  

PATTERN 

LIGHT SPRAY PATTERN

SPATTER PATTERN  

APPLICATION EXAMPLE

Summary of Contents for POLYSET CR-20 HFO

Page 1: ...USE ONLY A16607 Rev 07 2021 2775 Barber Road Norton OH 44203 330 753 4585 www icpgroup com POLYSET CR 20 HFO COMMERCIAL ROOFING ADHESIVE OPERATING INSTRUCTIONS FOR REFILLABLE LOW PRESSURE POLYURETHAN...

Page 2: ...2...

Page 3: ...ZZLE HANDI GUN DISPENSING UNIT 7 STEP 5 COLORWISE NOZZLE CARE 7 STEP 6 TACK FREE TEST 8 STEP 7 ADHESIVE APPLICATION 8 ADHESIVE APPLICATION METHODS 8 9 STEP 8 CHANGING CYLINDER 9 STEP 9 DAILY SYSTEM SH...

Page 4: ...ONS Proper chemical temperature is CRITICAL to the performance of any low pressure polyurethane foam system The recommended chemical temperature is 70 85 F 21 29 F see TDS for product specific process...

Page 5: ...to the nitrogen bottle Tighten fitting with a wrench 4 If needed attach the A Side Red Nitrogen Hose with Coupling 2 to the A Side Cylinder Nitrogen Regulator 1 Tighten fitting with a wrench 5 Attach...

Page 6: ...y spraying breaks to determine and verify the starting pressure in each refill cylinder NOTE See Pressurizing The System for instructions on how to add nitrogen to each cylinder NEVER use compressed o...

Page 7: ...specific temperature recommendations COLORWISE TEMPERATURE WARNING NOZZLES Changes from clear to blue indicating that the chemical has reached a cold temperature below 60 F 16 C and the adhesive shou...

Page 8: ...ng unit and or hoses Important After releasing the trigger of the Handi Gun activate the trigger safety to prevent accidental discharge APPLICATION METHODS Polyset CR 20 HFO can be used to adhere TPO...

Page 9: ...See Returning Cylinders on how to prepare the cylinders for being returned to ICP NOTE It is STRONGLY recommended to change out both A and B cylinders even if one cylinder has not completely emptied S...

Page 10: ...5 Equivalent flow of both A component and B component is required with all two component polyurethane systems in order to obtain proper performance curing and optimum yields If a problem occurs the ca...

Page 11: ...6 Remove the Handi Gun 9 6 or Hose Assembly from the Cylinder Outlet On Off Valves 5 7 Dispose of box or bag along with the Handi Gun 9 6 Hose Assembly 70 21 85 29 All Handi Gun nozzles are easily cl...

Page 12: ...uct s SDS available at www polysetadhesives com for specific information The urethane foam adhesive produced from these ingredients will support combustion and may present a fire hazard if exposed to...

Page 13: ...13...

Page 14: ...A 17 PASO 2 VERIFICACI N DE LA PRESI N DEL TANQUE 17 PASO 3 AN LISIS DE COCIENTE 17 18 PASO 4 CONEXI N DE LA BOQUILLA A LA UNIDAD DE APLICACI N HANDI GUN 18 PASO 5 CUIDADO DE LA BOQUILLA COLORWISE 18...

Page 15: ...mperatura de la sustancia qu mica sea la adecuada para garantizar el buen funcionamiento del sistema de espuma de poliuretano de baja presi n La temperatura recomendada para las sustancias qu micas es...

Page 16: ...l proceso de arranque del sistema actualizar la Bit cora de aplicaciones diarias A18015 4 Conectar el regulador de nitr geno 1 a la botella de nitr geno Apretar los acoples con una llave 5 En caso nec...

Page 17: ...l tanque se registra en el regulador OPCIONAL El man metro puede utilizarse al inicio del d a y despu s de una interrupci n entre aplicaciones para determinar y verificar la presi n de inicio en cada...

Page 18: ...n Handi Gun 1 Antes de conectar la boquilla apli que vaselina en la parte delantera de la pistola 2 Inserte la leng eta inferior de la boquilla en la ranura inferior de unidad de aplicaci n 3 Fije el...

Page 19: ...r una prueba de aplicaci n del adhesivo v ase el Paso 6 6 Una vez que se suelta el gatillo se debe reactivar durante los pr ximos 30 segundos o deber instalar una boquilla nueva 7 No proceder de esta...

Page 20: ...ar la manguera de nitr geno roja del lado A con acople 2 de la v lvula de cierre del nitr geno 4 6 Desconectar la manguera de nitr geno del lado B con acople 3 de la v lvula de cierre del nitr geno 4...

Page 21: ...nto se recomienda dispensar una cantidad m ni ma de adhesivo de la unidad al menos cada tres 3 d as para asegurar un flujo ptimo de la sustancia qu mica a trav s de las mangueras Se recomienda utiliza...

Page 22: ...an con fuerza equivalente La obstrucci n parcial o completa de un puerto tendr como resultado un flujo desproporcional del adhesivo Crujiente quebradizo no seca o seca muy lentamente De color caf oscu...

Page 23: ...espuma de uretano producido a partir de estos ingredientes favorecer la combusti n y puede presentar un riesgo de incendio si se expone a un fuego o calor excesivo de aproximadamente 240 F 116 C Use...

Page 24: ...24...

Page 25: ...RIFICATION DE LA PRESSION DE LA BOUTEILLE 28 TAPE 3 TEST DU RAPPORT 28 29 TAPE 4 POUR FIXER LA BUSE JECTEUR HANDI GUN 29 TAPE 5 ENTRETIEN DE LA BUSE COLORWISE 29 TAPE 6 TEST DE NON COLLANT 30 TAPE 7...

Page 26: ...appropri e est CRITIQUE pour la performance de tout syst me de mousse de polyur thane basse pression La temp rature chimique recommand e est de 21 29 C 70 85 F Voir Fiche technique pour les recommanda...

Page 27: ...C 70 85 F Consultez la fiche technique pour con na tre les recommandations de temp rature de traitement chique c ur 3 Avant pendant le processus de d marrage du syst me mettez jour le journal quotidi...

Page 28: ...PRESSION DE LA BOUTEILLE REMARQUE Le r gulateur de pression d azote qui est fix sur la bouteille d azote NE LIS PAS la pression l int rieur de la bou teille de recharge de produit chimique uniquement...

Page 29: ...ne doit pas tre distribu Arr tez la pulv risation et chauffer le produit chimique la temp rature recommand e Voir la TDS pour les recommandations de temp rature sp cifiques du produit L orifice passer...

Page 30: ...buse doit tre install e 7 Le non respect de ces instructions peut entra ner des fuites chimiques des d versements des claboussures ou des obstruc tions qui peuvent ruiner l unit distributrice et ou l...

Page 31: ...de temp rature n 6 et la vanne de marche arr t c t B la bouteille sur le filtre de tuyau avec l assemblage de jauge de temp rature n 7 Pr parez vous car certains produits chimiques seront distribu s d...

Page 32: ...des tuyaux pendant quelques secondes avant la pulv risation r duit la surpression et permet au produit chimique de s couler dans les proportions appropri es D PANNAGE Pour tout service technique cont...

Page 33: ...ssemblage de tuyaux des soupapes d ouverture et de sortie de la bouteille n 5 7 limination de la bo te ou du sac avec l assemblage de tuyaux Handi Gun n 9 n 6 70 21 85 29 Toutes les buses de Handi Gun...

Page 34: ...de ces ingr dients favorisera la combustion et peut pr senter un risque d incendie s il est expos un incendie ou une chaleur excessive d environ 240 F 116 C Portez des lunettes de protection avec cra...

Page 35: ...35...

Page 36: ...al information refer to www polysetadhesives com 800 321 5585 70 85 F 21 29 C 30 100 F 1 38 C 45 90 F 7 32 C Scan here to be directed to the SDS TDS and Operating Instructions page available on the we...

Reviews: