


38
z
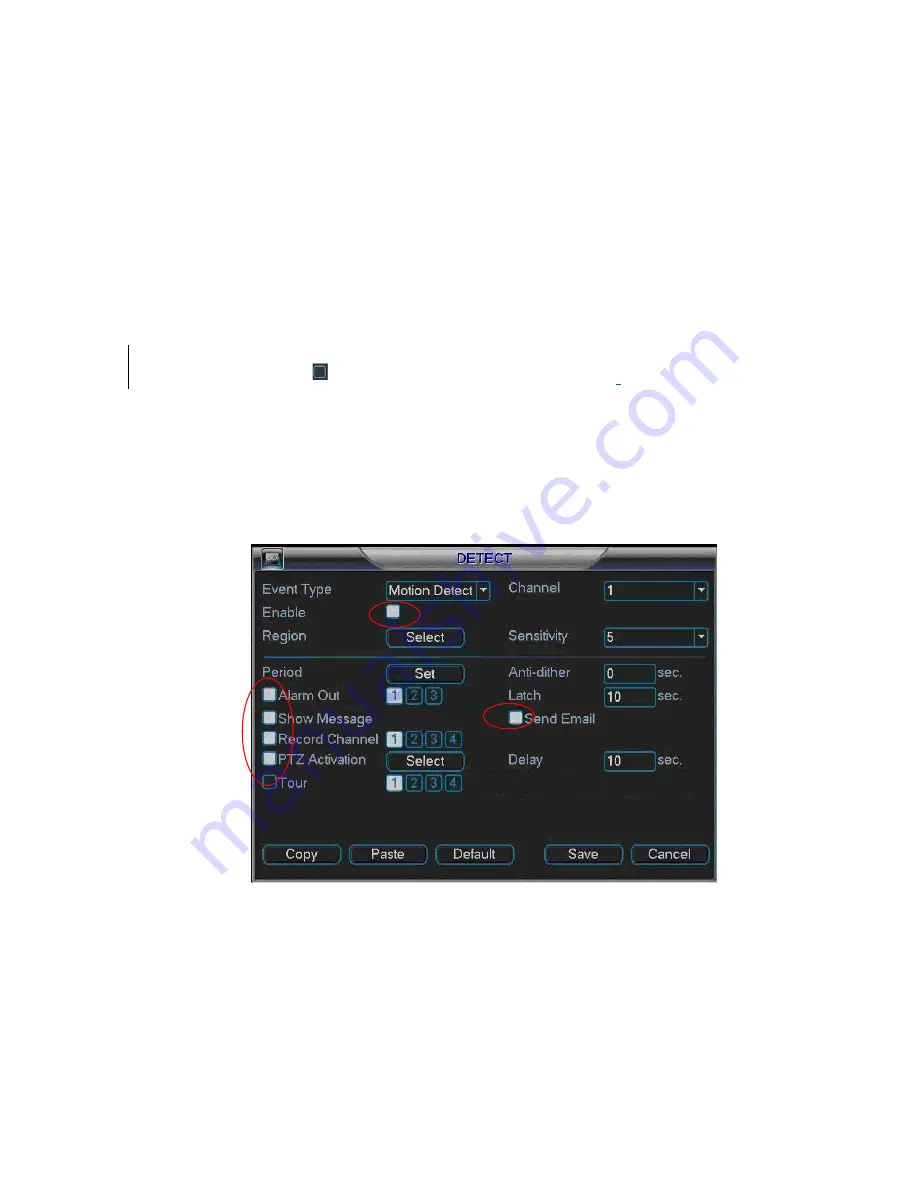
PTZ activation: Here you can set PTZ movement when alarm occurs. Such as go to
preset, tour &pattern when there is an alarm. Click
“
select
”
button, you can see an
interface is shown as in Figure 4-15.
z
Period: Click set button, you can see an interface is shown as in Figure 4-16. Here
you can set for business day and non-business day. In Figure 4-16, click set button,
you can see an interface is shown as in Figure 4-17. Here you can set your own
setup for business day and non-business day.
z
Anti-dither: Here you can set anti-dither time.
z
Sensitivity: there are six levels. The sixth level has the highest sensitivity.
z
Alarm output: when alarm occurred, system enables peripheral alarm devices.
z
Tour: Here you can enable tour function when alarm occurs. It is a one-window tour.
Please go to chapter 5.3.9 Display for tour interval setup.
Please highlight icon
to select the corresponding function.
After all the setups please
click save button, system goes back to the previous menu.
Note:
In motion detection mode, you can not use copy/paste to set channel setup since the
video in each channel may not be the same.
In Figure 4-14, you can left click mouse and then drag it to set a region for motion
detection. Click Fn to switch between arm/withdraw motion detection. After setting, click
enter button to exit.
Figure 4-13
Summary of Contents for Forensic
Page 1: ...1 Forensic DVR User s Manual ...
Page 9: ...9 ...
Page 39: ...39 Figure 4 14 Figure 4 15 Figure 4 16 ...
Page 43: ...43 Figure 4 20 Figure 4 21 Figure 4 22 ...
Page 53: ...53 Figure 4 43 ...
Page 78: ...78 Figure 5 42 ...
Page 83: ...83 Figure 6 11 ...
Page 108: ...108 Figure 7 44 Figure 7 45 Figure 7 46 ...
Page 122: ...122 Figure 8 5 Add device Add organization structure ...
Page 136: ...136 ...


