__
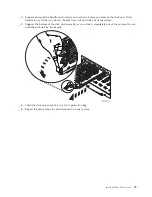
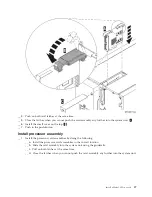
5.
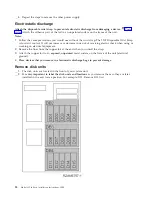
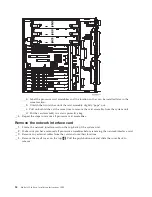
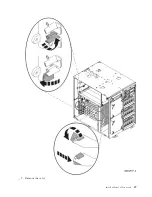
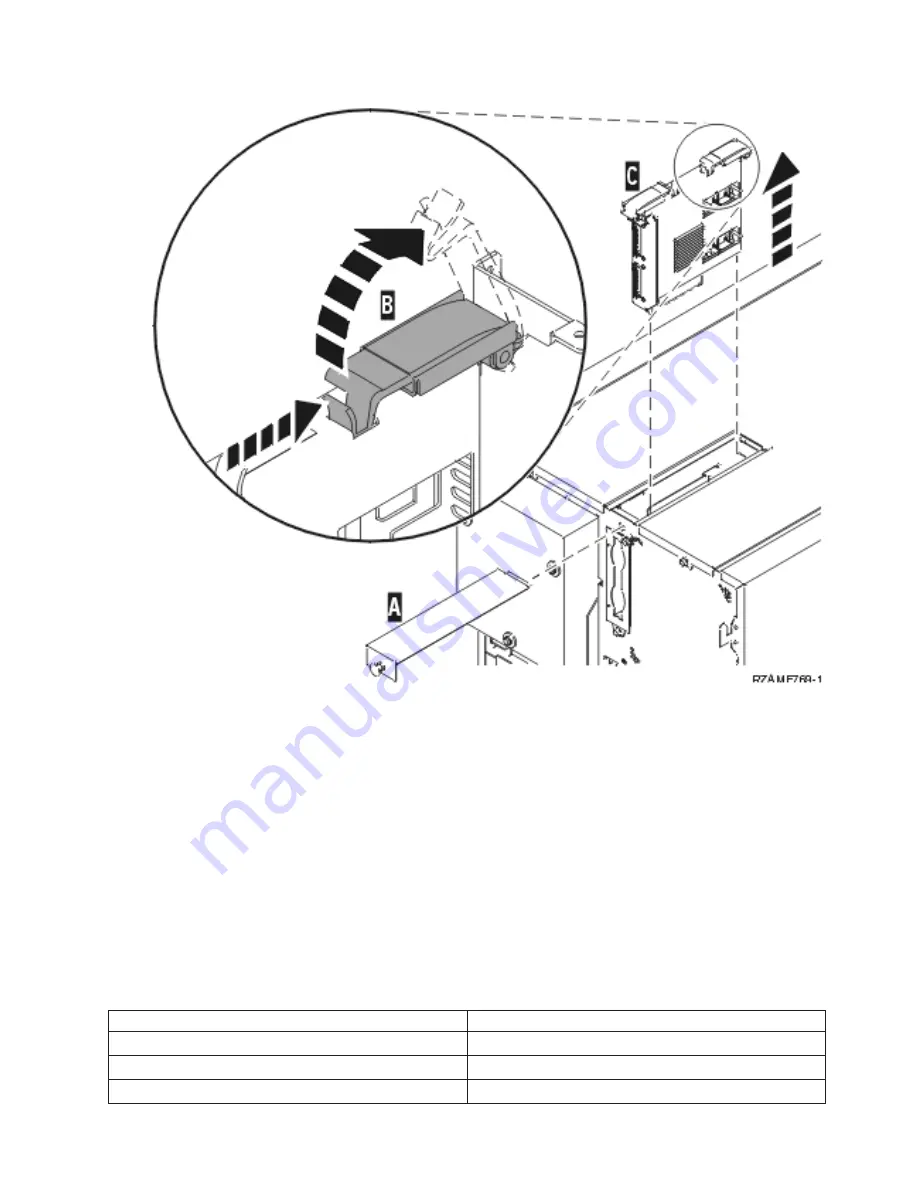
Unlatch
the
two
latches
until
the
card
assembly
slightly
“pops”
out
B
.
__
6.
Pull
on
both
latches
at
the
same
time
to
remove
the
card
assembly
from
the
system
unit
C
.
__
7.
Put
the
card
assembly
in
a
static
protective
bag.
Remove
PCI
cards
__
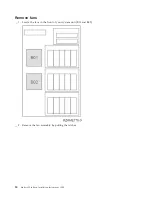
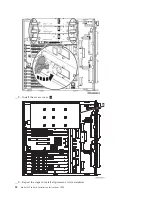
1.
Locate
the
PCI
card
positions
inside
the
side
of
your
system
unit.
__
2.
Attention:
Adapter
cards
are
fragile:
v
Handle
only
by
the
edges.
v
Keep
fingers
off
printed
circuit
area.
v
Use
static
strap
when
handling.
__
3.
Start
at
the
top
when
removing
the
cards.
__
4.
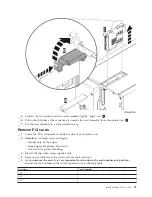
Remove
any
cables
from
the
cards
and
note
their
locations.
__
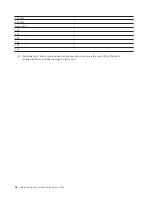
5.
As
you
remove
the
card,
it
is
very
important
to
write
down
the
card
number
and
position
.
Record
the
card
number
in
the
correct
position
in
the
following
table:
Position
Card
Number
C12
C11
C10
Install
a
Model
825
in
a
rack
25
Summary of Contents for eServer iSeries 825
Page 1: ...iSeries Model 825 in a rack installation instructions Version 5 ERserver...
Page 2: ......
Page 3: ...iSeries Model 825 in a rack installation instructions Version 5 ERserver...
Page 6: ...iv Model 825 In Rack Installation Instructions V5R3...
Page 11: ...__ 8 Open the back door Install a Model 825 in a rack 5...
Page 16: ...A Guidepins B Clips 10 Model 825 In Rack Installation Instructions V5R3...
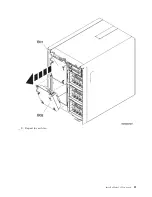
Page 22: ...__ 3 Pull the cover out 16 Model 825 In Rack Installation Instructions V5R3...
Page 27: ...__ 3 Repeat for each fan Install a Model 825 in a rack 21...
Page 33: ...__ 7 Remove the card Install a Model 825 in a rack 27...
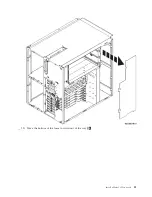
Page 37: ...__ 10 Move the bottom of the foam forward out of the way A Install a Model 825 in a rack 31...
Page 46: ...40 Model 825 In Rack Installation Instructions V5R3...
Page 50: ...44 Model 825 In Rack Installation Instructions V5R3...
Page 52: ...46 Model 825 In Rack Installation Instructions V5R3...
Page 60: ...54 Model 825 In Rack Installation Instructions V5R3...
Page 61: ......
Page 62: ...Printed in USA...

