44
IBM® xSeries 250: User’s Reference
5.
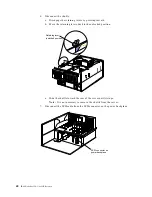
Remove the expansion-slot cover:
a.
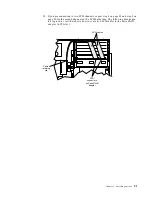
Rotate the adapter retention latch counterclockwise.
b. Lift the tab covering the top of the expansion-slot cover and then remove the
expansion-slot cover from the server. Store it in a safe place for future use.
c.
Press on the rear adapter retention latch (near the hard disk drives) as
indicated by the arrow on the latch and lift it to the open position.
Attention:
You must install expansion-slot covers on all empty slots. This
maintains the electromagnetic emissions characteristics of the system and
ensures proper cooling of system components.
6.
Refer to the documentation that comes with your adapter for any cabling
instructions. It might be easier for you to route any cables before you install the
adapter.
7.
Remove the adapter from the static-protective package.
Attention:
Avoid touching the components and gold-edge connectors on the
adapter. If you need to put down the adapter, place the adapter, component-side
up, on a flat, static-protective surface.
8.
Install the adapter:
a.
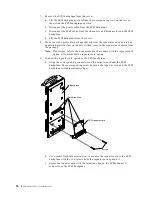
Carefully grasp the adapter by its top edge or upper corners, and align it with
the expansion slot on the processor board.
b. Press the adapter firmly into the expansion slot.
Attention:
When you install an adapter in the server, be sure that it is
completely and correctly seated in the expansion slot. Incomplete insertion
might cause damage to the processor board or the adapter.
c.
Lower the tab over the top corner of the adapter. Rotate the adapter retention
latch clockwise until it snaps into place.
d. Lower the rear adapter retention latch (near the hard disk drives) over the top
of the adapter and press on the indentation on the latch until the latch snaps
into place.
9.
Connect any needed cables to the adapter.
10. Enable the PCI slot from your operating system. (Refer to the documentation that
comes with your operating system for information about enabling a hot-plug PCI
slot.) Make sure that the power light for the hot-plug PCI slot comes on.
11. If you have other options to install or remove, do so now; otherwise, go to
“Completing the installation” on page 77.
Summary of Contents for eServer 250 xSeries
Page 1: ...User s Reference xSeries 250...
Page 2: ......
Page 3: ...IBM IBM xSeries 250 User s Reference SC21 P902 00...
Page 8: ...vi IBM xSeries 250 User s Reference...
Page 14: ...xii IBM xSeries 250 User s Reference...
Page 24: ...10 IBM xSeries 250 User s Reference...
Page 36: ...22 IBM xSeries 250 User s Reference...
Page 108: ...94 IBM xSeries 250 User s Reference...
Page 185: ......
Page 186: ...IBM Part Number 21P9020 Printed in the United States of America 21P9 2...


