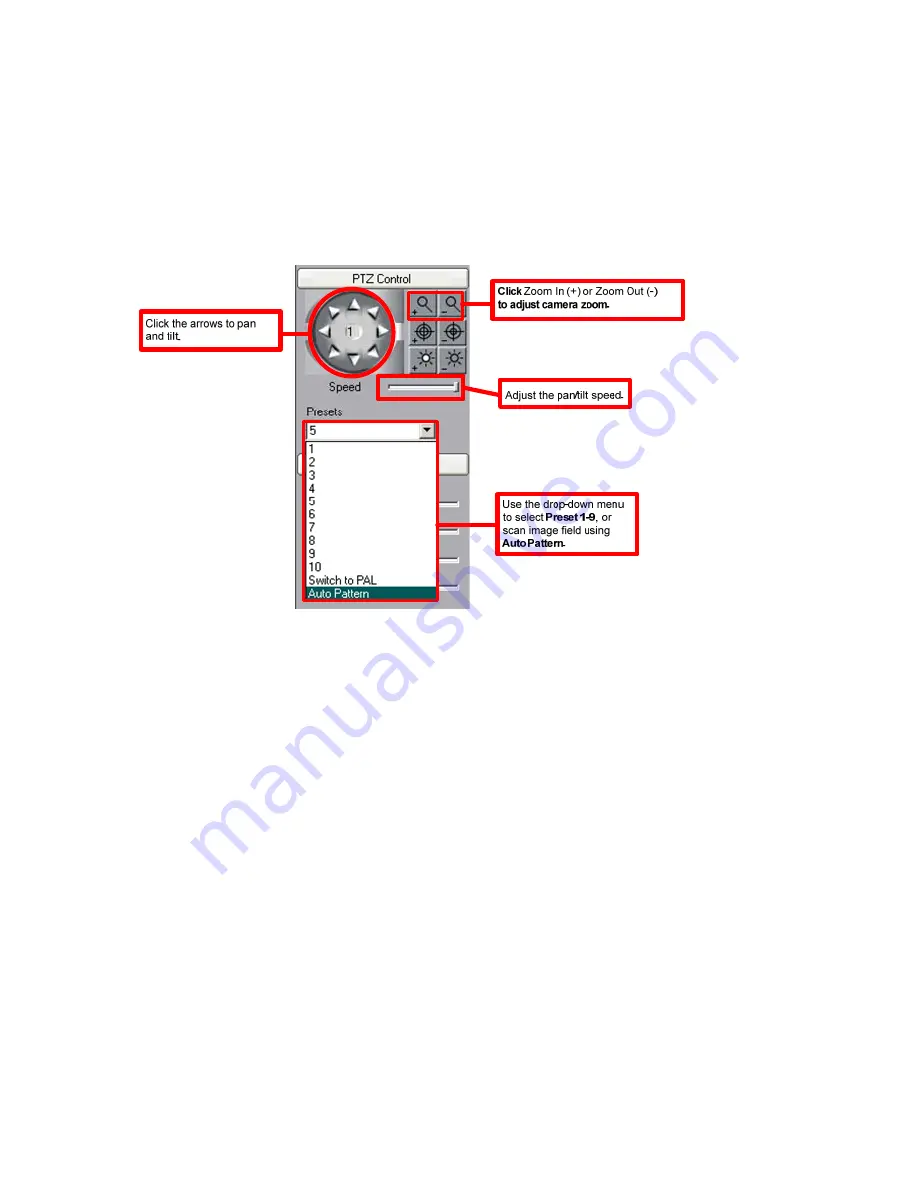
3.3.1 Controlling ePTZ
Note: ePTZ does not work in Full Screen mode. Press F11 to exit Full Screen.
Using the ePTZ control panel located on the left of the live video dashboard the user can:
1. Change the pan-tilt settings.
2. Zoom in and out.
3. Enable one of nine presets, or enable the Auto Pattern feature.
To control Zoom/Iris direction or activate presets, follow the diagram below:
To control the Pan/Tilt position of the camera:
1. Select a camera resolution level that enables ePTZ. See figure 3.3 above.
2. To use Pan/Tilt, the iris cannot be fully zoomed out. After zooming in partially or all the way,
use the arrows on the ePTZ control wheel to pan and tilt.
Using the Presets
There are 9 preset iris positions to choose from. When using the Annexxus Web Viewer, these
presets are factory defaults and cannot be changed. Each preset, from 1-9, shifts the iris to a
different preset position, changing the live image view.
Note that users can set the presets
themselves when using SRX-Pro/IP-Pro.
Auto Pattern
With Auto Pattern, the iris will continuously scan the view field from left to right. To use Auto
Pattern the iris cannot be fully zoomed out. After zooming in partially or all the way, select Auto
Pattern in the drop down menu.
3.4 Live Backup
Live Backup is the video recording feature of the network camera. It records onto the local PC
storage (local HDD, network HDD, or USB storage device). Recorded video is saved in the *.axv
format and can be played back with
Annexxus Player 2.0
.
Note: The Annexxus Player 2.0
application is included on the CD which accompanies the network camera – see Appendix B for
instructions on using Annexxus Player 2.0.
To start Live Backup video recording:
18


