


125
Set up mask areas
Set up mask areas of the camera. For further information about this function, refer to the operating instructions
of the camera in use.
Step 1
When displaying the images on a 4-screen, select the
desired cameras.
Step 2
Display the "Camera control [Advanced]" panel
(
☞
Page 117), and click the [Setup] button.
→
→
The camera setup window (
☞
displayed.
Step 3
Click the [Start] button.
→
→
A grid will appear over the image display area and
the segments designated as mask areas are cov-
ered with white translucent masks.
Step 4
Click a segment in the image display area.
→
→
Each click of the segment toggles between On
and Off for the mask area setting.
Step 5
Click the [End] button.
→
→
The mask area setting will be completed and the
grid will disappear.
Step 6
Click the [Back] button.
→
→
The camera setup window closes, and the display
returns to the "Camera control [Advanced]" panel.
Note:
• It is possible to reset all the mask area settings by
clicking the [Reset] button.
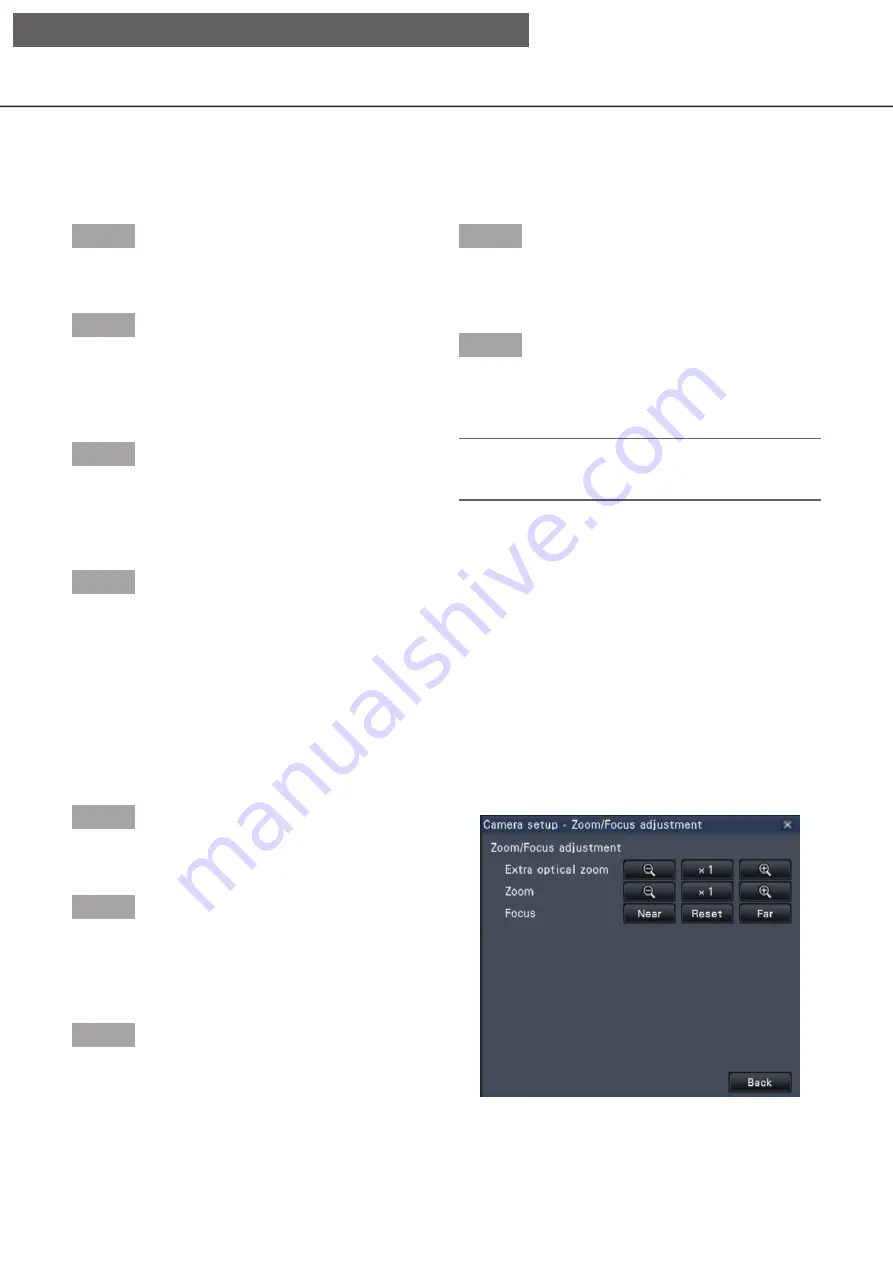
Zoom/Focus adjustment
Adjust zooming or focusing of the camera. For further information about this function, refer to the operating
instructions of the camera in use.
Step 1
When displaying the images on a 4-screen, select the
desired cameras.
Step 2
Display the "Camera control [Advanced]" panel
(
☞
Page 117), and click the [Setup] button.
→
→
The camera setup window (
☞
displayed.
Step 3
Click the [Setup] button.
→
→
The zoom/focus adjustment screen will be displayed.
[Operation via recorder's main monitor]


