background image

Important Safety Information 

4 


Warning


Strictly 

Observe


Disconnect the power plug to turn off 
the power. 

Pressing the 

POWER

 button alone will not 

completely cut off the power supply.    If the product 
will not be used for a long period of time, 
disconnect the power plug from the power socket. 
Failure to do so may result in damage or breakdown 
of the product in the event of lightening, etc.   


Prohibited

Exercise caution when handling the cables.   

Use the supplied cables and handle them with care by 
observing the instructions given below.    Inappropriate 
handling may damage the cables, resulting in fire or electric 
shock. 

 Do not place an object on the cables. 

 Do not bend the cables. 

 Do not modify the cables. 

 Do not pull the cables. 

 Do not compress the cables.

 Do not use the cables near a heating equipment. 


Prohibited


Do not drop or apply impact on the product. 

Do not drop the product, hit it against an object, or otherwise 
apply impact on the product.    Once the product receives 
impact, fire or electric shock may result from subsequent 
use.


Strictly 

Observe


Connecting/disconnecting the power 
plug. 

 When connecting/disconnecting the power cable, 

always do so by holding the plug.    Pulling the 
cable may cause the cable to partially break, 
resulting in fire. 

 When connecting/disconnecting the power plug 

to/from the power socket, make sure your hands 
are dry.    Handling the power plug with wet hands 
may result in electric shock. 

 Do not place any article around the power socket, 

because it will obstruct quick disconnection of 
the power plug when necessary. 


Prohibited


Do not place any object on the product. 

Doing so may cause the product to damage, or result in fire 
or electric shock.    In particular, a flower vase, planting pot 
or other container filled with liquid can cause fire or electric 
shock if it tips over and spills the liquid.   
If a foreign matter has entered the product, immediately turn 
off the power switch and disconnect the power plug from the 
power socket. 


Prohibited


Do not use this product in the places listed below. 

Failure to do so may result in breakdown. 

 Humid place 


 Dusty place 

 Place subject to vibration or shock 


 Place where the air vent will be blocked 

 Place subject to steep temperature gradient   


 On an unstable foundation 

 Place exposed to the direct sun   


 Near a heating equipment 

 Place subject to high temperature, such as inside a closed car 

 Poorly ventilated place or narrow space 


Strictly 

Observe


Moving to a cooler place 

If the product is moved from a cold place to a 
warm place, bedewing may occur on the exterior 
surface of or inside the product.    Continuing to 
use the product with dews attached on the surface 
or internal parts may cause fire or electric shock. 
After moving the product, let it assimilate several 
hours in the new environment without turning on 
the power. 


Prohibited

Do not damage the power cable. 

 Do not place a heavy object on the cable. 

 Do not pull the cable. 

 Do not kink the cable.

 Do not modify the cable. 

 Do not heat the cable.

 Do not forcibly bend the cable. 

 Do not lay another cable together. 


Prohibited


Do not charge the batteries.   

Doing so may cause battery fluid to leak, resulting 
in injury or burns.   


Prohibited

Do not use the product after dropping or 
otherwise damaging it. 

Doing so may result in fire or electric shock. 


Prohibited


Do not touch leaked battery fluid with bare hands. 

If battery fluid gets into the eye or contacts the skin or clothes, blindness, injury or skin inflammation may occur. 


What to do when battery fluid got into the eye 


 Do not rub the eye.    Immediately rinse the eye under clear running water, such as tap water, to wash away the battery 

fluid completely, and then immediately seek medical attention. 


What to do when battery fluid contacted the skin or clothes 


 Immediately rinse the affected area under clear running water, such as tap water, to wash away the battery fluid 

completely.    If there is a symptom of skin inflammation or injury, seek medical attention. 

Summary of Contents for AVeL Link AVLP2/DVDLA

Page 1: ...ayer with Built in DVD Player AVeL Link Player AVLP2 DVDLA User s Manual B MANU200080 02 Read the attached Setup Guide before using this product Keep this manual and Setup Guide in a secure place for...

Page 2: ...puter 29 Windows XP 30 Windows 2000 32 Windows Me 98 SE 34 Mac OS X 35 6 Setting the AVeL Link Player for the First Time 36 Setting the IP Address of the AVeL Link Player 36 Playing Video Audio Playin...

Page 3: ...oduction Functions of the AVeL Link Player p 2 Important Safety Information p 3 Precautions for Use p 9 Checking the Items in the Package p 11 Checking the Operating Environment p 12 Name of Each Part...

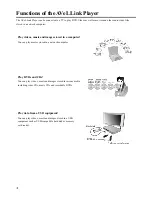
Page 4: ...lay videos music and images stored in a computer You can play movies stored in a network computer Play DVDs and CDs You can play videos music and images stored in various media including video CDs mus...

Page 5: ...the product may result in electric shock or fire Do Not Disassemble Do not repair modify or disassemble the product Doing so may result in fire electric shock burns or malfunction Should you require r...

Page 6: ...duct immediately turn off the power switch and disconnect the power plug from the power socket Prohibited Do not use this product in the places listed below Failure to do so may result in breakdown Hu...

Page 7: ...y Observe Keep the batteries away from small children If swallowed a battery may cause suffocation or damage the stomach or other internal organs If a child accidentally swallowed a battery immediatel...

Page 8: ...ut the batteries Leaving the batteries in the product may cause battery fluid to leak due to overdischarge resulting in injury or burns Should battery fluid leak thoroughly clean the areas around the...

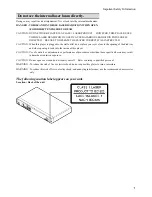
Page 9: ...s plugged to the wall outlet do not place your eyes close to the opening of the disk tray and other opening to look into the inside of this player CAUTION Use of controls or adjustments or performance...

Page 10: ...not installed and used in accordance with the manufacturer s instruction manual may cause interference with radio communications However there is no guarantee that interference will not occur in a par...

Page 11: ...dio Formats The figures are peak values As for the bit rate both the CBR and VBR systems are supported Format Bit rate Sampling rate MP3 64k 192kbps 32k 44 1k 48kHz WMA excluding WMA9Pro 64k 192kbps 4...

Page 12: ...surface material to deteriorate or coating to peel When using a chemically treated cleaning cloth follow the instructions for use provided by the manufacturer Updating the Firmware I O DATA DEVICE IN...

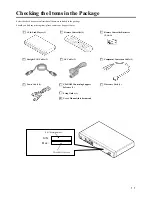
Page 13: ...issing item please contact our Support Center AVeL Link Player 1 Remote Controller 1 Remote Controller Batteries 2 AAA Straight LAN Cable 1 AV Cable 1 Component Conversion Cable 1 Power Cable 1 CD ROM...

Page 14: ...ROM drive Required for installing the support software provided in the CD ROM Video audio and image formats supported by the AVeL Link Player Video MPEG 1 MPEG 2 DivX 3 11 4 x 5 0 x 5 1 x 5 2 XviD WMV...

Page 15: ...n menu 8 Return button BACK Not used 26 Forward button FWD Forward the medium 4 speeds 9 Reverse button REV Reverse the medium 4 speeds 27 Next button NEXT Move to the next chapter 10 Previous button...

Page 16: ...4 Subtitle button SUBTITLE Switch the subtitle This button may not function depending on the data 15 URL CODE button URL CODE Display the URL entry screen 16 Repeat button REPEAT Switch the repeat mod...

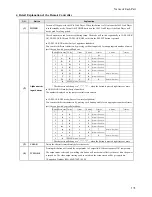
Page 17: ...nce 0 0 SPACE Return to Press Once The character will change to when the button is pressed eight times or more NUM LOCK ON mode Entry of numbers The numbers displayed on the remote controller are ente...

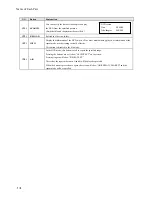
Page 18: ...e step mode This function may not be supported depending on the format of the movie file being played 12 HOME In the file mode pressing this button will display the home screen 13 ZOOM Pressing this b...

Page 19: ...button on the playback data selection screen will play all files currently displayed continuous playback 22 MUTE In both the DVD mode and file mode pressing this button will mute the sound Press this...

Page 20: ...formation of the repeat mode or other setting currently effective This button is disabled in the file mode 34 A B In the DVD mode this button is used to repeat the specified range Pressing the button...

Page 21: ...al connected to a network STOP HOME button NEXT button POWER button EJECT TRAY button PREV button Tray USB port PLAY ENTER button PAUSE PLAY RETURN Display Front Output destination DVI NTSC 480P 720P...

Page 22: ...MEMO...

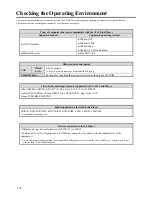
Page 23: ...ing Environment P 22 2 Preparing the Remote Controller P 23 3 Connecting the AVeL Link Player P 24 4 Installing AVeL Link Server P 26 5 Checking the IPAddress of the Computer P 29 6 Setting the AVeL L...

Page 24: ...c that automatically assigns the IP address is available on the network to which the AVeL Link Player is connected Using the AVeL Link Player to play the video audio and image files stored in your com...

Page 25: ...the remote controller The supplied batteries are used for operation checks Replace them with new commercially available AAA dry batteries at your earliest convenience Install the battery cover again T...

Page 26: ...er Equipment p 66 For connection with USB equipment refer to Playing from a USB Equipment or DVD CD Medium p 44 Go to the next page Tips AV cable supplied S Video input Video audio input S Video cable...

Page 27: ...able To connect the AVeL Link Player via a hub use the supplied LAN cable to connect the hub to the AVeL Link Player To connect the AVeL Link Player directly to the computer use a cross LAN cable to b...

Page 28: ...ows Go to p 28 if your computer is running Mac OS X Turn on the power to the computer and start Windows If your computer is running Windows XP 2000 log on as Administrator Set the support software CD...

Page 29: ...4 Installing AVeL Link Server Click the Finish button This completes the installation Go to 5 Checking the IP Address of the Computer p 29 Click...

Page 30: ...ll be displayed on the desktop xxx indicates the version Double click AVLP2U_xxx double click the MAC folder and then double click avellinkx xxx dmg xxx indicates the version Drag and drop the AVeL Li...

Page 31: ...describes the method to check the IP address of your computer The specific method varies depending on the operating system so read only the section applicable to the operating system your computer is...

Page 32: ...Start button Click Control Panel in the Start menu Click Network and Internet Connections When the Network and Internet Connections window opens click Network Connections Right click Local Area Connec...

Page 33: ...for the First Time p 36 1 Click 2 Click If this option is selected perform the following operations 1 Select Use the following IP address 2 Enter the appropriate values in IP address and Subnet mask...

Page 34: ...strator Right click My Network Place and then click Properties in the pop up menu Right click Local Area Connection and then click Properties in the pop up menu Click Internet Protocol TCP IP and then...

Page 35: ...lected perform the following operations 1 Select Use the following IP address 2 Enter the appropriate values in IP address and Subnet mask Be careful not to enter values that are already used by other...

Page 36: ...Subnet mask Go to 6 Setting the AVeL Link Player for the First Time p 36 Example of Windows 98 Example of Windows 98 Double click 1 Select Use the following IP address 2 Enter the appropriate values...

Page 37: ...e p 36 1 Click Double click 2 Click 1 Select Enter manually under Setting mode 2 Enter the appropriate values in IP address and Subnet mask Be careful not to enter values that are already used by othe...

Page 38: ...k the values you wrote down on the following pages Windows XP p 31 Windows 2000 p 33 Windows Me 98 SE p 34 Mac OS X p 35 Turn on the power to the AVeL Link Player It will take several seconds for the...

Page 39: ...6 Setting the AVeL Link Player for the First Time Select IP Setup and then press the ENTER button Select Switch to Manual and then press the ENTER button Select 2 Press 1 Press Select...

Page 40: ...of the AVeL Link Player Set the IP Address of the AVeL Link Player by referring to the example below Example If the IP Address of your computer is 192 168 0 100 set the IP Address of the AVeL Link Pl...

Page 41: ...Playing Video Audio Playing a File in the Computer p 40 Playing a DVD Video Video CD or Music CD p 43 Playing from a USB Equipment or DVD CD Medium p 44...

Page 42: ...nblock If your computer is using firewalls If your computer is using firewalls set by security software etc you may need to reset the firewalls before you can use the AVeL Link Player For the specific...

Page 43: ...k Player Cannot Connect to a Server Computer p 51 Number of servers simultaneously registered Up to 10 severs can be registered simultaneously Delete the servers not currently connected by using Delet...

Page 44: ...the selected folder will be played sequentially When Shuffle is selected the data stored in the selected folder will be played in a random order Number of displayable characters in a filename A filen...

Page 45: ...g the button Also note that pressing the button for a prolonged duration may cause the tray to open close repeatedly Exercise caution not to press the button too long because repeated opening closing...

Page 46: ...connected first the AVeL Link Player may not recognize the equipment correctly Some external USB hard disk drive consumes over 500mA To connect AC adapter is required Setting a DVD CD Medium 1 Open th...

Page 47: ...isplayed data continuous playback by pressing the PLAY PAUSE button on the remote controller Do not disconnect the USB equipment while a file in the USB equipment is displayed or played The AVeL Link...

Page 48: ...MEMO...

Page 49: ...Troubleshooting Troubleshooting p 48...

Page 50: ...ctions to be taken refer to WHEN THE AVEL LINK PLAYER CANNOT CONNECT TO A SERVER COMPUTER p 51 The server icon is not displayed in the AVeL Link Player menu Isn t the hub or router hindering proper ne...

Page 51: ...er you want to cancel the auto login to 4 Clear the check box of Always connect to this AVeL Link Server 5 Select Save A WMA file cannot be played and the screen shows DRM Not Supported The WMA file y...

Page 52: ...t have ID3 tag information The files must have ID3 tag information before they can be classified ID3 tag information can be set by ripping software etc when a file is created If your computer is runni...

Page 53: ...environment Enter the IP address according to the example below Example When the IP address of the AVeL Link Player is 192 168 0 5 Enter C xxxx PING 192 168 0 5 and then press the Enter key 3 Check t...

Page 54: ...till be starting Delete some files in the folder specified in AVeL Link Server or change to another folder by referring to Reference on AVeL Link Server p 54 Then restart AVeL Link Server and check if...

Page 55: ...Others Reference on AVeL Link Server p 54 Reference on AVeL Link Player Screens p 61 Connecting Other Equipment p 66 Content of the CD ROM p 68 Uninstalling AVeL Link Server p 68 Specifications p 69...

Page 56: ...nt to AVeL Link Server and then click AVeL Link Server Alternatively double click the AVeL Link Server shortcut icon on the desktop The screen shown to the right will be displayed Displaying A Video M...

Page 57: ...r time forAVeL Link Server to start To change the folder refer to Photo p 58 Displaying Music Click the MUSIC button The registered music data will be displayed You can display picture data in the bac...

Page 58: ...ort you want to use Security When a password is set you must enter the password to play the data in the server from the AVeL Link Player Be sure to remember the password you have set 2 Click 1 Click 1...

Page 59: ...ich movie video data are stored Watch Folder You can add a folder different from the one specified above Revert to the default folder Change the folder Select Click here to add a folder Click here to...

Page 60: ...d based on ID3 tag information Specify the default folder Specify a different folder Specify a different folder Select Click here to add a folder Click here to delete a folder Classify MP3 files by al...

Page 61: ...Reference on AVeL Link Server Language Specify the language to be used in AVeL Link Server You need not change the default setting Theme Specify the screen theme Only avellink can be selected...

Page 62: ...ou want to play into the following folders respectively Movies Copy the files to the movie folder Pictures Load the files into iPhoto Music Load the files into iTunes Movie folder is located Local dis...

Page 63: ...EDIT You can change the registered settings of a server computer to be connected Computer name Enter the name of the server computer to be connected the computer name must be entered only in the scre...

Page 64: ...reen Select one of the following three modes Fit To Screen Image is displayed according to the monitor size Since the aspect ratio is kept image will not be distorted However black streaks may be show...

Page 65: ...t Switch to Automatic and then press the ENTER button on the remote controller MAC address The MAC address on the specified wireless LAN is displayed When a router or access point is used IP address i...

Page 66: ...l be displayed automatically Update the firmware by following the on screen instructions Never turn off the power while the firmware is being updated Doing so may cause damage to the hardware For deta...

Page 67: ...vel is set The larger the number the lower the viewing restriction level becomes If Off is set all DVD Videos will be played TV Type Set the display size on the screen When a DVD Video is played the d...

Page 68: ...Amplifier To coaxial digital input terminal of an AV amplifier with built in decoder etc To optical digital input terminal of an AV amplifier with built in decoder etc Coaxial cable sold separately Op...

Page 69: ...the POWER button on theAVeLLink Player It takes several seconds for the AVeL Link Player to power up Press the SETUP button on the remote controller select FW Update and then press the ENTER button on...

Page 70: ...ink Player Uninstalling AVeL Link Server The following describes how to uninstall the support software you have installed in your computer Windows Click Start point to All Programs point to AVeL Link...

Page 71: ...S1 S2 Composite video output 1 Analog audio output 2 Optical digital audio output 1 Coaxial digital audio output 1 Power supply 100 to 240 VAC 50 60 Hz Power consumption 16 W normal Operating temperat...

Page 72: ...equipment or their control systems If this product is to be used as or in any of the aforementioned facilities equipment or their control systems the user is advised to take all possible precautions...

Reviews: