NH-2700CE 5. Operator Function
5- 118
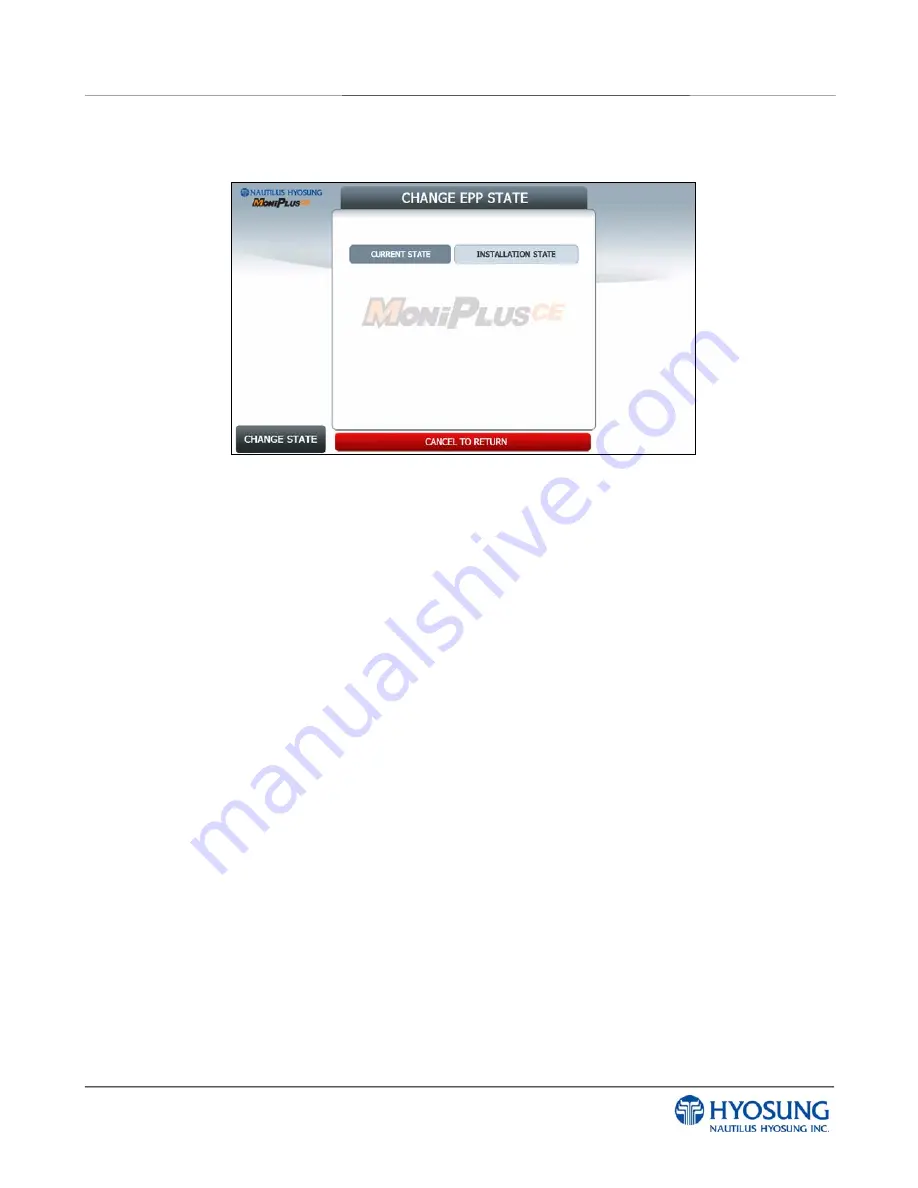
5.9.1.7 CHANGE EPP STATE.
Change EPP State Screen
After exiting from ‘ADD ID’ mode, you will come back again into ‘SET EPP STATE’ mode. It is
demonstrated as above. Now you are able to set EPP state up. Let`s begin.
1) If ID and password are entered successfully, you can check entered ID count
※
Caution : If limited time is passed after entering ID and password, ID count cannot
display exact ID count. In this case, ID count will display 0 value. So you should Exit from
this screen and re-enter ID and password to check exact ID count.
2) If ID count is more than 2, ‘Delete ID’ and ‘CHANGE STATE’ button would be enabled.
3) If you press ‘Change State’ button, current EPP state of ‘Initialization’ would be exchanged for
‘Installation’. Only in ‘Installation’ mode can the EPP accept a Master Key.
4) After exchanging EPP state, you must exit from not only ‘SET EPP STATE’ mode but also ‘Key
Management’ mode by pressing ‘Clear’ button on EPP twice.
Summary of Contents for NH-2700CE
Page 1: ...NH 2700CE Operator Manual Copyright 2011 Nautilus Hyosung Inc All right reserved...
Page 5: ...NH 2700CE 1 Introduction 1 1 Chapter 1 Introduction...
Page 10: ...NH 2700CE 2 Precautions for Safety 1 2 Chapter 2 Precautions for Safety...
Page 14: ...NH 2700CE 3 Hardware Specifications 3 1 Chapter 3 Hardware Specifications...
Page 22: ...NH 2700CE 4 Operating Instructions 4 1 Chapter 4 Operating Instructions...
Page 27: ...NH 2700CE 4 Operating Instructions 4 6 Changing Battery 2...
Page 53: ...NH 2700CE 4 Operating Instructions 4 32 NOTE THE BASIC MECHANISM OF RECEIPT PRINTER...
Page 55: ...NH 2700CE 5 Operator Function 5 1 Chapter 5 Operator Function...
Page 214: ...NH 2700CE 6 Installation 6 1 Chapter 6 Installation...
Page 220: ...NH 2700CE 6 Installation 6 7 Fig 6 5 Installation space 2 Side view 45...
Page 222: ...NH 2700CE 7 Appendix 7 1 Chapter 7 Appendix...
Page 252: ...NH 2700CE 7 Appendix 7 31 2 Select SYSTEM SETUP menu 3 Select SYSTEM CONTROL menu...
Page 295: ...NH 2700CE 7 Appendix 7 74 2 Press OPTIONAL FUNCTION 2 button 3 Press SCREEN SERVICES button...


