


4-5
Embroidery Mode
Hoop Selection
Scaling
Rotation
Positioning
Mirror side to side
and end to end
Select design
and select all
Adjust Designs
There are many options to adjust your designs.
Always adjust fi rst before beginning to
embroider.
There are three sets of control buttons which
are displayed by touching one of the three tabs
at the bottom right of the screen – embroidery
design functions (1), embroidery text functions
(2) and color functions (3).
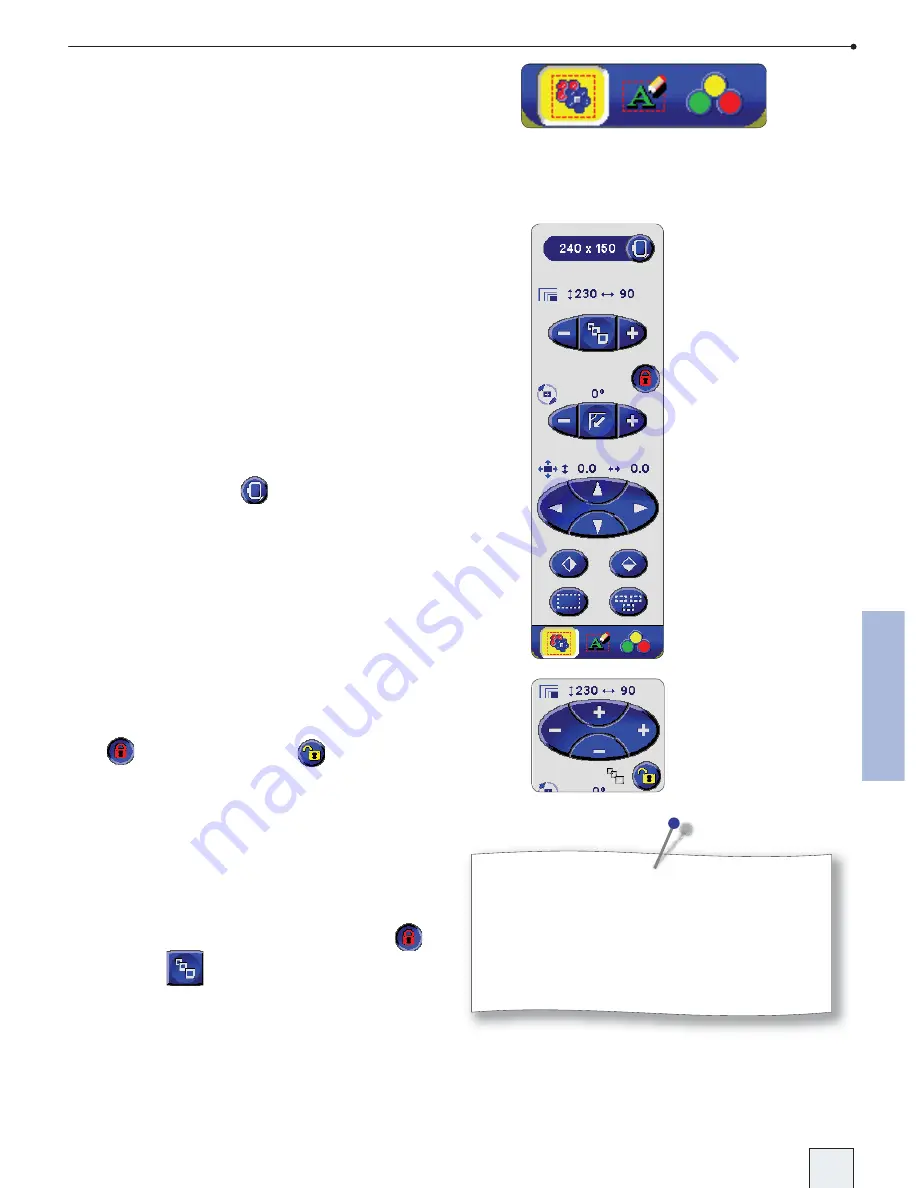
The scaling function works horizontally
and vertically on the screen. If you rotate
a design and then scale it with unlocked
proportions, you achieve a warp effect.
1.
2.
3.
Scaling
With the scaling function you can reduce or
enlarge the design size up to 20% by touching
− or +. As a default the proportions are locked,
which is shown by the button with a closed
lock
. Touch to unlock it,
. Height and
width are now adjusted individually, and the
scaling buttons change to show + and − both
horizontally and vertically.
You can also use the On Screen Design options
to scale your design (see page 4-9).
To change the design size more than 20%, use
the resize function. Access the resize function
when the scaling proportions are locked (
)
by touching
between the - and + (see page
4-10).
Embroidery Design Control Tab
Hoop Selection
When a design is loaded to the empty
embroidery area, the smallest hoop that fi ts the
design is automatically selected. If more designs
or text are added, another hoop size may need
to be selected. Touch
to open a list with
available hoop sizes. The selected size is shown
next to the button.
Resize
Unproportional
scaling
DSE 05 Kap 4.indd 4-5
05-03-18 16.32.48
Summary of Contents for Designer SE
Page 1: ...User s Guide KEEPING THE WORLD SEWING ...
Page 29: ...2 1 Sewing Mode ...
Page 46: ...2 18 Sewing Mode ...
Page 47: ...Set to Embroider ...
Page 55: ...4 1 Interactive 3D Embroidery Embroidery Mode ...
Page 77: ...5 1 File Manager ...
Page 87: ...Care of your Designer SE ...


