2-9
Sewing Mode
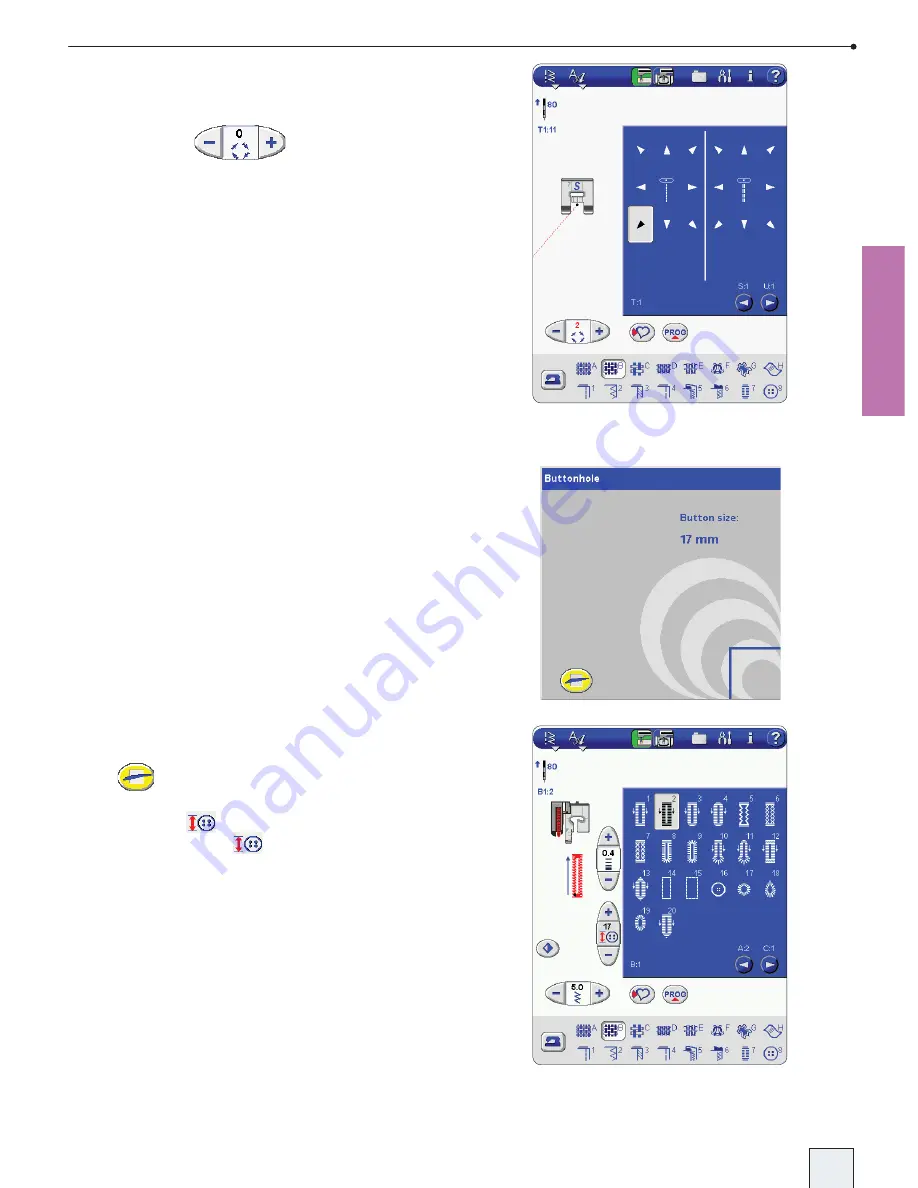
T-Menu
Select one of eight pre-set directions with the
arrows, and adjust the angle in smaller steps
with + and − in
.
Buttonholes
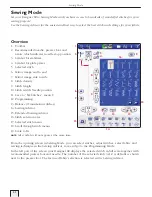
For buttonhole stitches, select stitch menu B
and select a buttonhole. Buttonholes can be
sewn with or without the Sensor Buttonhole
Foot. Follow the recommendations for each
buttonhole.
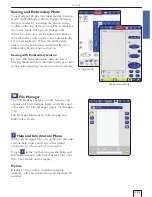
Set Button Size
When a buttonhole is selected with the Sensor
Buttonhole Foot connected, a button size
window opens.
Place your button in the lower right corner
of the screen. Scroll the wheel on the Sensor
Buttonhole Foot until the button is outlined on
the screen. The size can be set up to 50 mm
(2"). Remove the button from the screen and
touch
to close the window and set the size.
The selected button size is shown above the
button symbol
. If needed, adjust the size
with + and −. Touch
to open up the size
window again.
After setting the size, line up white area on the
side of the wheel with the white marking line on
the foot.
For more information on how to sew buttonholes,
see your Designer SE Handbook and your
Instruction CD.
DSE 05 Kap 2.indd 2-9
05-03-18 16.30.22
Summary of Contents for Designer SE
Page 1: ...User s Guide KEEPING THE WORLD SEWING ...
Page 29: ...2 1 Sewing Mode ...
Page 46: ...2 18 Sewing Mode ...
Page 47: ...Set to Embroider ...
Page 55: ...4 1 Interactive 3D Embroidery Embroidery Mode ...
Page 77: ...5 1 File Manager ...
Page 87: ...Care of your Designer SE ...


