


8
532821-2_A
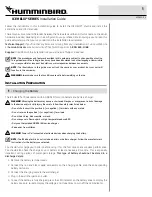
ICE HELIX® SERIES
Installation Guide
Transducer Maintenance
If your transducer remains in the water for long periods of time, slush,
algae and other marine growth can reduce the effectiveness of the
transducer. Periodically clean the face of the transducer with a mild,
marine-safe and plastic-safe soap or solution.
If your transducer remains out of the water for a long period of time,
it may take some time to wet the transducer after it is returned to the
water. Small air bubbles can cling to the surface of the transducer and
interfere with proper operation. These bubbles will dissipate with time,
or you may wipe the face of the transducer with your fingers after the
transducer is in the water.
Specifications
Power Requirement
15 Ah lithium-ion battery. . . . . . . . . . . . . . . . . . . . . . .. . .. . . . .11.1 volts
12.6 volt output charger
20 Ah lithium-ion battery. . . . . . . . . . . . . . . . . . . . . . . . . . . . . 14.8 volts
16.8 volt output charger
Contact Humminbird
Web site:
humminbird.com
E-mail:
Telephone:
1-800-633-1468
Direct Shipping:
Humminbird
Service Department
678 Humminbird Lane
Eufaula, AL 36027 USA
WARNING!
Disassembly and repair of this electronic unit should
only be performed by authorized service personnel. Any modification
of the serial number or attempt to repair the original equipment or
accessories by unauthorized individuals will void the warranty.
WARNING!
Do NOT use the Humminbird charger with other
manufacturers’ batteries. The Humminbird charger is only
compatible with Humminbird batteries. If you have questions, visit
our Web site at humminbird.com or contact Humminbird Technical
Support.
WARNING!
The transducer must be fully submerged in water during
operation because the sonar signal cannot pass through air. Air
pinging can damage the transducer.
NOTE:
Product specifications and features are subject to change
without notice.
NOTE:
For operations information, see the Operations Summary
Guide and control head operations manual.
FCC NOTICE:
This device complies with Part 15 of the FCC Rules. Operation
is subject to the following two conditions: (1) this device may not cause
harmful interference, and (2) this device must accept any interference
received, including interference that may cause undesired operation.
CAUTION!
This equipment has been tested and found to comply
with the limits for a Class B digital device, pursuant to Part 15 of the
FCC Rules. These limits are designed to provide reasonable
protection against harmful interference in a residential installation.
This equipment generates, uses and can radiate radio frequency
energy and, if not installed and used in accordance with the
instructions, may cause harmful interference to radio
communications. However, there is no guarantee that interference
will not occur in a particular installation. If this equipment does
cause harmful interference to radio or television reception, which
can be determined by turning the equipment off and on, the user is
encouraged to try to correct the interference by one or more of the
following measures:
Δ
Reorient or relocate the receiving antenna.
Δ
Increase the separation between the equipment and receiver.
Δ
Connect the equipment into an outlet on a circuit different from
that to which the receiver is connected.
Δ
Consult the dealer or an experienced radio/TV technician for help.
Class B Device (Broadcasting and communication equipment for home):
CAUTION!
This equipment is home use (Class B) electromagnetic
wave suitability equipment and to be used at home and it can be
used in all areas.
ENVIRONMENTAL COMPLIANCE STATEMENT:
It is the intention of Johnson
Outdoors Marine Electronics, Inc. to be a responsible corporate citizen,
operating in compliance with known and applicable environmental
regulations, and a good neighbor in the communities where we make or
sell our products.
WEEE DIRECTIVE:
EU Directive 2002/96/EC “Waste of Electrical and
Electronic Equipment Directive (WEEE)” impacts most distributors,
sellers, and manufacturers of consumer electronics in the European
Union. The WEEE Directive requires the producer of consumer electronics
to take responsibility for the management of waste from their products to
achieve environmentally responsible disposal during the product life cycle.
WEEE compliance may not be required in your location for electrical &
electronic equipment (EEE), nor may it be required for EEE designed and
intended as fixed or temporary installation in transportation vehicles such
as automobiles, aircraft, and boats. In some European Union member
states, these vehicles are considered outside of the scope of the Directive,
and EEE for those applications can be considered excluded from the WEEE
Directive requirement.
This symbol (WEEE wheelie bin) on product indicates the product
must not be disposed of with other household refuse. It must be
disposed of and collected for recycling and recovery of waste EEE.
Johnson Outdoors Marine Electronics, Inc. will mark all EEE
products in accordance with the WEEE Directive. It is our goal to comply in
the collection, treatment, recovery, and environmentally sound disposal
of those products; however, these requirements do vary within European
Union member states. For more information about where you should
dispose of your waste equipment for recycling and recovery and/or your
European Union member state requirements, please contact your dealer
or distributor from which your product was purchased.
© 2021 Johnson Outdoors Marine Electronics, Inc. All rights reserved.