5
lp-642 Rev. 000 Rel. 002 Date 10.5.20
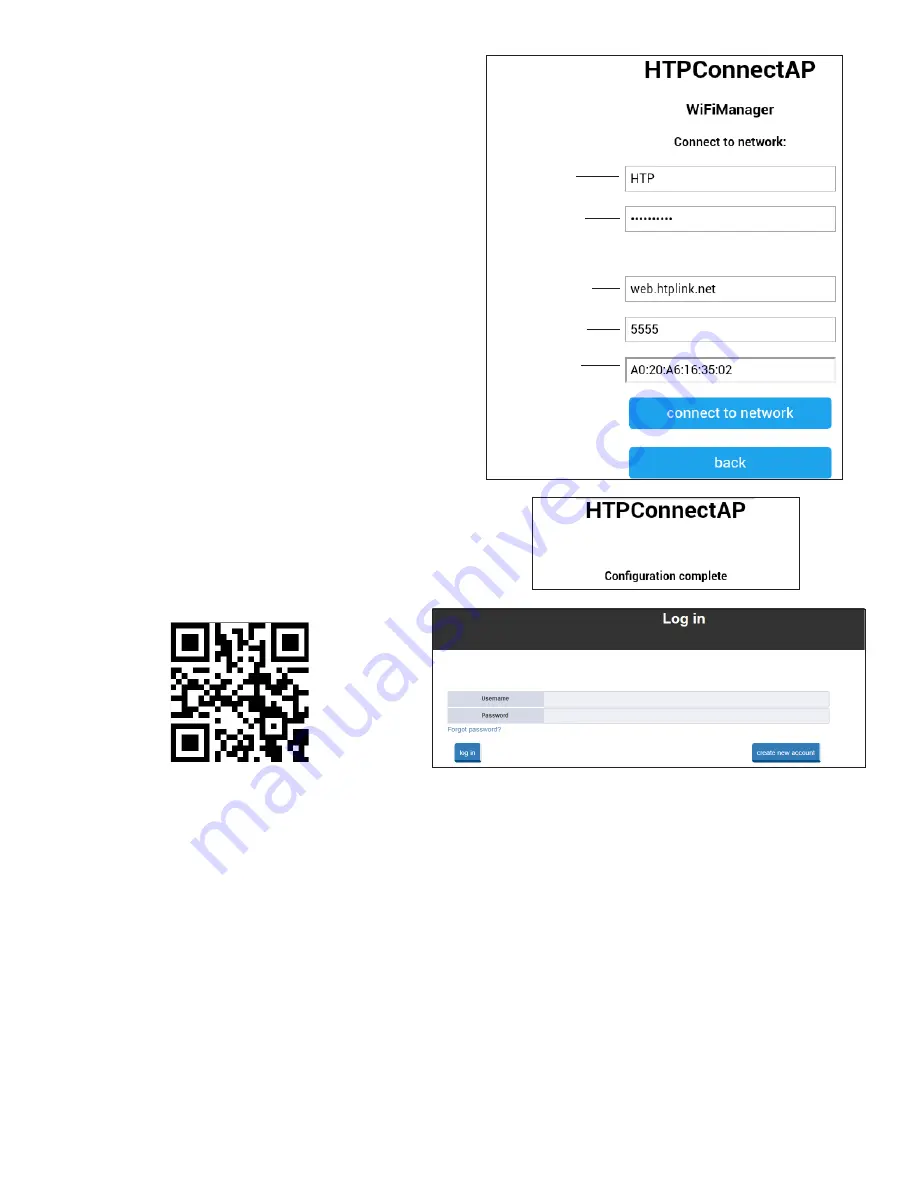
14. Use Google Chrome and enter https://webmonitor.htplink.
net or scan the QR Code below. The Log In screen in Figure 17
should appear in the browser.
Figure 17 - HTPConnectAP Browser Log In Screen
Resetting Router Data
1. If the connection is not succesfully established, or if you want to use the dongle on a different router, you will need the module to “forget” the
current router selection.
2. Apply power to the dongle.
3. Press and hold the push button switch visible in the hold in the dongle case with a non-conductive tool for five (5) seconds. Both the green
and yellow LEDs should go out for an instant. Then the LEDs should come back on solid.
4. Return to Configuring the HTP Link Software to establish a new connection.
15. Log in to your account.
Router / Network Name
(SSID)
Router / Network Name
Password
Dongle URL
Local Port
MAC ID
(Read from Dongle)
Figure 15 - HTPConnectAP Connect to WiFi Screen
7. Select “Configure WiFi” and wait for the screen in Figure 15 to
appear.
8. Enter the Network name (router SSID) in the Network field and the
router password in the Password field.
9. Take a moment to write down the MAC ID (For example:
AO:20:A6:16:60:F0 shown in Figure 15. Note that each dongle has
a unique MAC ID). The MAC ID will be required later when creating
the site.
10. Ensure the Server and Port fields contain the information shown
in Figure 15.
11. Select “Connect to Network”.
Figure 16 - HTPConnectAP WiFi Configuration Complete
12. Wait for the screen displayed in Figure 16 to appear.
13. Wait for the WiFi connection to the HTPConnectAP to disappear
from the router list. This is normal, and means that the module has
dropped the HTPConnectAP local connection and established a
connection with the router chosen in Steps #8 - 11.


