Getting Started
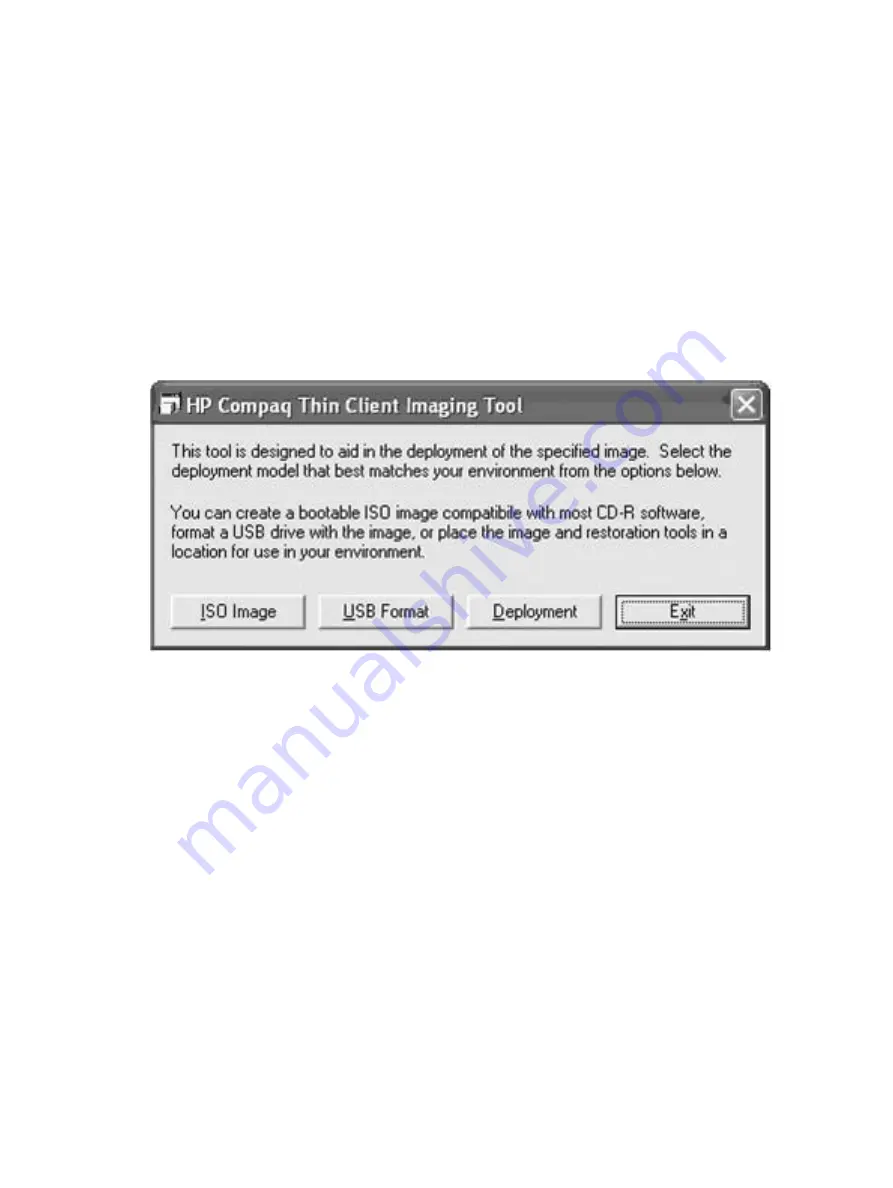
There are three deployment options supported by this utility. You can choose to do one or more of the
following using your personal computer:
●
Generate an ISO image to use with CD creation software to create a bootable CD for deployment
using a USB CD-ROM drive
●
Create a bootable flash image on a USB flash device (such as a drive key)
●
Unbundle the image to a directory for use in a custom deployment scenario or PXE image.
Download and run the Package-for-the-Web deliverable (an .exe file) that contains the original factory
image for the thin client. The HP Compaq Thin Client Imaging Tool (CRStart.exe) runs automatically and
will display the following dialog:
Figure
4
-
1
Imaging Tool
Choose one of the deployment options: ISO Image, USB Format, or Deployment. Each option is described
in the following paragraphs.
During the restore process, the thin client flash drive will be reformatted and all data
on it will be erased before the system image is copied to it. To prevent loss of data, be
sure that you have saved any user-created data from the flash drive.
During the first restart of the thin client following the restore process, it may take
approximately 15 minutes to unbundle the software before the Windows Desktop is
displayed.
ENWW
Getting Started 39
Summary of Contents for T5135 - Compaq Thin Client
Page 1: ...Troubleshooting Guide HP t5135 and t5530 Thin Client ...
Page 4: ...iv About This Book ENWW ...
Page 10: ...4 Chapter 1 Product Description ENWW ...
Page 18: ...12 Chapter 2 BIOS Settings F10 Utility ENWW ...
Page 26: ...Figure 3 2 Initial Troubleshooting Part 2 20 Chapter 3 Diagnostics and Troubleshooting ENWW ...
Page 27: ...Figure 3 3 No Power Part 1 ENWW Troubleshooting Flow Charts 21 ...
Page 28: ...Figure 3 4 No Power Part 2 22 Chapter 3 Diagnostics and Troubleshooting ENWW ...
Page 29: ...Figure 3 5 No Power Part 3 ENWW Troubleshooting Flow Charts 23 ...
Page 30: ...Figure 3 6 No Video Part 1 24 Chapter 3 Diagnostics and Troubleshooting ENWW ...
Page 31: ...Figure 3 7 No Video Part 2 ENWW Troubleshooting Flow Charts 25 ...
Page 32: ...Figure 3 8 No Video Part 3 26 Chapter 3 Diagnostics and Troubleshooting ENWW ...
Page 33: ...Figure 3 9 No Video Part 4 ENWW Troubleshooting Flow Charts 27 ...
Page 34: ...Figure 3 10 Error Messages 28 Chapter 3 Diagnostics and Troubleshooting ENWW ...
Page 35: ...Figure 3 11 No O S Loading ENWW Troubleshooting Flow Charts 29 ...
Page 36: ...Figure 3 12 O S Not loading from Flash 30 Chapter 3 Diagnostics and Troubleshooting ENWW ...
Page 37: ...Figure 3 13 Non Functioning Pointing Device or Keyboard ENWW Troubleshooting Flow Charts 31 ...
Page 38: ...Figure 3 14 No Internal Network Connection 32 Chapter 3 Diagnostics and Troubleshooting ENWW ...
Page 39: ...Figure 3 15 No Audio ENWW Troubleshooting Flow Charts 33 ...
Page 40: ...Figure 3 16 No IP Address 34 Chapter 3 Diagnostics and Troubleshooting ENWW ...
Page 41: ...Figure 3 17 Booting in Continuous Loop ENWW Troubleshooting Flow Charts 35 ...
Page 42: ...36 Chapter 3 Diagnostics and Troubleshooting ENWW ...
Page 43: ...4 Restoring the Flash Image ENWW 37 ...
Page 46: ...Creating an ISO Image 1 Click ISO Image 40 Chapter 4 Restoring the Flash Image ENWW ...
Page 53: ...5 Citrix Metaframe ENWW 47 ...
Page 56: ...50 Chapter 5 Citrix Metaframe ENWW ...
Page 58: ...52 Chapter 6 Microsoft Remote Desktop Protocol ENWW ...
Page 62: ...56 Appendix B Adding an Image Restore Tool ENWW ...
Page 63: ...C Configuring a PXE Server ENWW 57 ...
Page 72: ...66 Appendix C Configuring a PXE Server ENWW ...
Page 73: ...D System BIOS ENWW 67 ...
Page 76: ...70 Appendix D System BIOS ENWW ...
Page 77: ...E Replacing the Battery ENWW 71 ...
Page 82: ...76 Index ENWW ...


